
Main Courses
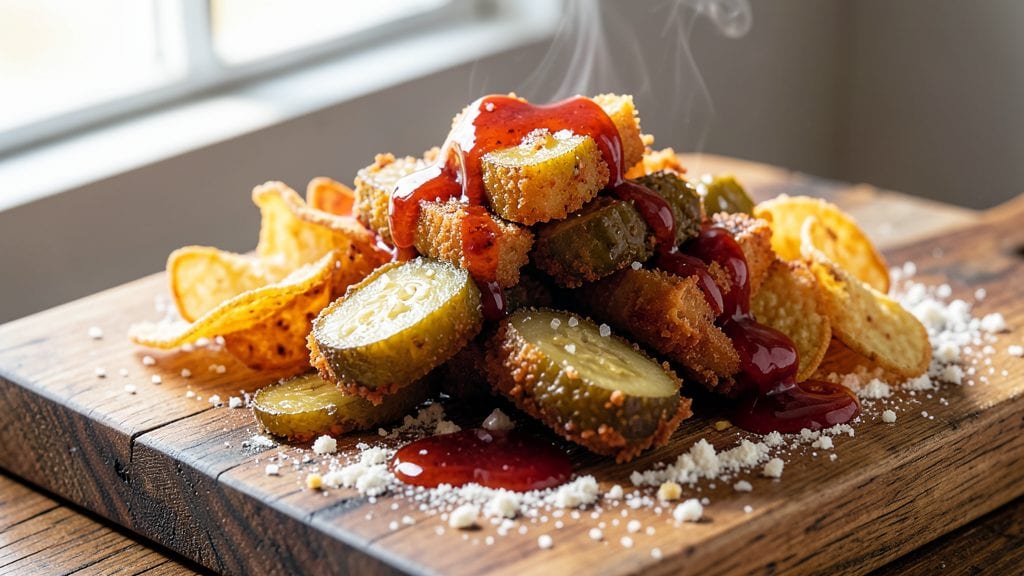
Mastering crispy fried pickles without buttermilk is all about the right substitution and technique—this recipe delivers vinegar-kissed crunch in just 15 minutes. I developed this method after realizing beer and vinegar create the perfect tangy, crispy texture that holds up even after frying.
The secret lies in the breading process and maintaining the right oil temperature.
What makes this recipe stand out is the foolproof technique that ensures every pickle stays crispy, not soggy. We'll use a simple beer-vinegar brine to tenderize the pickles before coating them in a light, crispy batter.
The key is frying in 350°F oil—hot enough to create that satisfying crunch without burning the exterior. This method works with any type of pickles, but dill or bread-and-butter varieties hold up best.
By the time you're done, you'll have golden-brown, vinegar-infused pickles that are crispy on the outside and tender inside. The beer adds depth while keeping the tangy flavor intact, and the vinegar ensures they stay crunchy even after frying.
Serve them hot with ranch or blue cheese dressing for the ultimate game-day snack or appetizer. Let's get started!
This recipe scales easily for parties, and the leftovers reheat beautifully in the oven. The technique works just as well with frozen pickles, making it a great last-minute option.
Whether you're hosting a crowd or just craving a crispy snack, this method delivers consistent results every time. Here's everything you need to know!
Ingredients for fried pickles recipe no buttermilk
Grab these ingredients for unbeatable crispy pickles—no buttermilk needed!
| Ingredient | Amount | Notes |
|---|---|---|
| Dill Pickles 🥒 | 1 ½ lb | Bread-and-butter or dill variety |
| Light Beer 🍺 | 1 cup | Lager or pale ale preferred |
| White Vinegar 💧 | ½ cup | Distilled white vinegar |
| All-Purpose Flour 🌾 | 1 ½ cups | Sifted for light coating |
| Cornstarch 🌽 | ½ cup | For extra crispiness |
| Granulated Sugar 🍚 | 1 tbsp | Balances tangy flavor |
| Kosher Salt 🧂 | 1 tsp | Coarse grain preferred |
| Black Pepper 🌶️ | ½ tsp | Freshly ground for heat |
| Vegetable Oil 🫒 | 3 cups | High smoke point oil |
| Garlic Powder 🧄 | 1 tsp | For extra flavor depth |
| Paprika 🌶️ | ½ tsp | Smoked for color and taste |
| Lemon Juice 🍋 | 1 tbsp | Brightens the flavor |
Pickles are the star here, so dill or bread-and-butter varieties are your best bet—they hold up perfectly during frying. Grab 1.5 lbs fresh from the refrigerated section at Kroger or Trader Joe's for the best texture. If you're using frozen pickles, thaw them first—no need to drain the brine. The beer and vinegar combo is what makes these pickles crispy and tangy. Bud Light or Corona work great, but any light lager will do. For the vinegar, white distilled is the way to go—avoid apple cider vinegar, which has a milder flavor.
No light beer? Substitute with sparkling water plus a splash of lemon juice for the same crispy texture. Running short on cornstarch? Arrowroot powder works 1:1. The sugar and spices are totally optional but add a nice kick—skip them if you prefer classic tangy pickles. For extra crunch, double the cornstarch. The oil temperature is critical: 350°F is perfect—use a thermometer to keep it steady. If you don't have one, test with a wooden chopstick—it should sizzle but not burn when dropped in.
Fry these bad boys fresh for the best crunch, but they reheat beautifully in the oven at 375°F for 5-7 minutes. Store leftovers in the fridge for up to 2 days—just reheat in the oven to restore crispiness. The batter mix keeps in the fridge for 3 days, so make extra for next time. These pickles are perfect for parties—double the batch and keep them warm in the oven while you serve.
Why You'll Love This Recipe
- I’ll be real: this recipe skips the buttermilk step entirely, which means no waiting for it to thicken or dealing with extra ingredients. Just flour, cornstarch, and a quick dip—no fuss.
- No Buttermilk Hassle: I’ll be real: this recipe skips the buttermilk step entirely, which means no waiting for it to thicken or dealing with extra ingredients. Just flour, cornstarch, and a quick dip—no fuss.
- Crispy-Tangy Magic: That beer batter? It’s the secret weapon—light, crispy, and packed with a tangy punch from the vinegar. The pickles stay crunchy inside, and the outside? Pure satisfaction.
- Game for Any Meal: Slap these on a burger, toss them in tacos, or serve them as a snack with ranch. They’re great hot or cold, so I keep a batch in the fridge for lazy nights or unexpected guests.
Instructions for vinegar-kissed crispy fried pickles
This method delivers restaurant-style fried pickles in record time—no buttermilk needed!
Prep the Pickles for Maximum Crunch
Pat the 1.5 lb dill pickles completely dry with paper towels—this is non-negotiable for crispy results. You want them bone dry, not just damp. Cut each pickle into 1-inch thick slices, keeping the rings intact. This thickness ensures they cook evenly without getting soggy in the middle.
Transfer the sliced pickles to a large bowl and pour in the 1 cup light beer and 0.5 cup white vinegar. The beer adds depth while the vinegar enhances that tangy crunch. Let them soak for 15 minutes—this step is crucial for flavor infusion and prevents them from turning mushy during frying.
Create the Ultra-Crispy Batter
In a separate bowl, whisk together the 1.5 cups all-purpose flour, 0.5 cup cornstarch, 1 tbsp granulated sugar, 1 tsp kosher salt, 0.5 tsp black pepper, 1 tsp garlic powder, and 0.5 tsp paprika. Sifting the flour first prevents lumps and gives you a lighter coating. Add the 1 tbsp lemon juice and mix until just combined—don't overmix or the batter will get gummy.
Here's the thing—this batter needs to be light and airy. If it looks too thick, whisk in 1-2 tablespoons of water until it flows like heavy cream when stirred. The cornstarch is your secret weapon for that shatteringly crisp exterior.
Heat the Oil to the Perfect Temperature
Fill a deep skillet or Dutch oven with 3 cups vegetable oil and heat over medium-high heat until it reaches 360°F on a deep-fry thermometer. If you don't have one, test with a small piece of bread—it should sizzle and turn golden in 30 seconds. This temperature is critical: too low and the pickles absorb oil; too high and they burn before crisping.
I like to keep the oil hot by maintaining medium-high heat—this is where your patience pays off. Let the oil shimmer gently before you start frying. The oil should be hot enough to see small bubbles around the sides of the pan when you add the pickles.
Fry Until Golden and Crispy
Working in batches (don't overcrowd!), remove the pickles from the beer-vinegar mixture and let any excess liquid drip off. Dip each slice into the batter, letting any excess drip back into the bowl, then carefully slide them into the hot oil. Fry for 2-3 minutes per side until they're deep golden brown and crispy—you'll hear a satisfying sizzle and see bubbles.
Use tongs to flip them gently—don't press down or they'll lose their shape. You want that crunchy exterior with a tender, tangy interior. Transfer the fried pickles to a wire rack set over a paper towel-lined plate to drain excess oil. They'll stay crispy this way instead of turning greasy.
Serve Immediately with Your Favorite Dippers
These pickles are best served straight from the fryer while they're still shatteringly crisp. I like to sprinkle them with a pinch of extra kosher salt right before serving to intensify the flavors. Serve with ranch dressing, spicy mayo, or even blue cheese dressing for dipping—each bite delivers that perfect balance of crunch, tang, and savory depth.
Real talk: if you let them sit too long, they'll lose their crispness faster than you can say "fried pickles." Eat them immediately for the ultimate crunch experience—your taste buds will thank you!
Pro Tips For Making Fried Pickles Recipe No Buttermilk
- Drain and Pat Dry: Skip the "good enough" rinse—drain pickles in a colander, then press them between paper towels for 10 minutes. Wet pickles steam in the oil, turning your crispy coating into soggy mush. I learned this the hard way after frying a batch that came out tasting like a sad, greasy burrito.
- Use Cold Beer: Chill that light beer for 30 minutes before adding it to the batter. Warm beer makes the flour gummy and the coating sticky—no one wants a gluey pickle. Sounds weird, but it works: the cold beer keeps the texture light and the flavor sharp.
- Double-Check the Oil: Fill your deep fryer or Dutch oven with 2 inches of oil—enough to submerge half the pickles. Too little oil = splattering chaos; too much = wasted oil and a longer cook time. I used to eyeball it, but now I measure. Trust me, your kitchen will thank you.
- Fry in Batches: Resist the urge to dump all the pickles in at once—crowding drops the oil temperature and makes the coating uneven. Two minutes per side, max, with space between them. Your future self will thank you when every bite is golden and crunchy, not greasy and limp.
Make-ahead tips for leftovers
Prep Ahead for Party Success
Make the batter mix the night before and store it in an airtight container in the fridge—it'll be ready to use when you're hosting. I always double the recipe for parties, and the batter keeps perfectly for 3 days.
Just whisk it again before using to restore that light, airy texture. The pickles themselves don't need prep ahead, but if you're short on time, slice and store them in their jar in the fridge for up to 2 days before frying. 💡
Freezer-Friendly Crispy Bites
Here's a game-changer: fry the pickles, let them cool completely, then store them in a single layer on a baking sheet in the freezer for 1 hour to prevent sticking. Transfer to a freezer bag and they'll keep for up to 1 month.
When ready to serve, reheat at 375°F for 5-7 minutes—they'll be crispy again in no time. This is perfect for game day prep when your hands are full with other snacks.
Oven Reheating Secrets
If you have leftovers (unlikely, but it happens), the oven is your best friend. Spread them on a baking sheet and reheat at 400°F for 4-5 minutes—this restores that satisfying crunch. I avoid the microwave because it turns them rubbery faster than you can say "soggy."
For extra crispiness, sprinkle with 1 tsp cornstarch before reheating. The cornstarch absorbs moisture and gives them that fresh-fried texture back. ✨
Batch Frying for Crowds
When feeding a crowd, maintain the oil temperature between 350-375°F throughout the cooking process. I use a deep-fat fryer for large batches because it's easier to maintain consistent heat. Fry in 3 batches max—overcrowding lowers the oil temperature and makes the pickles greasy.
Keep the cooked pickles warm in a 200°F oven while you finish frying the rest. This keeps them crispy and ready to serve.
Make-Ahead Brine Boost
For even more flavor, let the pickles soak in the beer-vinegar mixture overnight in the fridge. This deepens the tangy flavor and makes them extra tender. Just be sure to pat them completely dry before frying—any moisture will prevent that perfect crispy crust.
I do this when I'm planning ahead for a big gathering, and the difference in flavor is noticeable. 🥒
David's Taste-Test Tip
My husband David (official taste-tester) swears by this trick: after frying, sprinkle the pickles with ½ tsp smoked paprika while they're still hot. It adds a subtle smoky depth that pairs perfectly with ranch or blue cheese dressing.
He also recommends keeping a bowl of ice water nearby—dipping the fried pickles for 10 seconds after frying helps set the batter for extra crunch. Trust me, this works! 🔥
Nutrition facts
Frequently asked questions
Can I use vinegar alone instead of beer in the brine?
The beer adds depth of flavor, but you can substitute 1 cup sparkling water plus 1 tbsp lemon juice for the same crispy texture. The vinegar alone won't provide the same carbonation effect that helps create that satisfying crunch. For maximum tang, use ½ cup vinegar plus ½ cup sparkling water—this combo mimics the beer's light body while keeping the pickles crispy.
Why do my fried pickles turn out greasy instead of crispy?
Greasy pickles usually mean the oil wasn't hot enough (350°F) or you overcrowded the pan. Work in batches and maintain proper oil temperature—use a thermometer for accuracy. Also, pat the pickles bone dry before frying and let excess batter drip off. Transferring fried pickles to a wire rack (not paper towels) preserves crispness by preventing steam buildup.
What's the best way to reheat these for a party?
Keep fried pickles warm in a 200°F oven on a wire rack while frying the rest. For reheating leftovers, bake at 400°F for 4-5 minutes—sprinkle with 1 tsp cornstarch before reheating for extra crunch. Never microwave! The oven method restores that satisfying crunch without making them rubbery. For game day prep, fry in batches and keep warm in the oven until serving.
Can I make these with frozen pickles?
Yes! Thaw frozen pickles completely first, then pat them extra dry—they often have more moisture. The beer-vinegar soak still works perfectly, but you may need to adjust frying time (2-3 minutes per side) since frozen pickles are denser. For best results, use bread-and-butter variety—they hold up better than dill when frozen.
How do I keep the batter light and crispy?
Sift the flour first to eliminate lumps, and whisk the batter just until combined—overmixing makes it gummy. The cornstarch is key for crispiness, but if you're short on time, use 1 extra tbsp flour. Keep the batter light and airy like heavy cream, and let excess drip off pickles before frying. For extra crunch, chill the batter for 30 minutes before using—this helps it adhere better.