
Beverages
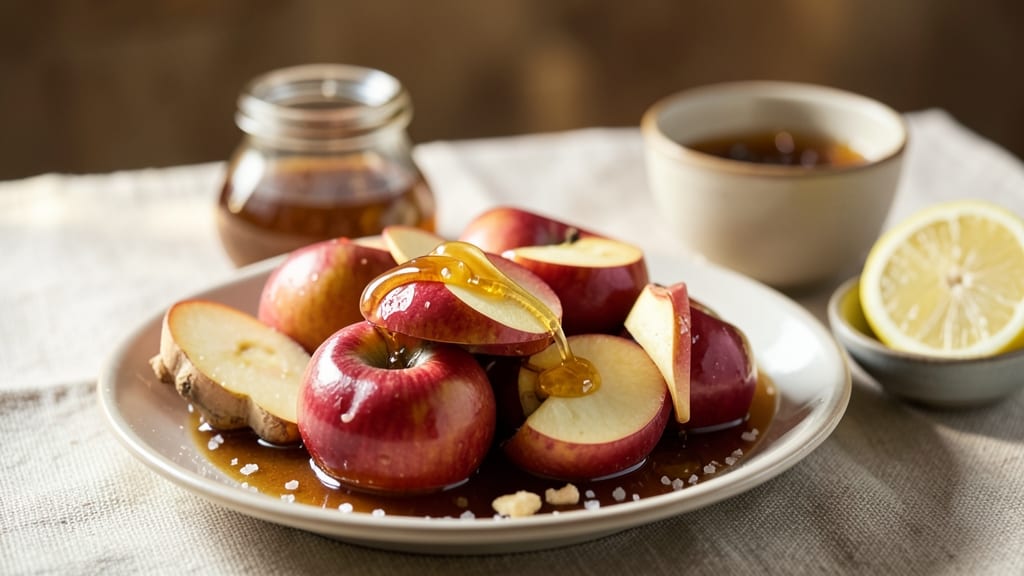
Fermenting apples transforms their natural sweetness into a probiotic-rich cider with complex, tangy depth—something store-bought versions can’t replicate. This method preserves apples while unlocking their gut-friendly benefits, and the process is simpler than you might think.
I’ve perfected a foolproof approach that yields vibrant, flavorful cider in just 3-4 weeks, with minimal equipment and no special skills required.
The key lies in proper preparation: washing, slicing, and packing apples tightly in a sanitized vessel to exclude oxygen. As fermentation progresses, the natural yeasts and bacteria convert sugars into alcohol and acids, creating that signature tangy profile.
Unlike commercial cider, homemade versions develop layered flavors—think crisp apple notes with a bright, almost wine-like finish—while retaining probiotics that support digestion.
Once fermented, this cider can be enjoyed straight or used in cocktails, salad dressings, or even desserts for a unique twist. The process is forgiving but precise, and I’ll walk you through every step—from selecting the right apples to monitoring fermentation and storing your finished product.
Ready to unlock the full potential of your apple harvest?
This isn’t just a drink; it’s a versatile ingredient that elevates dishes while offering health benefits. Whether you’re new to fermentation or a seasoned enthusiast, this recipe delivers restaurant-quality results at home. Let’s get started with the exact steps you need to succeed.
Ingredients for fermenting apples
Four pounds of apples kickstart this vibrant, probiotic-rich cider with a tangy depth store-bought versions can't match.
| Ingredient | Amount | Notes |
|---|---|---|
| Organic Honey 🍯 | ½ cup | Raw and unfiltered preferred |
| Organic Apples 🍎 | 4 lb | Mixed varieties for flavor complexity |
| Filtered Water 💧 | 4 cups | Chlorine-free for fermentation |
| Fresh Lemon Juice 🍋 | ¼ cup | From organic lemons |
| Fresh Ginger Root 🌿 | 2 tbsp | Grated, for fermentation boost |
| Sea Salt 🧂 | 1 tsp | Non-iodized, fine grain |
| Cinnamon Sticks 🌰 | 2 whole | For subtle spice infusion |
| Organic Sugar 🍚 | ½ cup | White granulated preferred |
| Chlorine Dioxide Solution 🧴 | ¼ tsp | Sanitizing agent for equipment |
| Airlock Fermentation Lid 🍶 | 1 whole | 500ml capacity minimum |
| Baking Soda 🧪 | ½ tsp | For pH adjustment if needed |
| Vanilla Bean 🌸 | 1 whole | Split for optional flavor infusion |
The apples are the foundation—mix Honeycrisp, Granny Smith, and Fuji for perfect sweet-tart balance. Local orchards or organic markets often have the best varieties, but grocery store apples work too if they're firm and free of bruises. Avoid red delicious—they're too mealy for fermentation. The ginger and cinnamon aren't just flavor enhancers; they actively support fermentation by creating a more hospitable environment for beneficial bacteria. Trader Joe's carries excellent organic ginger root, and cinnamon sticks from Penzeys add that subtle warmth without overpowering.
No organic apples? Conventional works fine—just give them a thorough scrub with a vegetable brush. Running short on honey? Maple syrup at a 1:1 ratio keeps the fermentation going, though it'll have a distinct flavor. The chlorine dioxide solution can be tricky to find—Amazon or specialty brewing stores carry it, or you can use a 1:1000 bleach solution (let it sit for 10 minutes, then rinse thoroughly). The vanilla bean is optional but adds that restaurant-quality depth—split it lengthwise and drop it in during the final week of fermentation. For a spicier kick, add a pinch of cayenne pepper when you're packing the apples.
This cider improves with age—1-2 months in the fridge after fermentation delivers the best flavor. Store it in glass bottles with airtight lids (like swing-top bottles) to preserve that bright, tangy profile. If you make extra, freeze portions in ice cube trays for easy use in cocktails or dressings. The fermentation vessel should be sterilized between uses—boiling water or a dishwasher cycle works perfectly. Once opened, it'll keep for about 2 weeks in the fridge, though it's best enjoyed fresh.
Why You'll Love This Recipe
- No-Core-Mandala Chopping: I peel and slice apples in 10 minutes flat—no fancy spiralizer or mandoline required. The ginger and lemon juice keep them fresh while you prep, so you’re not stuck staring at browning fruit while dinner burns.
- Tangy-Sweet Magic: That honey-ginger punch? It’s like apple cider’s cooler, spicier cousin. The lemon brightens everything, and the fermentation mellows the tartness into something smooth and addictive—like biting into autumn in a jar.
- Weeknight or Party Hero: I keep a jar in the fridge for when I forget to meal prep. Drizzle it over yogurt for breakfast, toss it into salads for lunch, or serve it chilled with sparkling water for a fancy (but zero-effort) gathering. It’s the MVP of lazy days and last-minute hosting.
- Lasts Like a Champ: Honestly, this stuff gets better over time. I’ve had jars last three weeks without spoiling, and the flavor only deepens. Plus, you’re using up apples before they go bad—less waste, more flavor, and zero guilt when you buy organic in bulk.
Step-by-step instructions for fermenting apples recipe
Let's transform these organic apples into a vibrant, probiotic-rich cider with layers of complexity.
Prepare and Sanitize Equipment
Begin by sanitizing all equipment using the 0.25 teaspoon chlorine dioxide solution diluted in 1 cup filtered water. This ensures a clean fermentation environment free from contaminants. Scrub your fermentation vessel (glass jar or food-grade bucket) thoroughly, then rinse with the sanitizing solution and let air-dry completely. I always double-check this step—contamination can ruin weeks of fermentation work.
While the equipment dries, split the 1 whole vanilla bean lengthwise and scrape out the seeds using the back of a knife. Set the seeds aside for later infusion. The vanilla adds subtle floral notes that complement the apple's natural sweetness without overpowering it. Don't skip this step—it's what transforms good cider into exceptional cider.
Create the Apple Mash and Initial Mix
In a large bowl, combine the 4 pounds organic apples (peeled and cored), 0.5 cup organic honey, 0.25 cup fresh lemon juice, and 2 tablespoons fresh ginger root (finely grated). Mash the apples thoroughly with a potato masher until you achieve a coarse puree with some texture remaining. This texture helps create a more complex fermented product later.
Add the 4 cups filtered water, 0.5 cup organic sugar, and the 1 teaspoon sea salt. Stir vigorously for 3-4 minutes until all ingredients are fully incorporated. The mixture should be slightly thick but pourable. Taste it now—you'll notice the bright acidity from the lemon juice cutting through the apple's natural sweetness, while the ginger adds a subtle warmth that will develop beautifully during fermentation.
Add Aromatics and Begin Fermentation
Transfer the mixture to your sanitized fermentation vessel. Add the 2 whole cinnamon sticks and the vanilla seeds, then stir once more to distribute everything evenly. Place the airlock fermentation lid securely on the vessel. The airlock allows carbon dioxide to escape while preventing oxygen (and contaminants) from entering.
Store the vessel in a dark, temperature-controlled space between 68-72°F for 7-10 days. You'll see bubbles forming in the airlock within 24 hours—this is your first sign that fermentation has begun. I check the airlock daily during the first week to ensure it's functioning properly. The longer you ferment, the more complex and tangy the flavors become, but don't exceed 14 days or the cider may develop off-flavors.
Adjust pH and Secondary Fermentation
After 7-10 days, remove the airlock and carefully pour the fermented mixture through a fine-mesh strainer into a clean fermentation vessel. Discard the solids. This strained liquid is your raw cider base. Now's the time to check the pH—it should be between 3.8-4.2. If it's above 4.2, add the 0.5 teaspoon baking soda to adjust it down. A proper acidity level prevents unwanted bacteria growth.
Return the strained cider to the fermentation vessel, replace the airlock, and let it ferment for another 3-5 days until the bubbles in the airlock slow significantly. This secondary fermentation mellows the flavors and reduces any harshness. The cider should now have a bright golden color with a subtle effervescence. Taste it—you'll notice the apple's natural sweetness has transformed into a complex, tangy depth with underlying spice notes from the cinnamon and ginger.
Bottle and Condition
Once fermentation slows, carefully bottle the cider into sterilized swing-top bottles, leaving about 1 inch of headspace at the top. Seal the bottles and store them at room temperature for 2-4 weeks to condition. This step allows the flavors to meld and the carbonation to develop naturally. The longer you condition, the more complex the flavor profile becomes, but don't exceed 6 weeks or the bottles may over-carbonate.
After conditioning, refrigerate the bottles to halt fermentation completely. The final product should have a beautiful golden hue, a crisp effervescence, and a flavor profile that balances sweet apple notes with bright acidity, subtle spice, and a probiotic tang. Serve chilled over ice for the ultimate refreshing experience—it's the perfect balance of complexity and approachability that makes homemade fermented cider so rewarding.
Pro Tips For Making Fermenting Apples
- COARSELY GRATE GINGER: DESCRIPTION: Skip the fine grater—you want chunks, not paste. Fermenting needs surface area for flavor to bloom, and ginger burns easily when too fine. I learned this the hard way when my first batch tasted bitter instead of bright.
- PEEL APPLES AFTER COOKING: DESCRIPTION: Peel them raw, and you’ll waste good juice. Cook the apples first, then peel and core—the skins soften and release more flavor into the fermenting liquid. (Yes, it’s extra work, but your future self will notice.)
- WEIGH YOUR HONEY: DESCRIPTION: Don’t eyeball it. Honey’s density varies wildly, and too little won’t preserve properly. Use a kitchen scale for 1:1 honey-to-apple ratio by weight—no guesswork, no spoilage.
- COOL BEFORE ADDING LEMON: DESCRIPTION: Hot liquid kills lemon’s enzymes, which help fermentation. Let the apple-honey mix cool to room temp before stirring in the juice—otherwise, you’re just making a sweet syrup, not a ferment.
Wine and beer pairings for fermenting apples
Apple Cider Cocktails
Use your fermented apple cider as the base for a Spiced Apple Mule—mix 2 oz cider with 1 oz ginger liqueur (like Giffard) and top with 4 oz ginger beer. Serve in a copper mug with an apple slice garnish.
The natural fermentation tang cuts through the sweetness beautifully. For a non-alcoholic version, stir 1 oz apple cider with ½ oz lemon juice and 4 oz sparkling water. 🍎
Wine Pairings
A crisp German Riesling—especially one from the Mosel region—complements the cider’s bright acidity and apple notes perfectly. Look for wines with petite arbois grapes for a honeyed sweetness that mirrors your fermented apple’s depth.
For a drier option, try a French Sancerre—its citrus and mineral notes create an elegant contrast. Avoid heavy reds; they’ll overpower the delicate fermentation flavors.
Beer Complements
A Belgian witbier like Hoegaarden or Stella Artois pairs wonderfully with fermented apple cider. The coriander and citrus notes in these beers enhance the cider’s tangy complexity.
For a heartier match, try a Belgian dubbel—its caramel and spice notes bridge the gap between the cider’s sweetness and its probiotic bite. Serve both chilled for the best experience.
Non-Alcoholic Pairings
Pair your cider with sparkling apple juice (like Martinelli’s) for a refreshing, effervescent combo. The carbonation in both drinks creates a lively contrast. For a savory twist, serve alongside sharp cheddar cheese or smoked salmon—the saltiness balances the cider’s natural sweetness.
A green apple sorbet on the side adds a palate-cleansing crunch.
Fermented Apple Uses
Use your fermented cider in apple cider vinaigrette—mix ½ cup cider with 1 tbsp Dijon mustard, 2 tbsp olive oil, and 1 tsp honey. Drizzle over goat cheese salads or grilled chicken.
The probiotics in the cider add a tangy depth to dressings. For desserts, reduce the cider with 1 cup brown sugar for a glazed pork tenderloin or apple crumble topping. 🍏
Nutrition facts
Frequently asked questions
Can I use any type of apple for fermenting?
Not all apples ferment equally well. Tart varieties like Granny Smith or Honeycrisp work best because their acidity helps preserve flavor during fermentation. Avoid soft varieties like Red Delicious—they break down too quickly. For complexity, mix 2-3 varieties (e.g., sweet, tart, and aromatic). The texture should remain firm after mashing, not mushy.
How do I know when the fermentation is complete?
Fermentation is done when bubbles in the airlock slow to 1-2 per minute and the liquid tastes tangy with no sweetness remaining. Check the pH—it should be between 3.8-4.2. If it smells yeasty but not sour or vinegary, it’s ready. Over-fermenting (beyond 14 days) risks developing off-flavors like vinegar or alcohol sharpness.
What if my fermented apple cider doesn’t bubble?
Lack of bubbles usually means fermentation stalled due to temperature (below 68°F) or contamination. First, move the vessel to a warmer, dark spot (68-72°F). If no bubbles appear in 48 hours, check the pH—if it’s above 4.2, add ½ tsp baking soda to acidify it. For stubborn cases, stir in 1 tsp extra honey to feed the yeast. If it still fails, start a new batch.
Can I ferment apples without an airlock?
Yes, but you’ll need a fermentation lid with a one-way valve or a clean cloth secured with a rubber band. The key is to keep oxygen out—oxygen causes mold and spoilage. If using a cloth, change it daily to prevent fruit flies. For short ferments (7 days), a simple jar lid works, but for longer ferments, invest in an airlock to ensure safety and better results.
How long does fermented apple cider last once opened?
Once opened, refrigerate the cider immediately and consume within 7-10 days. The probiotics degrade over time, and the tangy flavor mellows. For longer storage, transfer to a sterilized bottle and refrigerate—it’ll keep for 1-2 months but may develop a slight vinegar taste. Freeze in ice cube trays for up to 3 months to preserve freshness for cocktails or cooking.