Sauces & Condiments
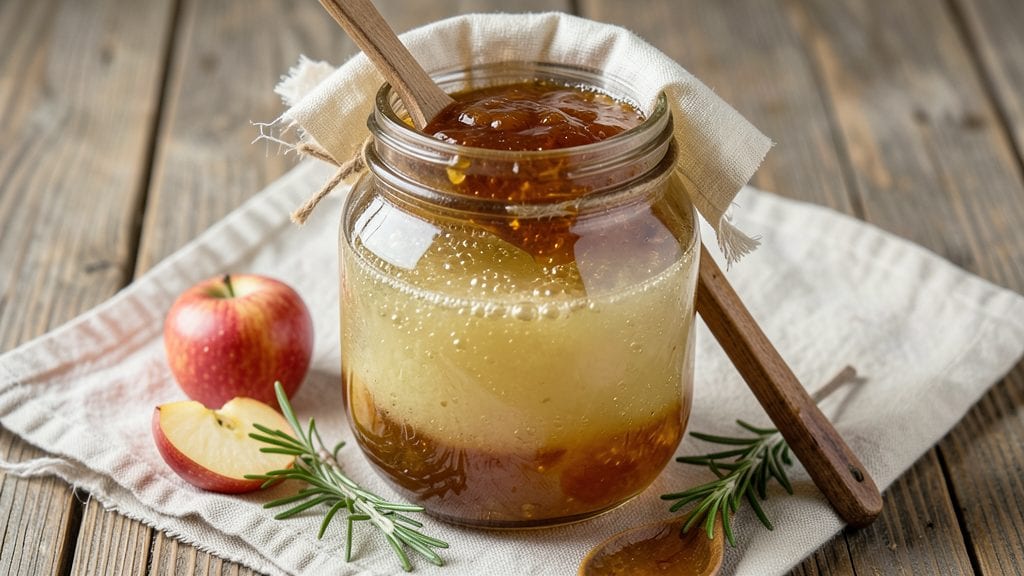
Transforming simple honey into a probiotic powerhouse takes just two ingredients and patience—this fermented honey recipe delivers a tangy, complex sweetener that elevates everything from tea to marinades.
Standing on a step stool in my grandmother’s kitchen in Sicily, I first learned how fermentation preserves while enhancing flavor, and this method carries that same wisdom into modern cooking.
The process is straightforward: combine raw honey with a starter culture (like apple cider vinegar or a previous batch), then let nature do the work over weeks.
What makes this recipe special is its dual purpose—it’s both a functional probiotic and a versatile condiment. The fermentation develops subtle tangy notes that deepen over time, making it perfect for drizzling over yogurt, stirring into cocktails, or using as a glaze for roasted meats.
Unlike store-bought honey, this version gains complexity with each passing week, rewarding your patience with layers of flavor you won’t find in commercial products.
The result is a liquid gold with a velvety texture and bright, almost wine-like depth—ideal for those who appreciate both health benefits and culinary sophistication. With just honey and a starter, you’ll create something far more dynamic than the sweetener on your shelf.
Here’s how to get started with a method that’s foolproof and full of potential.
Once fermented, this honey keeps for months in the refrigerator, making it a pantry staple worth repeating. Experiment with flavors by adding citrus zest, vanilla, or spices like cinnamon during fermentation for customized variations. The possibilities are as endless as your creativity—and your taste buds will thank you.
Ingredients for fermented honey
Two core ingredients transform ordinary honey into a probiotic-rich treasure chest of tangy complexity.
| Ingredient | Amount | Notes |
|---|---|---|
| Raw Honey 🍯 | 1 lb | Unpasteurized, local preferred |
| Unfiltered Apple Cider Vinegar 🍏 | ¼ cup | With mother culture intact |
| Filtered Water 💧 | ¼ cup | Room temperature preferred |
| Glass Jar with Lid 🥫 | 1 whole | Wide-mouth, 16oz minimum |
| Cheesecloth or Coffee Filter 🧻 | 1 piece | For straining honey |
| Rubber Band 🔗 | 1 whole | For securing filter |
| Wooden Spoon 🪵 | 1 whole | For gentle stirring |
| Optional: Citrus Zest 🍋 | 1 tsp | Lemon/orange for flavor |
The honey you choose is everything. Raw, unpasteurized honey from local beekeepers packs the most enzymes and flavor—Whole Foods or local farmers markets are your best bets. Look for labels that say 'unfiltered' or 'unpasteurized'—those words mean alive, living honey with probiotic potential. Apple cider vinegar with the 'mother' (that gooey bit) is critical—Bragg or local organic brands work best. If you're using store-bought vinegar, check the ingredients list for 'mother culture' or 'acetic acid bacteria'. The water should be filtered if possible, but tap water in most cities is fine. For the jar, glass is non-negotiable—plastic can leach chemicals and won't handle the fermentation process well. I always grab a 16oz wide-mouth jar from IKEA or Amazon—they're cheap and perfect for this.
No apple cider vinegar? Unpasteurized lemon juice with a pinch of sugar can work in a pinch, though the fermentation will be less robust. Short on time? Use a previous batch of fermented honey as your starter—just 1 tbsp will kickstart the process. The cheesecloth or coffee filter is where the magic happens—reusable muslin bags from kitchen stores are ideal, but an old coffee filter in a pinch works too. Want to add flavor? Citrus zest or a cinnamon stick can be tucked into the jar during fermentation. Just remove them before straining. The wooden spoon is key—metal can introduce unwanted bacteria. If you don't have one, a clean plastic spoon works, but avoid anything that might scratch the glass.
Once fermented, this honey keeps for up to 12 months in the fridge—far longer than regular honey. Store it in the same jar with the lid tightly sealed. For best results, keep it in a cool, dark place. If you've added flavorings like citrus zest, remove them before storing. The fermented honey will thicken slightly over time—just stir before use. Portion into smaller jars for gifting or to keep on hand. Freezing is also an option, though it may alter the texture slightly. The longer it ferments, the more complex the flavor becomes—taste it weekly and stop when it reaches your desired tang level.
Why You'll Love This Recipe
- Five-Minute Mix: I swear, this is the kind of recipe where you can measure, stir, and forget about it—literally. Just raw honey, apple cider vinegar, and water in a jar. No peeling, no chopping, no waiting for the oven. Honestly, the hardest part is remembering to stir it once a week.
- Tangy-Sweet Magic: That first taste? It’s like honey had a makeover—bright, zesty, with just enough vinegar kick to wake up your taste buds. I’ll be real: it’s the kind of thing that makes you go back for seconds, even when you’re not supposed to be snacking.
- Pantry Powerhouse: This stuff works everywhere. Drizzle it on yogurt, stir it into tea, or toss it with roasted veggies. Between us, it’s my go-to for quick dressings or even a fancy glaze for grilled chicken—no one has to know it’s just fermented honey doing the heavy lifting.
- Lasts Forever: One batch keeps for months, so you’re not scrambling to make more. Plus, it’s cheaper than buying specialty condiments, and you control the flavor. (Yes, even on a Tuesday night when you’re too tired to think.)
Step-by-step instructions for fermented honey
Transforming raw honey into a probiotic-rich elixir is simpler than you think—just follow these precise steps.
Prepare the Fermentation Base
Begin by combining the 0.25 cup unfiltered apple cider vinegar and 0.25 cup filtered water in the glass jar with lid. Stir gently with the wooden spoon until fully integrated—this creates the acidic environment that kickstarts fermentation. The vinegar's mother culture will introduce beneficial bacteria, while the water helps dilute the honey for proper fermentation.
If using the 1 tsp optional citrus zest, add it now and stir again. The zest introduces subtle brightness that complements the honey's depth. Leave the jar uncovered and let the mixture sit at room temperature for 15 minutes—this allows the vinegar to fully dissolve and the citrus oils to infuse. You'll notice a slight effervescence as the mixture begins its transformation.
Combine with Raw Honey
Carefully pour the 1 lb raw honey into the jar, ensuring it coats the sides evenly. Use the wooden spoon to stir thoroughly until the mixture becomes smooth and homogenous. The honey should now have a syrupy, slightly thickened consistency—this is ideal for fermentation. The raw honey's natural enzymes will interact with the vinegar's probiotics, creating a complex flavor profile.
Here's the thing—don't rush this step. Stirring too vigorously can introduce air bubbles that may disrupt fermentation. Instead, use gentle, deliberate motions to blend the ingredients. You'll see the mixture darken slightly as the honey and vinegar begin to mingle at a molecular level. This is when the magic starts.
Secure and Ferment
Place the cheesecloth or coffee filter over the jar's opening and secure it tightly with the rubber band. This creates an airtight seal while allowing gases to escape—critical for preventing mold while encouraging fermentation. Store the jar in a dark, warm place (around 70-75°F) for 7-10 days. You'll know fermentation is active when you see tiny bubbles forming along the sides of the jar.
Resist the urge to peek or disturb the jar during fermentation. Every time you open it, you risk introducing contaminants. Instead, trust the process. After 7 days, taste a small amount—it should have a tangy, slightly effervescent quality with a depth of flavor that's more complex than raw honey alone. If it still tastes too sweet, let it ferment another 2-3 days. The goal is a balance between sweetness and acidity.
Strain and Store
After fermentation, remove the cheesecloth or coffee filter and strain the honey through a fine-mesh sieve into a clean jar if needed. The strained honey will be clearer and smoother, with a vibrant golden hue. If you prefer a slightly cloudy texture, you can skip straining—just ensure the filter is clean to avoid contamination.
Store the fermented honey in the glass jar with lid in the refrigerator. The cold temperature slows fermentation, preserving the probiotics and flavor. Your fermented honey will keep for up to 6 months, though the flavor continues to evolve over time. The longer it sits, the more complex and tangy it becomes—almost like a liquid gold with depth.
Use and Enjoy
Incorporate your fermented honey into teas, dressings, or drizzle it over yogurt and oatmeal. Its probiotic properties make it a powerhouse for gut health, while its rich flavor elevates both sweet and savory dishes. Start with 1 teaspoon and gradually increase as you acclimate to its intensity. The citrus zest, if used, will add a bright contrast to the honey's natural sweetness, making it perfect for marinades or glaze.
Remember, the longer you ferment it, the more pronounced the probiotic benefits and tangy notes become. If you're new to fermentation, start with the 7-day mark—this gives you a gentle introduction to the flavor profile without overwhelming acidity. Enjoy your homemade probiotic elixir, crafted with just a few simple ingredients and a little patience.
Pro Tips For Making Fermented Honey
- STIR DAILY FOR 5 MINUTES: I learned this the hard way—skipping the daily stir means uneven fermentation and a gummy mess. Use a clean spoon to break up any honey clumps and mix thoroughly for 5 minutes, even if it feels like overkill.
- USE ROOM-TEMPERATURE HONEY: Cold honey from the fridge thickens the mix and slows fermentation. Let your raw honey sit out for at least 2 hours before mixing—it’ll blend smoother and ferment faster. (Yes, even if you’re impatient like me.)
- SKIP THE METAL LID: Metal reacts with vinegar and can sour the whole batch. Stick to a glass jar with a tight-fitting lid, and if you’re worried about leaks, place a small plate underneath. No need to overcomplicate it.
- STRAIN THROUGH CHEESECLOTH TWICE: The first straining removes big debris, but the second pass—after 2 weeks—catches the finer particles that make the final product cloudy. Use a coffee filter for a clearer result, but cheesecloth works fine if you’re in a hurry. (Your future self will thank you.)
Perfect pairings for fermented honey
Tea Elevations
Fermented honey transforms your morning tea into a gut-health powerhouse. I love drizzling 1 teaspoon into hot Earl Grey or chamomile tea—the tangy depth cuts through the floral notes beautifully.
For an iced twist, mix 2 teaspoons with ½ cup cold brew and a splash of lemon juice for a refreshing probiotic drink. The fermentation's subtle acidity balances tea's bitterness while adding complexity. 🍵
Yogurt & Oatmeal Topper
This is my go-to breakfast upgrade—just ½ teaspoon over Greek yogurt or steel-cut oats adds a bright, almost wine-like sweetness. The probiotics in the honey complement the live cultures in yogurt, creating a gut-friendly power breakfast.
For extra flair, sprinkle with toasted almonds or fresh berries. The texture remains smooth, never grainy, even after refrigeration.
Savory Glaze
Brush 1 tablespoon of fermented honey over grilled salmon or roasted carrots before the final 5 minutes of cooking. The tangy-sweet glaze caramelizes beautifully, creating a sticky, flavorful crust.
I also use it as a marinade base for chicken thighs—mix with soy sauce and garlic for an umami-rich coating. The fermentation's acidity tenderizes meat while adding depth.
Cocktail Infusions
Fermented honey makes an unexpected but brilliant cocktail ingredient. Stir ½ teaspoon into a gin and tonic for a probiotic twist, or add it to whiskey sours for a honeyed complexity. For a non-alcoholic option, mix with sparkling water and a squeeze of lime.
The fermentation's effervescence adds a lively fizz that enhances any drink. I keep a small bottle on hand specifically for mixology experiments.
Dressing Base
Create a tangy vinaigrette by whisking 3 tablespoons fermented honey with ¼ cup olive oil, 1 tablespoon Dijon mustard, and 1 tablespoon apple cider vinegar. This dressing works wonders on spinach salads or as a marinade for grilled vegetables.
The honey's probiotics add a functional boost to your meal, while the tangy notes elevate simple greens. Store leftovers in an airtight container for up to 1 week.
Baking Enhancer
Replace regular honey in recipes with fermented honey for a deeper flavor profile. Use it in muffins, glazes, or even homemade granola. The fermentation's acidity helps activate baking soda, resulting in lighter textures.
I've found that ½ cup fermented honey in a lemon loaf recipe creates a moist, tangy crumb that keeps slices fresh for days. The probiotic benefits carry through to your baked goods too!
Nutrition facts
Frequently asked questions
What makes fermented honey different from regular honey?
Fermented honey develops beneficial probiotics and a tangy complexity through natural fermentation with vinegar or starter cultures. Unlike regular honey, it has a bright, almost wine-like depth and gut-friendly properties that enhance both sweet and savory dishes. The process transforms simple honey into a functional food with layers of flavor you won't find in store-bought versions.
Can I use store-bought honey for this recipe?
Store-bought honey is often pasteurized, which kills the natural enzymes and probiotics needed for proper fermentation. For best results, use raw, unpasteurized honey from local beekeepers. The live cultures in raw honey create a more vibrant fermented product with deeper flavor. If you must use processed honey, expect milder results.
How do I know when the fermentation is complete?
Fermentation is complete when the honey develops a tangy, slightly effervescent quality with balanced sweetness and acidity. After 7-10 days, taste a small amount—it should have a bright, almost fizzy character. If it's still too sweet, let it ferment another 2-3 days. Over-fermenting can make it overly sour, so monitor daily after the first week.
What can I do if mold appears during fermentation?
If you see mold (fuzzy spots or discoloration), discard the batch immediately as it's unsafe to consume. To prevent this, always use sterile equipment, keep the jar covered with cheesecloth, and store it in a warm (70-75°F) but not humid environment. Never use metal utensils that could introduce bacteria. Starting with a clean workspace is your best defense against contamination.
Can I ferment honey without apple cider vinegar?
Yes! You can use unpasteurized lemon juice with a pinch of sugar as a substitute, though the fermentation will be less robust. For stronger results, use a previous batch of fermented honey (1 tbsp) as a starter culture. Water kefir grains or kombucha starter can also work, but apple cider vinegar with mother culture remains the most reliable option for consistent fermentation.