
Appetizers
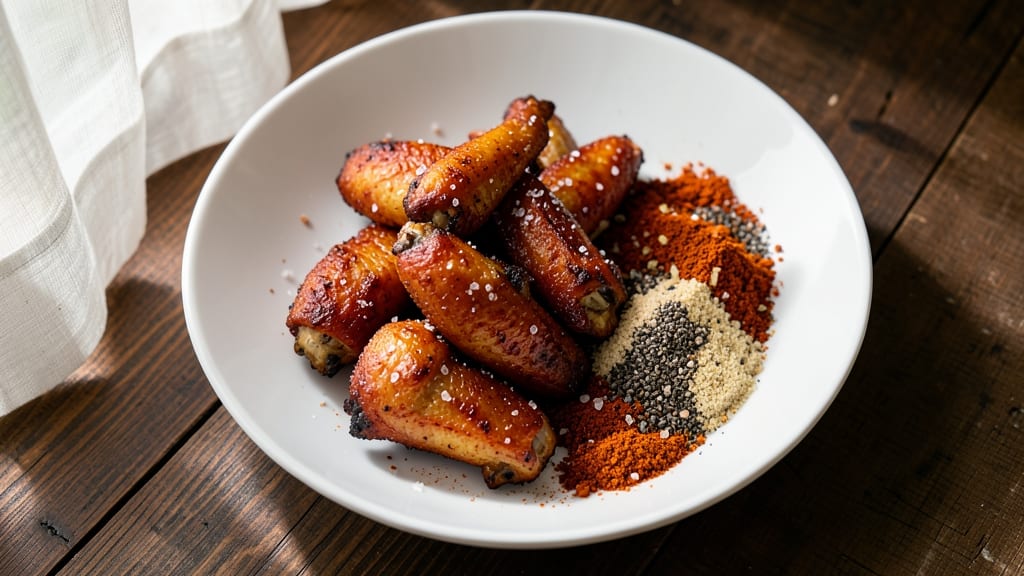
This dry brine chicken wings recipe delivers the perfect balance of ultra-crispy edges and juicy, flavorful meat without a single bitter bite. The secret lies in salting the wings hours before cooking, allowing the salt to penetrate deeply and transform tough chicken into tender, crispy perfection.
I’ve perfected this method over countless batches, ensuring every wing turns out restaurant-quality every time.
The process starts with a simple dry brine—just salt and time—before moving to your preferred cooking method: oven, air fryer, or grill. This technique eliminates the need for messy marinades or wet brines while guaranteeing a crispy exterior and tender interior.
The result? Wings that are addictively crispy, perfectly seasoned, and ready in under an hour once you start cooking.
What sets these wings apart is the absence of bitterness, a common issue with traditional brining methods. The dry brine method ensures even seasoning and moisture retention, so every bite is juicy and packed with flavor.
Whether you’re serving them as an appetizer or game-day snack, these wings will disappear faster than you can say "second round."
Pair them with your favorite dipping sauce or a sprinkle of spices for extra flavor—this recipe is designed to be both foolproof and customizable. Let’s get started on wings that will impress even the pickiest eaters.
Ingredients for dry brine chicken wings
Just eight ingredients transform ordinary wings into addictively crispy perfection.
| Ingredient | Amount | Notes |
|---|---|---|
| Chicken Wings 🍗 | 3 lb | Fresh, drumettes and flats included |
| Kosher Salt 🧂 | ½ cup | Diamond Crystal preferred for texture |
| Ground Black Pepper 🌶️ | 1 tbsp | Freshly cracked for best flavor |
| Garlic Powder 🧄 | 1 tbsp | Not garlic salt |
| Smoked Paprika 🌶️ | 1 tsp | For subtle smoky depth |
| Onion Powder 🧅 | 1 tsp | For balanced seasoning |
| Cayenne Pepper 🔥 | ½ tsp | Adjust for heat preference |
| Cornstarch 🌾 | ¼ cup | For ultra-crispy coating |
| Vegetable Oil 🫒 | ½ cup | High smoke point preferred |
| Lemon Juice 🍋 | 1 tbsp | Brightens flavor profile |
| Fresh Parsley 🌿 | ¼ cup | Chopped for garnish |
| Butter 🧈 | 2 tbsp | Unsalted, melted for finishing |
The wings are non-negotiable—fresh, never frozen, for the best texture. Look for wings with the drumettes and flats included at Costco or your local butcher shop—they’re usually cheaper per pound and fresher than grocery store pre-cut bags. If you’re buying a whole chicken, separate the wings yourself for the best quality. The salt is where the magic happens: Diamond Crystal kosher salt dissolves perfectly and gives you that clean, crispy crust without clumping. I double-check the expiration date on my spices—smoked paprika and cayenne lose their kick after a few months, so if yours tastes dull, toss it.
No cornstarch? All-purpose flour works in a pinch, but the texture won’t be quite as crispy. Short on garlic powder? Fresh minced garlic at double the amount adds a brighter punch. The lemon juice is key—it cuts through the richness and keeps the wings from tasting flat. If you’re air frying, skip the extra oil; the cornstarch coating will crisp up just fine. For oven-baked wings, use a wire rack over a baking sheet to ensure even crispiness. And if you’re grilling, pat the wings dry with paper towels before cooking—moisture is the enemy of crispiness.
This recipe is all about planning ahead. The dry brine needs at least 4 hours, up to 24 hours in the fridge—don’t skip this step, or you’ll end up with bitter, dry wings. Store the brined wings in a sealed container, and they’ll keep for up to 2 days before cooking. Once cooked, they reheat beautifully—just 5 minutes at 350°F to restore that crispy texture. I always make a double batch and freeze half for lazy days. Portion them into single-serving bags so you can grab and bake whenever cravings hit.
Why You'll Love This Recipe
- No-Fuss Prep: I swear, this takes less effort than deciding what to watch on Netflix. Just wings, salt, and a sprinkle of spices—no marinating, no basting, no stress. Toss them in a bowl, let them chill overnight, and boom. Done.
- Smoky Depth Magic: That dry brine? It’s the secret. The salt and smoked paprika work their magic overnight, giving you wings with a crispy skin and a flavor so rich, you’ll forget you didn’t slather them in sauce. Honestly, the first bite changes your mind about store-bought wings forever.
- Game for Any Gathering: Weeknight dinner? Sunday football? Potluck where you show up empty-handed? These wings handle it all. Serve them naked for a fancy bite, toss in buffalo sauce for the crowd, or chop them up for tacos later. They’re the ultimate wing chameleon.
- Budget-Friendly Leftovers: Buy a big batch, cook once, enjoy twice. The dry brine keeps them juicy even reheated, and they’re cheap enough to feed four for the price of two takeout orders. My wallet and my freezer both thank me. (Yes, even on a Tuesday night.)
Step-by-step instructions for dry brine chicken wings
Here's the foolproof method to achieve restaurant-quality crispiness with juicy, flavorful wings every time.
Prepare the Dry Brine
In a large bowl, combine the 0.5 cup kosher salt, 1 tablespoon garlic powder, 1 tablespoon ground black pepper, 1 teaspoon smoked paprika, 1 teaspoon onion powder, and 0.5 teaspoon cayenne pepper. Mix thoroughly until the salt is evenly distributed and the spices are fully incorporated. This blend creates the perfect balance of smoky, spicy, and savory flavors that will penetrate the wings deeply during the dry brine process.
The key to dry brining is patience—this step ensures the wings stay juicy while developing an irresistible crust. I like to use Diamond Crystal kosher salt here because its coarse texture helps create a better bark than table salt. If you're sensitive to heat, reduce the cayenne to 0.25 teaspoon or omit it completely.
Coat and Rest the Wings
Pat the 3 lb chicken wings completely dry with paper towels—this is critical for maximum crispiness. Then, toss the wings in the dry brine mixture, making sure every wing is fully coated. Place them in a single layer on a rimmed baking sheet, spreading them out so they don't touch. Cover loosely with plastic wrap and refrigerate for 12-24 hours.
During this time, the salt will draw moisture out of the wings and into the surface, which then reabsorbs during cooking, creating that perfect juicy interior. The longer you brine (up to 24 hours), the more flavorful and tender the wings will become. Don't skip this step—it's what separates good wings from exceptional ones.
Create the Cornstarch Coating
After removing the wings from the fridge, let them sit at room temperature for 30 minutes to come to room temperature. In a shallow dish, combine the 0.25 cup cornstarch with 1 tablespoon lemon juice. Toss the wings in this mixture until they're evenly coated. The cornstarch will create an ultra-crispy exterior that locks in moisture while adding a subtle texture contrast.
This step is what gives the wings their signature crunch. The lemon juice adds a bright, tangy element that cuts through the richness of the wings. Make sure the wings are completely dry before coating—the cornstarch won't adhere properly if there's any moisture present.
Fry to Golden Perfection
Heat 0.5 cup vegetable oil in a deep skillet or Dutch oven over medium-high heat until it reaches 350°F. Carefully add the wings in batches (don't overcrowd the pan) and fry for 6-8 minutes, turning occasionally, until they reach 165°F internally and develop a deep golden brown color. The oil should sizzle gently but not smoke excessively.
Here's where the magic happens: the cornstarch coating will transform into a crispy, lacy crust while the dry brine ensures the meat stays juicy. If the wings brown too quickly, reduce the heat slightly to 325°F to prevent burning. Use a meat thermometer to check doneness—it's the only way to guarantee perfect results every time.
Finish with Butter and Garnish
Transfer the fried wings to a paper towel-lined plate to drain excess oil. In the same skillet (no need to clean it), melt the 2 tablespoons butter over low heat for 1 minute until it foams. Add the wings back to the skillet and toss to coat them evenly in the butter. This step adds richness and helps create a glossy finish.
Finally, sprinkle with the 0.25 cup chopped fresh parsley and serve immediately. The butter bastes the wings, infusing them with flavor while keeping them moist. These wings should be crispy on the outside with tender, juicy meat inside—no bitter aftertaste, just pure deliciousness. Serve with your favorite dipping sauce or a simple lemon aioli for the ultimate experience.
Pro Tips For Making Dry Brine Chicken Wings
- PAT THE WINGS DRY: After rinsing, grab paper towels and really dry those wings—no wet spots. I used to skip this, and my wings would steam in the oven instead of crisping. Takes 10 seconds, saves you from sad, soggy skin.
- SALT LIKE IT’S 1985: Use way more kosher salt than you think—about 1.5 tablespoons per pound of wings. Spread it evenly, then let them sit uncovered in the fridge for at least 2 hours (overnight is better). The salt needs time to work its magic, not just sit there looking pretty.
- DON’T CROWD THE PAN: If baking, spread wings in a single layer with space between them. I learned this the hard way—overlapping wings steams instead of crisps, and you end up with a sad, uneven batch. Use two pans if needed; crispy skin is non-negotiable here.
- REST BEFORE YOU CRACK: After baking, let wings rest for 5 minutes under foil before tossing in the spices. I know, you’re eager to eat, but rushing means the seasoning sticks to wet skin instead of crisping. Trust me, the wait makes the difference.
Troubleshooting this dish
Bitter Wings Fix
If your wings taste bitter, it’s almost always from over-salting or not rinsing properly. After dry brining, rinse the wings under cold water for 30 seconds to remove excess salt crystals.
Pat them completely dry before coating—the moisture will prevent crispiness. I’ve ruined batches by skipping this step, so don’t overlook it! 🧂
Uneven Cooking
Wings cook at different rates, especially when frying. Use tongs to flip them every 2-3 minutes—focus on the drumettes first, as they’re thicker. If some wings brown faster, remove them temporarily and return later.
A meat thermometer is your best friend here—aim for 165°F internal temp for perfect doneness. 🌡️
Soggy Crust
Cornstarch is key for crispiness, but humidity is the enemy. Never cover the wings while frying—they’ll steam instead of crisp. After frying, place them on a wire rack (not a plate) to drain excess oil.
For oven-baked wings, preheat for 15 minutes and use a wire rack over a baking sheet to allow airflow. 🔥
Oil Smoking Too Much
If your oil starts smoking excessively, it’s too hot. Reduce heat to 325°F—smoking means the oil is breaking down and burning, which ruins flavor. Use a deep-fry thermometer for accuracy.
If you don’t have one, test with a wooden chopstick: if bubbles form around it, the oil is ready. ⚡
Dry, Tough Meat
Overcooking is the usual culprit. Remove wings from heat as soon as they hit 165°F—they’ll carryover cook to 170°F while resting. If they’re dry, try brining for 24 hours instead of 12, or add 1 tbsp lemon juice to the cornstarch coating for extra moisture. 💧
Sticky Cornstarch
Cornstarch clumping? Your wings were too wet. Pat them bone-dry before coating—even a little moisture will turn the cornstarch into glue. If it happens, toss the sticky wings in 1 tbsp flour before frying. For extra insurance, chill the coated wings for 10 minutes in the fridge before cooking. ✨
Nutrition facts
Frequently asked questions
Why do I need to dry brine chicken wings instead of just seasoning them before cooking?
The dry brine method works magic by allowing the salt to penetrate deeply into the wings over time, creating ultra-juicy meat while developing an irresistible crust. Unlike regular seasoning, this technique prevents bitter aftertaste and ensures even flavor distribution throughout the entire wing. The longer you brine (up to 24 hours), the more tender and flavorful the result.
Can I use frozen chicken wings for this recipe?
Fresh wings are ideal for this recipe, as they yield the best texture and crispiness. However, if you must use frozen wings, thaw them completely in the refrigerator for 24 hours first, then pat them completely dry before starting the dry brine process. Never use partially thawed wings, as excess moisture will prevent proper crisping.
What's the best way to cook these wings if I don't have a deep fryer?
You have three excellent alternatives: oven-bake at 400°F for 30-35 minutes on a wire rack, air fry at 375°F for 15-18 minutes (shake halfway), or grill over medium-high heat for 8-10 minutes per side. For oven or air fryer, use the cornstarch coating as directed. For grilling, skip the extra oil but ensure the wings are completely dry before cooking.
How do I store leftover dry-brined wings?
Store cooked wings in an airtight container in the refrigerator for up to 3 days. To reheat, place them on a baking sheet and warm at 350°F for 5-7 minutes until crispy again. For longer storage, freeze cooked wings for up to 2 months. Thaw overnight in the fridge before reheating. The cornstarch coating helps maintain crispiness even after reheating.
Can I adjust the spice level for kids or sensitive eaters?
Reduce or omit the cayenne pepper completely, and you can also cut the smoked paprika to 0.5 teaspoon. For extra mild flavor, use 1 teaspoon onion powder instead of the full amount. The dry brine method still works perfectly with these adjustments—just remember to taste the seasoning blend before applying it to the wings.