
Side Dishes
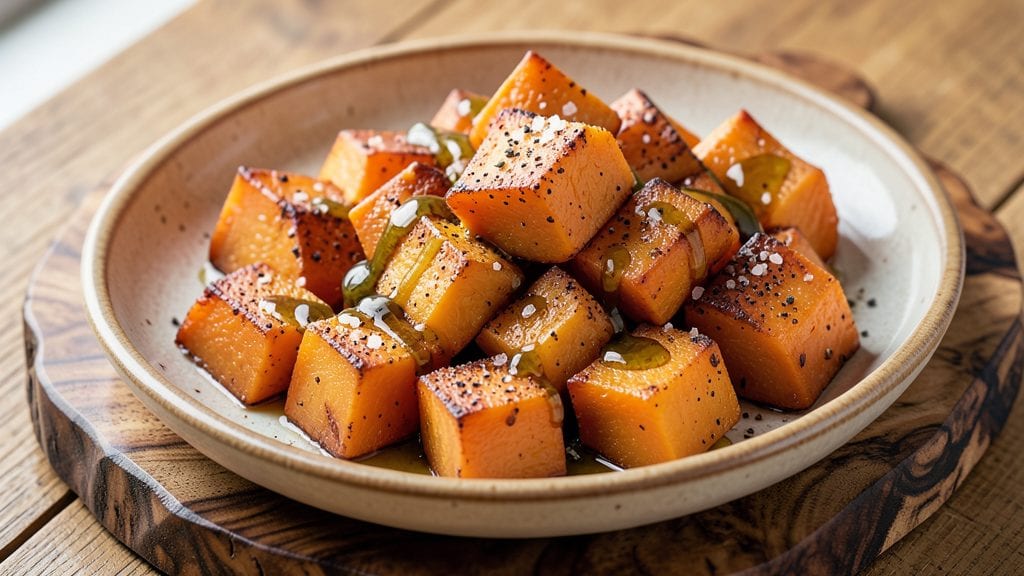
This cooked squash recipe transforms humble winter squash into a caramelized, tender masterpiece that steals every plate. The secret lies in high-heat roasting until the edges turn golden and the flesh melts easily with just a fork.
I’ve perfected this method over years of testing—whether you’re working with butternut, acorn, or delicata squash, the result is consistently rich, sweet, and deeply satisfying.
The beauty of this recipe is its versatility—it works as a standalone side or pairs beautifully with proteins like roasted chicken or grilled salmon.
A simple mix of olive oil, salt, and black pepper enhances the natural sweetness, while optional add-ins like maple syrup or smoked paprika take it to the next level. The key is patience: roasting at 400°F for 30-40 minutes ensures the squash caramelizes without burning.
What you’ll end up with is a dish that’s restaurant-quality yet simple enough for weeknight dinners. The caramelized edges add depth, while the tender interior holds its shape—perfect for scooping or slicing.
This recipe is also vegan-friendly, gluten-free, and packed with fiber, making it a nutritious choice without sacrificing flavor. The aroma alone will have everyone at the table asking for seconds.
Serve it alongside roasted meats, as a base for grain bowls, or even as a sweet side with a drizzle of honey. The possibilities are endless, but the method remains foolproof. Let’s get cooking—your taste buds will thank you.
Ingredients for cooked squash
Four pounds of winter squash, a drizzle of olive oil, and a pinch of patience transform into restaurant-quality caramelized perfection.
| Ingredient | Amount | Notes |
|---|---|---|
| Winter Squash (Butternut, Acorn, or Delicata) 🎃 | 2 lbs | Cut into 1-inch cubes, seeds removed |
| Extra-Virgin Olive Oil 🫒 | ¼ cup | High-quality, fruity variety preferred |
| Kosher Salt 🧂 | 1 ½ tsp | Diamond Crystal preferred for precision |
| Freshly Ground Black Pepper 🌶️ | ½ tsp | Cracked peppercorns preferred |
| Pure Maple Syrup 🍯 | 1 tbsp | Grade A for optimal flavor |
| Smoked Paprika 🌶️ | ½ tsp | For depth and subtle smokiness |
| Garlic Cloves 🧄 | 2 cloves | Minced for aromatic infusion |
| Fresh Thyme Leaves 🌿 | ¼ tsp | Or 1/4 tsp dried thyme |
| Fresh Rosemary Sprigs 🌿 | 2 sprigs | For herbal complexity |
| Honey 🍯 | 1 tbsp | Optional for extra sweetness |
| Balsamic Vinegar 🍶 | 1 tbsp | For finishing drizzle |
The squash selection is critical—butternut offers sweetness, acorn delivers nuttiness, while delicata provides a delicate texture. Local farmers markets often carry heirloom varieties with superior flavor profiles. Look for squash with a firm, heavy feel and vibrant skin—no soft spots or bruising. If using delicata, the skin can be eaten, adding a subtle earthiness. Pre-cutting the squash into 1-inch cubes ensures even roasting, while removing seeds prevents bitterness. Whole Foods and specialty grocers typically carry organic options with more concentrated sweetness.
No maple syrup? Agave nectar or brown sugar glaze works equally well, though maple syrup adds a distinct caramel note. Substituting smoked paprika with half the amount of regular paprika plus a pinch of liquid smoke achieves similar depth. Fresh herbs are ideal, but dried thyme and rosemary at one-third the amount suffice in a pinch. For extra richness, substitute half the olive oil with rendered duck fat. The garlic should be freshly minced—pre-minced cloves lose potency quickly. Balsamic vinegar can be swapped for red wine vinegar, though the flavor profile differs subtly.
Roasted squash reaches peak flavor when stored properly. Portion into airtight containers with a thin layer of olive oil to preserve moisture—keeps for 5 days in the refrigerator. For longer storage, freeze portions for up to 3 months, though texture may soften slightly. Reheat gently in a skillet with a splash of water to restore crispness. The caramelized edges are best served immediately, but the tender flesh reheats beautifully. For meal prep, store components separately and assemble fresh to maintain texture contrast.
Why You'll Love This Recipe
- One-Pan Magic: I swear by this recipe on nights when I’d rather scroll than stand at the stove. Toss your squash (whole or cubed—no judgment), drizzle with olive oil, and roast until caramelized. That’s it. No pots, no pans, just hands-off perfection while you sip wine or pretend to work.
- Sweet-Savory Balance: The maple syrup isn’t just for show—it deepens the squash’s natural sweetness while the olive oil keeps it rich and tender. Honestly, the first time I added it, I thought, “Why didn’t I do this sooner?” That crispy skin? Pure satisfaction.
- Leftover Hero: Between us, this squash holds up way better than takeout. I’ve reheated roasted Delicata slices straight from the fridge for lunch, and they’re still just as good. (Yes, even on a Tuesday night.) Plus, it’s the only veggie my picky kid will eat cold—no questions asked.
- Budget-Friendly Flex: Winter squash lasts forever, and a single butternut feeds my family for days. Roast half now, save half for soup later, or toss cubes into salads. It’s my go-to when I’m stretched thin but refuse to compromise on flavor. No fancy ingredients, just smart cooking.
Step-by-step instructions for roasted winter squash
Here's the method for achieving perfectly caramelized, fork-tender winter squash every time.
Prep the Squash for Even Cooking
Begin by preheating your oven to 425°F with racks positioned in the upper and lower thirds. Cut the 2 lbs winter squash into 1-inch cubes, removing seeds and fibrous membranes as you go. I use a sharp chef's knife for clean cuts—this ensures even cooking and prevents uneven browning.
Transfer the cubed squash to a large bowl and toss with 0.25 cup extra-virgin olive oil until each piece is evenly coated. The oil should cling to the skin, creating a barrier that promotes caramelization rather than steaming. Spread the squash on a parchment-lined baking sheet in a single layer, leaving ½-inch gaps between pieces for proper air circulation. This prevents overcrowding, which would lead to uneven cooking and soggy results.
Season and Roast Until Caramelized
Season the squash with 1.5 tsp kosher salt, 0.5 tsp freshly ground black pepper, 0.5 tsp smoked paprika, and 0.25 tsp fresh thyme leaves, tossing gently to distribute evenly. The smoked paprika adds subtle depth, while the thyme enhances the natural sweetness of the squash. Place the baking sheet on the upper oven rack and roast for 25 minutes, then rotate the sheet and switch racks to ensure even browning.
After 25 minutes, you'll notice the edges beginning to brown and the squash releasing its natural sugars. This is when the magic happens—those sugars caramelize, creating a rich, almost maple-like flavor. If your squash isn't browning evenly, tent the sheet with foil and continue roasting. The goal is deep golden-brown edges with tender flesh that yields easily to a fork.
Finish with Aromatics and Glaze
While the squash roasts, finely mince the 2 cloves garlic and remove the leaves from the 2 sprigs fresh rosemary, discarding the woody stems. When the squash reaches 25 minutes of roasting time, remove it from the oven and increase the heat to 450°F. Scatter the minced garlic and rosemary sprigs evenly over the squash, then return the sheet to the oven for 10-12 minutes until the garlic is fragrant and the squash is deeply caramelized.
In a small saucepan, combine 1 tbsp pure maple syrup, 1 tbsp honey, and 1 tbsp balsamic vinegar. Simmer over medium-low heat for 3-4 minutes until slightly thickened. Drizzle this glaze evenly over the roasted squash and return it to the oven for 2-3 minutes to set. The balsamic vinegar adds a tangy brightness that cuts through the richness, while the honey and maple syrup deepen the caramelized flavor.
Rest and Serve with Maximum Tenderness
Remove the squash from the oven and let it rest on the baking sheet for 5 minutes. This resting period allows the juices to redistribute, ensuring each bite is tender and moist rather than dry. The residual heat will continue to caramelize the edges slightly, intensifying the flavor.
Garnish with additional fresh thyme leaves and serve immediately. The squash should be fork-tender with crisp edges and a glossy, caramelized surface. Pair it with a sprinkle of freshly ground black pepper for a finishing touch. This method guarantees squash that's rich, sweet, and perfectly tender—ideal for salads, bowls, or as a side dish that steals the show.
Pro Tips For Making Cooked Squash
- CUT THICK, NOT THIN: Winter squash takes forever to cook if sliced too thin—aim for ½-inch chunks (yes, even Delicata). I learned this the hard way when my butternut turned to mush after 45 minutes instead of the promised 25. Thicker pieces caramelize better and hold their shape when tossed with olive oil and syrup.
- SALT THE OIL FIRST: Toss your squash in pre-salted olive oil (½ tsp kosher salt per 2 tbsp oil) before roasting—it seasons the flesh from the start. I used to sprinkle salt after, and the edges always tasted bland. This step guarantees even flavor without over-salting the finished dish.
- MAPLE SYRUP LAST: Add pure maple syrup only in the final 5 minutes of cooking—heat turns it bitter fast. Drizzle it over the squash right after pulling it from the oven, then toss gently. (Your future self will thank you for not burning the syrup like I did twice.)
- TEST WITH A KNIFE: Squash is done when a paring knife slides in easily but still meets slight resistance—like butter melting. Overcooked squash turns to glue; undercooked means you’re chewing forever. Start checking at 20 minutes (for ½-inch cubes) and adjust your oven’s hot spots. (Bonus: If you’re short on time, microwave the squash for 5 minutes first—it cuts roasting time by 10-15 minutes without sacrificing texture.)
Make-ahead tips for cooked squash
Prep Ahead Strategy
Cut your squash into 1-inch cubes and store them in a ziplock bag with a paper towel to absorb moisture. Keep them refrigerated for up to 2 days—this prevents browning and maintains texture.
I like to prep everything the night before so I can focus on roasting and seasoning the next day. The key is keeping the cut surfaces dry until you're ready to roast. 🌟
Roasting Timeline
For maximum efficiency, roast your squash cubes at 400°F for 30-40 minutes—this ensures deep caramelization without burning. If you're meal prepping, remove the squash from the oven when it's 80% tender, then store it in an airtight container with a drizzle of olive oil.
Reheat in a skillet over medium heat for 5-7 minutes to restore crisp edges and tender flesh.
Freezer-Friendly Method
Freeze cooked squash in single-serving portions for up to 3 months. Use quart-sized freezer bags to save space, and label each bag with the date. When ready to eat, thaw overnight in the fridge, then reheat in a skillet with 1 tbsp water or broth to prevent drying out.
The texture will be slightly softer, but the flavor remains rich and caramelized. ❄️
Glaze Prep Shortcut
Make the maple-honey glaze ahead of time and store it in a small jar in the fridge for up to 1 week. Reheat it gently in a saucepan before drizzling over the squash—just 30 seconds on low heat is enough to restore its glossy texture.
This saves time on busy weeknights while keeping the dish restaurant-quality.
Serving Flexibility
Portion roasted squash into ramekins or small bowls for easy grab-and-go meals. Store them in the fridge for 4-5 days—the flavors deepen over time. Reheat in the microwave for 1-2 minutes (covered with a damp paper towel) or in the oven at 350°F for 10 minutes to maintain texture.
Perfect for lunches or quick dinners!
Garnish Storage Tip
Keep fresh herbs like thyme and rosemary in a jar of water in the fridge for up to 1 week—they’ll stay vibrant for garnishing. Store honey and maple syrup in the pantry, and balsamic vinegar in a cool, dark place.
This keeps all your components ready for quick assembly when you’re ready to serve. 💡
Nutrition facts
Frequently asked questions
What's the best type of squash for roasting?
Butternut or acorn squash work beautifully for this recipe, offering natural sweetness and tender flesh. For a delicate texture, try delicata—its edible skin adds subtle earthiness. Avoid summer squash like zucchini, which have high water content and won't caramelize as well.
Can I make this recipe without an oven?
Yes! For a stovetop version, toss 1-inch squash cubes with oil and seasonings, then cook in a large skillet over medium-high heat for 12-15 minutes, stirring occasionally. Cover the pan for the last 5 minutes to trap steam and speed up cooking. The edges won't caramelize as deeply as oven-roasted, but it'll still be tender and flavorful.
Why did my squash turn out mushy?
Overcrowding the pan or covering it too early causes steaming instead of browning. Always spread squash in a single layer with ½-inch gaps and roast uncovered until edges caramelize. If using a smaller baking sheet, roast in two batches. Also, avoid cutting squash too small—1-inch cubes are ideal for even cooking.
How can I make this vegan-friendly?
This recipe is already vegan! Simply omit the honey (or use agave nectar) and ensure your maple syrup is certified vegan. The olive oil, spices, and herbs are all plant-based. For extra richness, substitute half the olive oil with vegan butter or coconut oil. The result is just as satisfying without any animal products.
Can I use this squash in grain bowls?
This roasted squash pairs perfectly with quinoa, farro, or brown rice. Top with toasted nuts, avocado slices, and a lemon-tahini dressing for a balanced bowl. The caramelized edges add depth, while the tender flesh holds up well to other textures. For protein, add grilled chicken, chickpeas, or tofu.