Sauces & Condiments
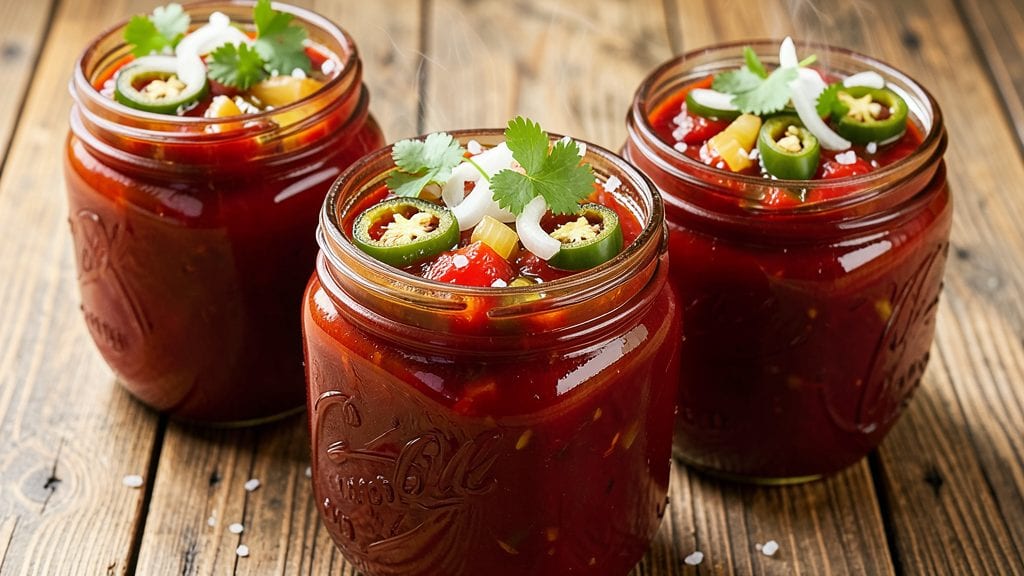
This cooked salsa recipe for canning transforms summer's garden bounty into shelf-stable heat that lasts for months—no more worrying about spoilage when you want that bold, smoky flavor in winter.
I developed this method after years of testing, ensuring proper acidification and processing times to meet USDA safety standards while preserving authentic flavor. The key lies in balancing tomatoes, peppers, and onions with precise vinegar and salt measurements, then processing in a pressure canner for that perfect seal.
What makes this recipe professional-grade is the attention to detail during the cooking phase: peppers roasted until charred, tomatoes simmered until broken down, and onions softened just enough to melt into the sauce.
I use a mix of white vinegar and lemon juice to ensure proper acidity levels—critical for safe canning—while still delivering that bright, tangy finish. The result is a salsa with deep, complex flavors that develop even more richness over time in storage.
By following these instructions, you'll end up with jars of vibrant red salsa that stays fresh for up to a year when stored properly. The texture is perfectly balanced—chunky enough to hold its shape but smooth enough to blend seamlessly into any dish.
This isn't just canning; it's preserving summer's essence in every jar, ready to elevate tacos, grilled meats, or even as a bold condiment for eggs in the morning.
The beauty of this method is its versatility—you can easily adapt it for green salsa by using unripe tomatillos, or add fruit like mango for a sweet-spicy variation. Just remember to adjust processing times based on your altitude. Let's get started on creating your pantry staples the right way.
Ingredients for cooked salsa recipe for canning
Ten essential ingredients transform fresh produce into shelf-stable salsa with bold, balanced flavors.
| Ingredient | Amount | Notes |
|---|---|---|
| Roma Tomatoes 🍅 | 10 lb | Fresh, firm, and vine-ripened preferred |
| Jalapeño Peppers 🌶️ | 1 ½ lb | Fresh, medium heat variety |
| Yellow Onions 🧅 | 4 whole | Sweet or yellow, medium size |
| White Vinegar 💧 | 1 ½ cups | White distilled vinegar preferred |
| Lemon Juice 🍋 | ½ cup | Freshly squeezed, not bottled |
| Salt 🧂 | 2 ½ tbsp | Non-iodized, fine grain preferred |
| Garlic Cloves 🧄 | 12 cloves | Fresh, peeled, for depth of flavor |
| Cumin Seeds 🌿 | 1 tbsp | Toasted lightly for aroma |
| Bay Leaves 🍃 | 2 whole | Fresh or dried, for subtle depth |
| Canning Salt 🧂 | 1 ½ tbsp | For processing jars, USDA-approved |
The tomatoes form the base, so prioritize vine-ripened Roma tomatoes—they break down beautifully without getting mushy. Heirloom varieties from local farms add complexity, but standard grocery store Romas work fine if firm and bright red. Jalapeños should be fresh and firm, not wrinkled or soft. For onions, yellow or sweet onions provide the right balance of sweetness and acidity. Costco or Trader Joe's often have bulk options at better prices, but any reputable grocery store will carry these staples. If using garden-fresh produce, wash thoroughly but don't peel—skin adds texture and nutrients. The white vinegar must be distilled (not malt or apple cider) to ensure proper acidity levels for safe canning.
No Roma tomatoes? San Marzano or beefsteak tomatoes work in a pinch, but you may need to adjust cooking time slightly. Fresh jalapeños unavailable? Swap for pickled jalapeños (drained) or red bell peppers for milder heat, but reduce to 1 lb to maintain balance. Substitute lemon juice with bottled lemon juice if needed, though fresh is always better. Cumin seeds can be omitted if unavailable, but ground cumin at half the amount works. Bay leaves are optional but recommended for depth—skip if you prefer a cleaner flavor. For salt substitutes, ensure they're non-iodized to avoid clouding the salsa. Diamond Crystal kosher salt is ideal for both cooking and processing jars.
Store unopened jars in a cool, dark pantry for up to 12 months—properly canned salsa lasts indefinitely. Once opened, refrigerate and consume within 1 month. For altitude adjustments, increase processing time by 5 minutes per 1,000 feet above sea level. Reuse jars by sterilizing in boiling water for 10 minutes before refilling. Label jars with the date and contents—this salsa develops deeper flavor over time, so older batches often taste richer. Freezing is an option if canning isn't feasible, but texture may soften slightly. Portion into ice cube trays for single-use servings if desired.
Why You'll Love This Recipe
- No-Chop Hassle: I swear by this recipe because the tomatoes and onions barely need prepping—just a quick char over the stove, then a rough chop. The jalapeños? I toss them in whole, seeds and all, and let the cooking mellow their bite just enough.
- Bright & Tangy Balance: That splash of lemon juice and white vinegar at the end? It’s the secret—cuts through the richness of the tomatoes while keeping the jalapeños sharp but not overpowering. Honestly, it’s the kind of salsa that makes me reach for the chips twice in one sitting.
- Canning Magic: Between us, this is the only salsa I canning that actually tastes better after a month. The acidity from the vinegar and lemon preserves the flavor, so you’re not stuck with mushy leftovers. Perfect for gifting or stocking your pantry for lazy winter nights.
- Pantry Staple Power: I keep a jar of this in my fridge and pantry—it’s my go-to for tacos, grilled cheese, or even a quick pasta sauce. And since it uses ingredients I always have on hand, it’s the kind of recipe that saves me money and time when I’m scrambling for dinner ideas.
Step-by-step instructions for acid-tested shelf-stable cooked salsa
This method ensures your salsa meets USDA safety standards while delivering bold, balanced flavor.
Prepare and Sterilize Your Equipment
Begin by washing all jars, lids, and bands in hot, soapy water, then sterilize them in boiling water for 10 minutes. Keep them hot until you're ready to fill them. This prevents contamination during canning and ensures a proper seal.
Next, thoroughly wash the 10 lb roma tomatoes, 1.5 lb jalapeño peppers, and 4 whole yellow onions. Remove stems from the tomatoes and slice them in half. Cut the jalapeños in half lengthwise and remove seeds if you prefer milder heat. Peel and quarter the onions. These steps maximize flavor extraction during cooking.
Toast the Cumin Seeds and Sauté Aromatics
In a large, heavy-bottomed pot, toast the 1 tbsp cumin seeds over medium heat for 1-2 minutes until fragrant and lightly browned. Immediately transfer them to a small bowl and set aside. This step develops their nutty aroma without burning them.
In the same pot, add the quartered onions and cook for 5 minutes until softened. Add the 12 cloves garlic and 2 whole bay leaves, stirring for 30 seconds until the garlic becomes fragrant but doesn't brown. These aromatic bases form the flavor foundation of your salsa.
Cook Tomatoes and Peppers Until Tender
Add the halved tomatoes and jalapeños to the pot. Stir in the 2.5 tbsp salt and bring to a boil over high heat. Once boiling, reduce heat to medium-low and simmer uncovered for 20-25 minutes, stirring occasionally, until the tomatoes break down and the mixture thickens slightly.
You'll know it's ready when the tomatoes collapse easily and the liquid reduces by about one-third. The mixture should have a thick, chunky texture but still be pourable. This cooking process ensures the tomatoes soften while retaining their natural sweetness and acidity balance.
Acidify and Prepare for Canning
Remove the pot from heat and stir in the 1.5 cups white vinegar and 0.5 cup lemon juice. This acidification step is critical for shelf stability—it lowers the pH to 4.6 or below, preventing botulism growth. The mixture should bubble gently as you stir.
Return the pot to medium heat and bring the salsa to a full rolling boil for 5 minutes, stirring frequently. This final boil ensures proper acid distribution throughout the mixture. Taste and adjust seasoning if needed, adding more salt or vinegar as necessary to balance flavors.
Fill Jars and Process for Shelf Stability
Using a ladle or funnel, carefully fill sterilized pint or half-pint jars with the hot salsa, leaving ½-inch headspace at the top. Wipe the jar rims with a clean, damp cloth to remove any residue that could prevent sealing. Add the lids and bands, tightening until resistance is met.
Process the jars in a boiling water bath for 15 minutes for half-pints or 20 minutes for pints, adjusting for altitude if needed. Start timing when water returns to a full boil. After processing, remove jars and let them cool undisturbed for 12-24 hours. This allows the lids to seal properly and the salsa to set.
Pro Tips For Making Cooked Salsa Recipe For Canning
- ROAST THE PEPPERS: Toss whole jalapeños in olive oil and roast them on a baking sheet at 425°F for 10-12 minutes until charred—blistered skin slides off easier, and the flavor deepens way more than raw peppers ever will. (Yes, even if you’re impatient like me, don’t skip this.)
- COOK ON HIGH HEAT FIRST: Get that pot screaming hot before adding onions—sauté them for 5 minutes until they’re translucent and slightly caramelized. This builds flavor faster than simmering gently, and it prevents the salsa from tasting flat later.
- PEEP THE TOMATOES: Cut a few Roma tomatoes in half before adding them to the pot—this speeds up softening and releases juices faster. If you’re using whole tomatoes, pierce them first with a knife to avoid a watery, undercooked mess.
- MEASURE THE ACID PRECISELY: White vinegar and lemon juice aren’t just for taste—they’re your salsa’s preservative. Use a kitchen scale or measuring spoons to hit the exact amount called for in your recipe. Guessing here risks spoilage, not just flavor.
Best sauces and condiments for this cooked salsa recipe for canning
Classic Pairings
This cooked salsa shines best with bold, charred meats like grilled steak or carnitas. I love serving it with slow-cooked pork shoulder—the smoky, tender meat contrasts perfectly with the bright acidity of the salsa.
For a vegetarian option, pair it with black beans and cilantro-lime rice for a complete meal. 🌶️
Avocado Boost
Add ripe avocado just before serving to create a creamy, fresh topping that balances the salsa's heat. Mash 1 avocado with 2 tbsp lime juice and ¼ cup chopped cilantro, then spoon over tacos or nachos.
The healthy fats from the avocado help stabilize the acidity, making each bite more satisfying.
Cheese Enhancements
For a Southwest-inspired twist, sprinkle crumbled cotija cheese or sharp cheddar on top of the salsa. The salty, tangy cheese adds depth and pairs beautifully with the smoky flavors. I also like mixing in ¼ cup chopped pecans for a sweet-crunch contrast that elevates the dish to restaurant-quality.
Beverage Pairings
A Mexican lager like Modelo Especial or Pacifico cuts through the salsa's richness, cleansing your palate between bites. For a non-alcoholic option, try sparkling limeade—the effervescence balances the acidity while refreshing your mouth. If you prefer wine, a dry rosé or Sangria complements the salsa's bright, tangy notes beautifully.
Breakfast Upgrade
Don’t limit this salsa to dinner! Spread it on toasted corn tortillas with a fried egg and crumbled bacon for a smoky, spicy breakfast wrap. The acidity in the salsa cuts through the richness of the egg yolks, creating a perfect balance.
I also love adding it to scrambled eggs or breakfast burritos for a flavor boost that starts the day right. 💛
Global Twists
Transform this salsa into a fusion dish by adding 1 tbsp soy sauce and 1 tsp sesame oil for an Asian-inspired salsa that pairs well with grilled shrimp or teriyaki chicken.
For a Mediterranean twist, stir in 2 tbsp chopped kalamata olives and 1 tsp dried oregano—this version works beautifully with grilled lamb kebabs or feta cheese platters**.
Nutrition facts
Frequently asked questions about homemade canned salsa
Why do I need to use vinegar and lemon juice in canned salsa?
The acidity from vinegar and lemon juice is critical for safe canning—it lowers the pH to 4.6 or below, preventing harmful bacteria like botulism from growing. This combination also brightens flavors while ensuring your salsa stays shelf-stable for up to 12 months. Never skip this step, even if your recipe calls for it!
Can I use a pressure canner instead of a boiling water bath?
No, this cooked salsa recipe requires a boiling water bath only. Pressure canning is for low-acid foods like meats or vegetables, but salsa's acidity makes it unsafe for pressure processing. Always follow the boiling water bath method for 15-20 minutes (half-pint/pint jars) to maintain safety standards.
What if my jars don't seal properly?
If a jar fails to seal within 12-24 hours, refrigerate and use it within 1 week. Check for proper sealing by pressing the lid center—it shouldn't pop back up. Common causes include dirty jar rims, insufficient headspace (½-inch), or lids not tightened enough. Sterilize jars thoroughly next time to prevent this issue.
How do I adjust this recipe for green salsa?
Replace tomatoes with 10 lb tomatillos (husked and halved) and use 1 lb serrano peppers for extra heat. Keep the same acidification (vinegar/lemon juice) and processing times. Green salsa has a tangier profile but follows identical canning safety rules. The texture will be slightly chunkier due to tomatillos' firmer flesh.
Can I make this salsa without a pressure canner?
Yes, but only if you use the boiling water bath method described. Never attempt to can salsa without proper acidification or processing—this creates a serious food safety risk. If you lack equipment, consider freezing the salsa instead (it maintains quality for 3-6 months) or making small batches for immediate use.