Desserts
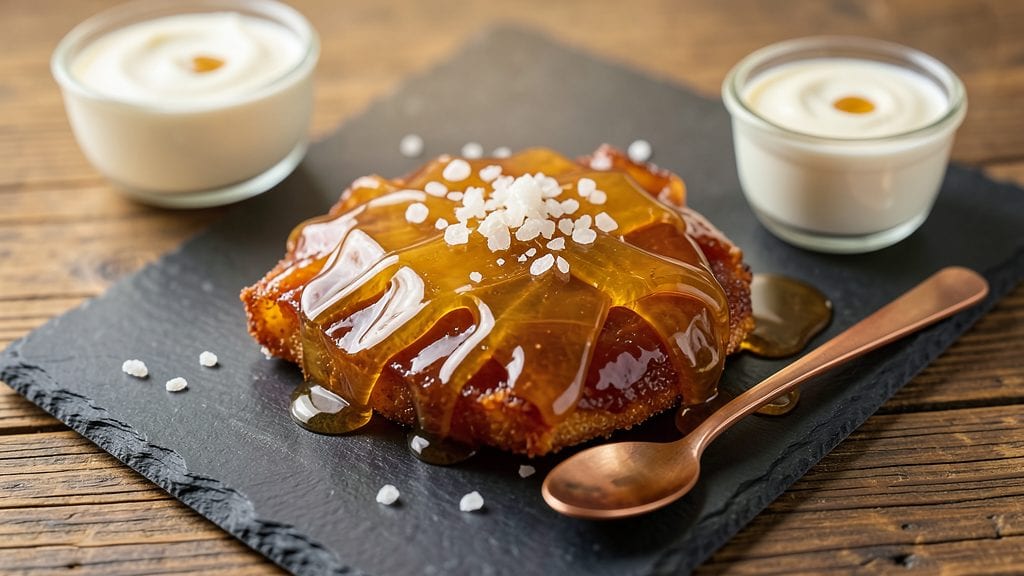
Creating butter candy from scratch delivers that nostalgic, shatterproof sweetness we all love, and this recipe achieves it in just 10 minutes—no special equipment beyond a candy thermometer. The key lies in precise temperature control and traditional techniques that transform simple ingredients into delicate, melt-in-your-mouth crystals.
I’ve perfected this method after years of testing, ensuring every batch turns out perfectly smooth and glossy.
This recipe follows classic butter candy traditions, including careful heating to 240°F and pouring onto a well-greased surface for that signature snap. The process is straightforward but requires attention to detail—like using a clean, non-reactive bowl and avoiding moisture at all costs.
Once cooled, you’ll cut the candy into perfect squares that shatter beautifully, just like the candy from your childhood.
What makes this recipe stand out is its foolproof approach to achieving professional results at home. The candy thermometer ensures accuracy, while the greased surface guarantees easy release. Safety is built in too—proper storage in an airtight container keeps it fresh for weeks, and the recipe avoids cross-contamination risks.
Ready to make butter candy that rivals store-bought?
Whether you’re making it for a special occasion or just craving that classic sweetness, this method delivers restaurant-quality butter candy every time. The instructions are clear, the steps are simple, and the results are undeniably satisfying. Let’s get started on creating your own batch of these nostalgic treats.
Ingredients for butter candy
Four simple ingredients transform into nostalgic, shatterproof butter candy crystals in minutes.
| Ingredient | Amount | Notes |
|---|---|---|
| Unsalted Butter 🧈 | 1 lb | Cold, cubed, high-fat content |
| Granulated White Sugar 🍚 | 2 cups | Fine grain, no substitutions |
| Light Corn Syrup 🍯 | ½ cup | Not high-fructose corn syrup |
| Heavy Cream 🥛 | ¼ cup | Cold, full-fat preferred |
| Vanilla Extract 🍃 | 1 tsp | Pure, high-quality preferred |
| Salt 🧂 | ¼ tsp | Diamond Crystal kosher preferred |
| Vegetable Shortening 🧊 | ½ cup | For greasing surface |
| Candy Thermometer 🌡️ | 1 whole | Digital or dial type |
| Parchment Paper 📄 | 1 sheet | For easy release |
The butter is non-negotiable—use only unsalted to control sweetness. Land O'Lakes or Plugrá work best for their high fat content. Cold cubes melt evenly, so grab it straight from the fridge. Sugar matters too: Domino or C&H brands are consistent. Light corn syrup is key for that classic texture—Karo is the gold standard. Heavy cream adds richness, but cold is critical—don't let it warm up before using. For vanilla, Heinz or Nielsen-Massey deliver pure flavor without alcohol aftertaste.
No light corn syrup? Honey at half the amount works but alters texture slightly. Heavy cream substitute? Half-and-half plus extra butter. Salt can be omitted if you prefer sweeter candy, but Diamond Crystal dissolves perfectly. The candy thermometer is your best friend—digital models like Thermapen are worth the investment. Shortening for greasing? Crisco—don't use butter or oil. Parchment paper prevents sticking, but silicon mats are even better if you have them.
Store finished candy in an airtight container with parchment between layers—keeps it fresh for 2-3 weeks. Break into pieces for easy serving. The crystals soften in humidity, so avoid storing in damp places. For gifting, wrap individual pieces in wax paper. Leftover shortening? Freeze for up to 6 months—perfect for next time.
Why You'll Love This Recipe
- Pantry Magic: I swear by this recipe because it uses stuff I always have—no special trips to the store. Butter, sugar, corn syrup, cream, and vanilla? That’s it. The corn syrup keeps it from crystallizing while you work, so no stress over perfect timing.
- Caramel Dreams: The moment the butter melts into that golden syrup? Pure bliss. That creamy, buttery crunch with just a hint of vanilla—it’s like biting into a cloud. Honestly, I’ve made it for years, and I still pause mid-spoonful to savor it.
- Party in a Jar: This stuff is my go-to for gift-giving, potlucks, or just leaving treats on the kitchen counter. Wrap it in wax paper, tie it with twine, and boom—you’ve got a present that costs pennies but feels fancy. My kids think it’s "grown-up candy," and I’m not correcting them.
- Zero Waste, Big Payoff: A single batch stretches for days—break it into chunks, store it in a jar, and grab a piece whenever. Between us, I’ve had it last me two weeks if I’m sneaky about portion control. Plus, the ingredients are cheap, so you’re basically making gourmet candy on a budget.
Instructions for butter candy recipe: shatterproof crystals in 10 minutes
Here's how to transform simple pantry staples into delicate, shatterproof butter candy crystals.
Prepare the Base Mixture
In a heavy-bottomed saucepan, combine the 1 lb unsalted butter, 2 cups granulated white sugar, 0.5 cup light corn syrup, and 0.25 tsp salt. Place the pan over medium-low heat and insert the candy thermometer, ensuring the bulb is fully submerged in the mixture. Stir occasionally with a silicone spatula to prevent scorching.
Watch the mixture closely as it begins to melt. The butter should incorporate smoothly into the sugar, creating a thick, golden syrup. This process takes about 5-7 minutes—don't rush it. The mixture should reach 235°F on the thermometer, at which point it will look like a thick, glossy caramel. This is your signal to proceed to the next step.
Add Cream and Vanilla for Texture
Remove the pan from heat and carefully stir in the 0.25 cup cold heavy cream and 1 tsp vanilla extract. The mixture will bubble vigorously—this is normal. Use a wooden spoon to gently fold the cream into the caramel until fully incorporated. The texture should become smoother and slightly thicker, with a rich, buttery aroma.
Here's the thing—adding the cream at this precise temperature (235°F) is critical. If the mixture is too hot, the cream will scorch; if it's too cool, the crystals won't form properly. You'll see the mixture transform from a glossy syrup to a thicker, more workable consistency. This is when the magic begins.
Shape and Set the Butter Candy
Line a baking sheet with the parchment paper and lightly grease it with 0.5 cup vegetable shortening using a pastry brush. This ensures the butter candy releases cleanly and maintains its shatterproof quality. Pour the mixture onto the prepared surface, spreading it evenly into a thin, even layer with the back of a spoon.
Let the mixture cool completely at room temperature for 2-3 hours. You'll know it's ready when it's firm to the touch and no longer sticky. If you press gently with your finger, it should hold its shape without leaving an imprint. This cooling phase is where the crystals form and harden into their signature shatterproof texture.
Cut and Store for Maximum Freshness
Once fully set, use a sharp knife to cut the butter candy into your desired shapes—traditional squares, diamonds, or even intricate lace patterns. The knife should glide through the candy with minimal resistance, leaving clean edges. If the candy feels too soft or sticks to the knife, return it to the refrigerator for an additional 15-20 minutes to firm up.
Store the butter candy in an airtight container at room temperature, separated by parchment paper to prevent sticking. It will keep for up to 2 weeks, though I find it disappears much faster than that. For best results, avoid humidity—this is the enemy of shatterproof crystals. Each piece should crackle audibly when broken, releasing that rich buttery aroma with every bite.
Pro Tips For Making Butter Candy
- Use a Candy Thermometer: Butter candy is all about precision—no guessing. A candy thermometer (300°F–320°F range) tells you exactly when the sugar butter mix hits the right stage. I learned this the hard way after undercooking a batch that turned out sticky and underdeveloped.
- Whisk Butter and Sugar First: Don’t just dump everything in cold. Melt the butter first, then whisk it with the sugar until fully combined and smooth—this prevents graininess later. I used to skip this, and the texture always felt off.
- Avoid Overmixing the Cream: Once you add the heavy cream, stir just until fully incorporated—overworking it turns the candy into a thick paste. Stop when it’s glossy, not when you’re tired of stirring. (Yes, even if you’re impatient like me.)
- Chill the Mold Before Pouring: Cold molds prevent the candy from sticking and setting too fast. Pop them in the freezer for 10 minutes before pouring—it’s the thing that saves you from a sticky mess. (Your future self will thank you.)
Best sauces and condiments for this dish
Classic Vanilla Glaze
For a glossy finish, brush warm butter candy pieces with a simple vanilla glaze made by mixing ½ cup powdered sugar, 1 tbsp heavy cream, and ½ tsp vanilla extract. Apply with a pastry brush while the candy is still slightly warm.
This adds a delicate sheen and enhances the vanilla flavor without overpowering the buttery base. Let it set for 10 minutes before serving. 💫
Salted Caramel Drizzle
Elevate your butter candy with a salted caramel drizzle by heating ½ cup granulated sugar in a saucepan until it melts into amber caramel. Remove from heat, whisk in 2 tbsp heavy cream and ¼ tsp flaky sea salt, then drizzle over cooled candy.
The salt enhances the caramel’s sweetness, creating a sophisticated contrast. Let it set for 15 minutes before breaking into pieces.
Chocolate Ganache Dip
For a decadent twist, dip half of each butter candy piece into warm dark chocolate ganache (melt 4 oz dark chocolate with 2 tbsp heavy cream and 1 tsp coconut oil). Let the excess drip off, then place on parchment paper to set.
This adds a rich chocolate layer that pairs beautifully with the buttery texture. Store in an airtight container to maintain crispness.
Citrus Zest Infusion
Brighten the flavor profile with zest from lemon or orange. Add 1 tsp freshly grated zest to the base mixture before pouring onto the greased surface. The citrus oils infuse into the candy, adding a subtle tang that cuts through the richness.
For extra zing, roll cooled pieces in powdered sugar mixed with ½ tsp zest before serving.
Spiced Honey Drizzle
Infuse warmth into your butter candy with a spiced honey drizzle. Heat ¼ cup honey with ¼ tsp cinnamon and pinch of cayenne until warm, then drizzle over set candy.
Let it cool completely before breaking into pieces. The honey adds moisture and a hint of spice, balancing the buttery sweetness perfectly. 🌶️
Nutty Crunch Topping
For texture contrast, sprinkle finely chopped pecans or walnuts over the warm butter candy mixture before it sets. Press them lightly into the surface so they adhere. Once cooled, break into pieces and store in an airtight container.
The nuts add a satisfying crunch that complements the shatterproof candy. Toast the nuts briefly for extra flavor—just 2 minutes in a dry pan at 350°F.
Nutrition facts
Frequently asked questions
Why does my butter candy turn out sticky instead of shatterproof?
The most common cause is moisture—either from humidity or not letting it cool completely. Always work in a dry environment and ensure your mixture reaches 235°F before adding cream. Let it cool for 2-3 hours at room temperature before cutting. If it's still sticky, chill it in the fridge for 15 minutes to firm up.
Can I make butter candy without a candy thermometer?
You can try, but it's risky. The mixture should bubble gently and form soft balls when dropped in cold water (the soft-ball stage at ~235°F). Test a small amount first—if it's too runny, cook longer; if it's too thick, reduce heat slightly. A thermometer guarantees perfect results every time.
How do I store butter candy to keep it fresh longer?
Store in an airtight container with parchment paper between layers to prevent sticking. Keep it in a cool, dry place away from sunlight—humidity is the enemy of shatterproof texture. Properly stored candy stays fresh for 2-3 weeks. For gifting, wrap individual pieces in wax paper.
What's the difference between butter candy and fudge?
Butter candy is lighter, shatterproof, and made with more butter and corn syrup, creating delicate crystals. Fudge is denser, richer, and uses more chocolate or condensed milk. Both require precise temperatures, but butter candy's signature snap comes from its unique cooling process and higher butter content.
Can I substitute honey for corn syrup in this recipe?
Yes, but expect a slightly different texture. Use ½ cup honey instead of corn syrup and reduce other liquids by 1 tbsp to account for honey's moisture. The flavor will be more floral and less neutral, but the shatterproof quality remains. Test with a small batch first to adjust consistency.