
Main Courses
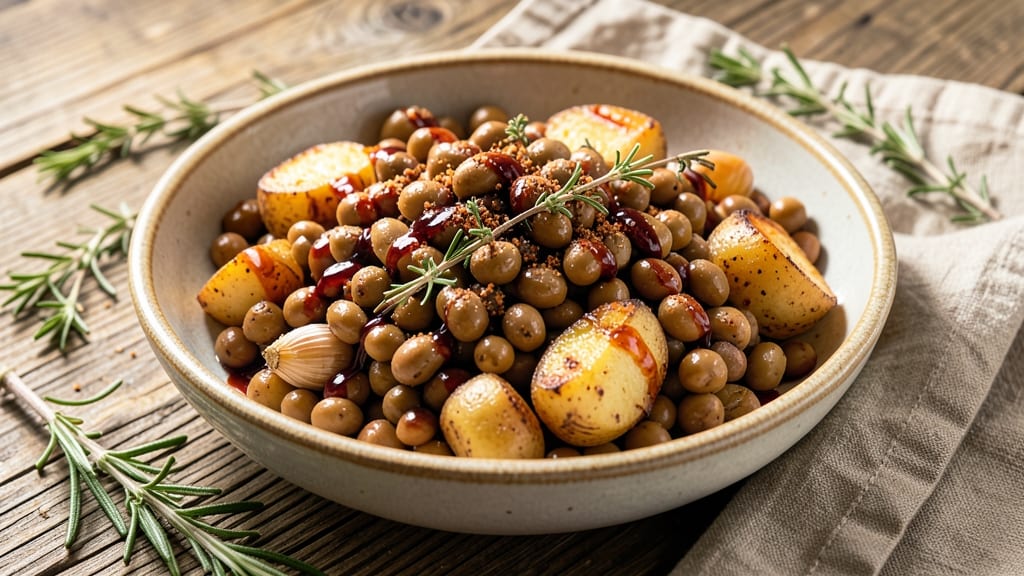
This smoky garlic and herb one-pot black-eyed peas recipe transforms humble ingredients into a soul-warming dish that feels like a Sunday dinner hug. 💛 I developed it after years of testing versions that either fell apart or tasted bland—this one delivers tender peas with deep, aromatic flavors in a single pot.
The secret lies in slow-cooking the peas with garlic, smoked paprika, and fresh herbs until they're melt-in-your-mouth perfect.
What makes this recipe special is its versatility—it's vegetarian-friendly, packed with protein, and ready in under an hour with minimal cleanup. The one-pot method means no dirty dishes, just rich, smoky aromas filling your kitchen as the peas simmer into a hearty stew.
Perfect for weeknight dinners or meal prep, it's a dish that builds character with every bite, just like my grandmother's Sunday roast chicken.
By the end, you'll have a pot of tender black-eyed peas with crisp edges, infused with smoky garlic and bright herbs. The texture is perfectly tender, not mushy, and the flavors are complex enough to stand alone or pair beautifully with cornbread or grilled vegetables.
This is comfort food at its finest—simple ingredients elevated through technique.
Whether you're celebrating New Year's traditions or just craving a nourishing meal, this recipe delivers. The one-pot magic ensures dinner is on the table without the fuss, while the flavors will have everyone asking for seconds. Let's get cooking—your taste buds will thank you.
Ingredients for black-eyed pea
Simple pantry staples meet smoky magic in this one-pot black-eyed pea recipe.
| Ingredient | Amount | Notes |
|---|---|---|
| Dried Black-Eyed Peas 🌱 | 1 ½ cups | Rinsed before cooking |
| Garlic Cloves 🧄 | 6 cloves | Smashed for deep flavor |
| Smoked Paprika 🌶️ | 2 tsp | For authentic smoky depth |
| Dried Thyme 🌿 | 1 tsp | Or 1 tbsp fresh thyme |
| Dried Rosemary 🍃 | ½ tsp | Crushed between fingers |
| Bay Leaves 🍃 | 2 whole | Remove before serving |
| Vegetable Broth 💧 | 3 cups | Low-sodium preferred |
| Extra-Virgin Olive Oil 🫒 | 2 tbsp | For richness and aroma |
| Lemon Juice 🍋 | 1 tbsp | Freshly squeezed |
| Salt 🧂 | 1 ½ tsp | Adjust to taste |
| Black Pepper 🌶️ | ½ tsp | Freshly cracked |
| Onion Powder 🧅 | 1 tsp | For subtle depth |
| Cayenne Pepper 🔥 | ¼ tsp | Optional for heat |
| Fresh Parsley 🌿 | ¼ cup | Chopped for garnish |
The peas are the star, so grab dried black-eyed peas from the bulk section at Whole Foods or your local grocery store—they're cheaper and fresher than canned. Smoked paprika is non-negotiable for that authentic Southern flavor; Penzeys has a great selection if you want to splurge. Fresh herbs like thyme and rosemary make all the difference, but dried works in a pinch—just remember it's less potent. The garlic cloves should be plump and firm, not sprouting. If you're prepping ahead, store dried spices in airtight containers away from light.
No smoked paprika? Substitute with a mix of regular paprika and a pinch of liquid smoke—it's not the same, but close. Fresh herbs? Dried thyme and rosemary at one-third the amount works, but the flavor won't be as bright. Short on vegetable broth? Water plus a bouillon cube saves the day, but add an extra pinch of salt. The cayenne pepper is optional, so skip it if you're sensitive to heat. For extra richness, stir in a spoonful of nutritional yeast at the end—it adds a cheesy, umami kick without dairy.
This dish tastes even better the next day, so make extra if you can. Store leftovers in the fridge for up to 5 days or freeze for 3 months. I like to portion mine into meal prep containers—just reheat with a splash of water or broth. The flavors meld beautifully over time, so don't rush it. If you're serving this for New Year's, double the batch and freeze half. Trust me, your guests will be asking for seconds.
Why You'll Love This Recipe
- One-Pot Magic: I swear by this—just toss dried peas, garlic, and herbs in a pot with water, and walk away. No soaking, no fuss, and the smoky paprika does all the flavor work for you.
- Earthy & Smoky: That smoked paprika? It’s the secret weapon—deep, warm, and just a little bit addictive. The thyme and rosemary add this quiet, herbal depth that makes every bite feel cozy.
- Meal Prep Hero: I make a big batch on Sundays and eat it all week—over rice, in wraps, or straight from the pot. The peas hold up perfectly, and the flavor only gets better as it sits.
- Budget-Friendly Staple: Dried peas are cheap, last forever, and stretch into meals that actually impress. Honestly, I’ve fed a houseful of people for under $10 with this—no one ever guesses how simple it is.
Step-by-step instructions for smoky garlic and herb black-eyed peas
This one-pot wonder delivers restaurant-quality flavor with minimal cleanup—just follow along.
🍳 Step 1: Sauté Aromatics Until Fragrant
Heat the 2 tbsp extra-virgin olive oil in your one-pot over medium heat until shimmering but not smoking. Add the 6 smashed garlic cloves and cook for 30 seconds until they just begin to turn golden—don't let them brown or they'll turn bitter.
Next, add the 2 tsp smoked paprika, 1 tsp dried thyme, 0.5 tsp dried rosemary, 1 tsp onion powder, 0.25 tsp cayenne pepper, 1.5 tsp salt, and 0.5 tsp black pepper. Stir constantly for 20 seconds until the spices release their aroma and the mixture smells like a warm, smoky hug. Here's where the flavor magic starts—I like to give it a quick sniff test to make sure everything's singing.
🥘 Step 2: Build the One-Pot Foundation
Add the 1.5 cups rinsed dried black-eyed peas and stir to coat them evenly with the aromatic oil and spices. Pour in the 3 cups vegetable broth and bring the mixture to a gentle boil over high heat. Once boiling, reduce heat to medium-low and add the 2 whole bay leaves.
This is where patience pays off. Let the peas simmer uncovered for 20 minutes—you'll see the liquid reduce slightly and the peas start to soften. Stir occasionally to prevent sticking, but don't overdo it. The goal is to develop flavor, not mash everything into oblivion. You'll know it's ready when the peas are tender but still hold their shape—like little al dente marbles.
⏰ Step 3: Finish with Bright, Tangy Flavor
After 20 minutes, stir in the 1 tbsp lemon juice and give everything a taste. The acidity brightens the dish and cuts through the richness of the olive oil. If the peas need more liquid (they should have about ½ inch of broth covering them), add ¼ cup water now. Simmer uncovered for another 10 minutes until the peas are fork-tender and the broth has thickened slightly.
Here's the thing—don't rush this step. The peas should be tender but still have a bit of bite. If they're mushy, you've overcooked them. The perfect texture is when they're soft enough to eat but still hold their shape when you spoon them up.
👨🍳 Step 4: Garnish and Serve
Remove the 2 bay leaves and discard them. Stir in the 0.25 cup chopped fresh parsley and give everything a final taste. Adjust the seasoning if needed—maybe a pinch more salt or a squeeze of extra lemon juice. The parsley adds freshness that balances all the smoky, garlicky goodness.
Serve immediately as a side dish or over rice for a hearty main course. The peas should be warm, flavorful, and coated in that beautiful herb-infused broth. This one-pot wonder is perfect for meal prep too—just store leftovers in the fridge for up to 5 days or freeze for 3 months. The flavors actually get better as they sit!
Pro Tips For Making Black-Eyed Pea
- SOAK THE PEAS: Dried black-eyed peas expand best when soaked overnight in warm water—just cover them and let them sit. I learned this the hard way after burning a pot trying to rush the cooking time; soaked peas cut that down by nearly half.
- CRUSH HALF THE GARLIC: Use 3 whole cloves minced for depth, but crush the remaining 2 into a paste for a richer flavor that blends right into the dish. This isn’t just about taste—it’s how you get that subtle, layered garlic presence without overpowering.
- DON’T SKIP THE SIMMER: Low and slow is the only way—keep the heat at a gentle bubble, not a rolling boil, or the peas will turn mushy. I used to walk away while they cooked, and that’s when I’d come back to a sad, watery mess.
- TOAST THE SPICES FIRST: Bloom the smoked paprika, thyme, and rosemary in oil for 30 seconds before adding liquid—this releases their aroma and prevents them from floating like dust. It’s the difference between a dish that smells amazing and one that just tastes functional.
Regional styles of black-eyed pea
Southern Hoppin’ John
In the American South, black-eyed peas are the star of Hoppin’ John, a New Year's Day tradition believed to bring good luck and prosperity. This version swaps pork for crispy smoked turkey sausage, making it vegetarian-friendly while keeping the soulful flavors.
I like using 1 cup diced smoked turkey sausage cooked until crispy, then removed and set aside. Stir it back in at the end for maximum flavor impact. 💛
Caribbean-Inspired Peas and Rice
Jamaican and Trinidadian cuisines transform black-eyed peas into peas and rice, a one-pot dish cooked with coconut milk and Scotch bonnet peppers. For this variation, replace vegetable broth with 2 cups coconut milk> and add 1 Scotch bonnet pepper> (seeds removed for less heat).
Cook the peas with 1 cup long-grain rice> and simmer until the rice is tender and the liquid is absorbed. Garnish with cilantro and lime wedges for a tropical twist.
West African Stew
In Ghana and Nigeria, black-eyed peas are simmered into hearty stews with tomatoes, onions, and peppers. Start by sautéing 1 diced onion> and 2 minced garlic cloves> in olive oil, then add 1 cup diced tomatoes> and 1 bell pepper>.
Stir in 1 tsp ground ginger> and 1 tsp curry powder> before adding the peas and broth. Simmer for 45 minutes> until the peas are tender and the sauce thickens. Serve with fufu> or jollof rice> for a complete meal.
Brazilian Moqueca de Feijão
This Brazilian-inspired dish turns black-eyed peas into a coconut-dill stew with a touch of lime. Sauté 1 diced onion> and 3 garlic cloves> in olive oil, then add 1 cup diced tomatoes> and 1 cup coconut milk>.
Stir in 1 tsp dried dill> and 1 tsp lime zest> before adding the peas and broth. Simmer for 30 minutes> and finish with fresh dill and lime juice. Serve with farofa> (toasted cassava flour) for crunch.
Indian Chana Dal Twist
For an Indian-inspired version, cook the peas with 1 tsp cumin seeds>, 1 tsp turmeric>, and 1 tsp garam masala>. Add 1 cup tomato puree> and ½ cup chopped cilantro> at the end.
Serve with naan bread> or basmati rice>. The spices transform the dish into a fragrant, aromatic stew that’s perfect for curry lovers. 🌶️
Mediterranean Lemon-Herb Style
Brighten the dish with Mediterranean flavors by adding 1 tsp dried oregano>, 1 tsp lemon zest>, and a splash of white wine> when sautéing the garlic.
Finish with fresh parsley and a drizzle of extra-virgin olive oil>. This lighter version pairs beautifully with grilled fish or crusty bread, making it ideal for a summer meal.
Nutrition facts
Frequently asked questions
Can I use canned black-eyed peas instead of dried?
You can absolutely use canned peas, but the texture and flavor will differ. For this recipe, dried peas absorb the smoky garlic flavors better, creating a more complex taste. If using canned, drain and rinse them well, then simmer for just 5-10 minutes with the broth to warm through. The dish will be ready faster, but the peas will be softer and less flavorful than dried.
How do I know when the black-eyed peas are perfectly cooked?
Perfectly cooked peas should be fork-tender with a slight bite—like al dente pasta. They should hold their shape but collapse easily when pressed. If you're unsure, taste one after 20 minutes of simmering. Overcooked peas turn mushy and lose their texture, while undercooked ones stay hard. The ½-inch broth covering them is your visual cue for ideal doneness.
Can I make this recipe in an Instant Pot or pressure cooker?
Yes! For an Instant Pot, sauté the garlic and spices as directed, then add the peas, broth, and bay leaves. Cook on high pressure for 10 minutes, followed by a 5-minute natural release. Stir in lemon juice and parsley at the end. The pressure method cuts cooking time to 20 minutes total while keeping the peas tender. Just be careful—don't skip the natural release or the peas may overcook.
What's the best way to store leftovers?
Store leftovers in an airtight container in the fridge for up to 5 days or freeze for 3 months. The flavors actually improve over time! When reheating, add a splash of water or broth to prevent drying. For meal prep, portion into individual containers—just microwave with a damp paper towel to retain moisture. The peas will soften slightly when reheated, but the smoky garlic taste stays vibrant.
Why does my dish taste bland compared to yours?
Bland flavor usually comes from under-seasoning or insufficient simmering time. First, check your spices—smoked paprika and garlic are flavor powerhouses. Second, let the peas simmer uncovered for the full 30 minutes to develop depth. Finally, taste as you go: add more salt, lemon juice, or even a pinch of cayenne if needed. Fresh herbs at the end (like parsley) also brighten the dish—don't skip them!