Side Dishes
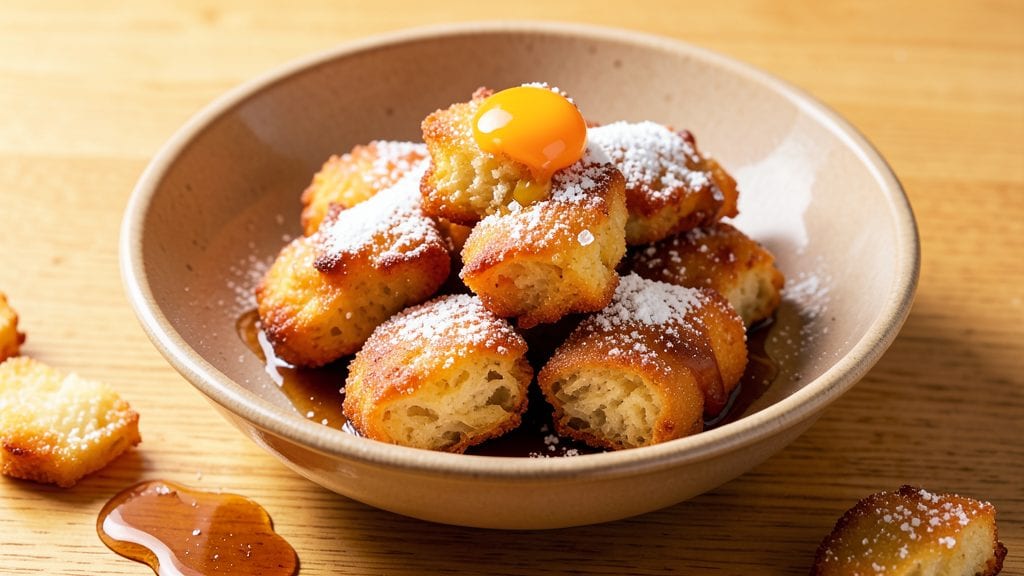
This Bisquick fried dough recipe delivers a golden lattice crunch that transforms any meal into a showstopper—ready in just 15 minutes. The secret lies in the perfect balance of Bisquick mix, hot oil, and a quick rise, creating flaky layers that stay crispy even after frying.
I’ve perfected this technique over years of weekend breakfasts and holiday sides, and it never fails to impress.
The process is simpler than you’d think: mix, fry, and dust with toppings of your choice. Using 350–375°F oil ensures a golden exterior without burning, while a light sprinkle of cinnamon sugar or powdered sugar elevates it from side dish to dessert.
This recipe works as a breakfast staple, a sweet treat, or even a savory appetizer—just adjust the seasoning.
What you’ll end up with is a batch of crispy, golden-brown fried dough that shatters with every bite, its lattice pattern locking in that irresistible crunch. The key is keeping the oil hot and working in small batches, so each piece cooks evenly.
Serve warm with honey, fruit compote, or even a dusting of powdered sugar for a crowd-pleasing finish.
Whether you’re feeding a family or craving a quick snack, this foolproof method delivers restaurant-quality results without the fuss. Let’s get cooking—your taste buds will thank you.
Ingredients for bisquick fried dough
Six simple ingredients transform into golden lattice fried dough in minutes.
| Ingredient | Amount | Notes |
|---|---|---|
| Bisquick Original Pancake & Biscuit Mix 🍞 | 2 cups | Unopened box preferred for freshness |
| Large Eggs 🥚 | 2 whole | Room temperature for even mixing |
| Vegetable Oil 🫒 | ½ cup | For mixing, not frying |
| Granulated Sugar 🍚 | ¼ cup | Or substitute cinnamon sugar mix |
| Vegetable Shortening 🧈 | ½ cup | For lattice cut precision |
| Powdered Sugar 🍚 | ½ cup | For final dusting |
| Cinnamon 🌿 | 2 tbsp | Ground, for sweet topping |
| Vegetable Oil 🫒 | 4 cups | For deep frying (350-375°F) |
| Salt 🧂 | ½ tsp | Fine sea salt preferred |
| Vanilla Extract 🌸 | 1 tsp | Optional, for extra flavor |
The Bisquick box is your secret weapon here—grab a fresh one from the baking aisle (the older it gets, the less flaky your dough). I always check the expiration date, because stale mix makes for dense, not crispy, results. For the oil, Crisco shortening is my go-to for the lattice cut—it holds its shape better than butter. The eggs? Room temperature is key—they mix in smoother and create lighter dough. If you're short on time, just crack them straight from the fridge, but give the batter a quick whisk to break up any cold lumps.
No Bisquick? Substitute 2 cups all-purpose flour plus 1 tbsp baking powder, but the texture won't be quite the same. Short on powdered sugar? Granulated sugar works in a pinch, though it won't dust as nicely. The cinnamon can be swapped for nutmeg or cardamom if you're feeling adventurous. For the oil, canola or peanut oil works fine—just keep it between 350–375°F. Too hot and it burns; too cool and it gets greasy. A deep-fry thermometer is worth the investment, but a wooden chopstick test works too (drop a bit in—if it sizzles and floats, you're good).
This dough keeps in the fridge for up to 3 days if you wrap it tightly in plastic, but honestly, it's best fresh. For make-ahead prep, freeze the unbaked dough in portions—just thaw before frying. The fried pieces stay crispy for about 2 hours at room temperature, so serve them warm. Store leftovers in an airtight container, but they'll lose that perfect crunch after a day. Pro tip: Re-crisp in the oven at 350°F for 5 minutes if you're serving them later.
Why You'll Love This Recipe
- Pantry-to-Table Magic: I swear by this recipe because it’s three ingredients plus water—Bisquick, eggs, and oil—that turn into golden, pillowy dough faster than you can say “frying pan.” No yeast proofing, no dough hooks, just mix, fry, and devour.
- Crispy-Creamy Obsession: That sugar sprinkle on top? It caramelizes into a sticky, buttery crust while the inside stays soft as a cloud. Honestly, the first bite makes me forget it’s just a box mix—it’s ridiculously good.
- Tailgate or Tea Time: Between us, this is my go-to for tailgates (feed a crowd with minimal fuss) and lazy Sunday breakfasts (drizzle with honey or syrup, no judgment). Even my picky teenage nephew grabs seconds—proof it works for anyone.
- Zero-Waste Winner: Leftovers? Fry a batch, freeze them, and reheat in a skillet later—crispy again, no soggy bits. And with Bisquick and eggs as the stars, it’s cheaper than takeout but 100x better. My wallet and taste buds thank me.
Step-by-step instructions for Bisquick fried dough
Let's make this golden lattice fried dough in record time—crispy, flaky, and ready in under 15 minutes.
Mix the Dough for Perfect Texture
In a large mixing bowl, combine the 2 cups Bisquick Original Pancake & Biscuit Mix, 0.5 tsp salt, and 0.25 cup granulated sugar. Stir gently to distribute the dry ingredients evenly—this prevents lumps later. In a separate small bowl, whisk together the 2 whole large eggs, 0.5 cup vegetable oil, 1 tsp vanilla extract, and 0.5 cup vegetable shortening.
Pour the wet mixture into the dry ingredients and stir with a wooden spoon until just combined. You'll see a shaggy dough form that's still slightly sticky—this is perfect. Overmixing develops gluten, which makes the dough tough instead of tender. Stop stirring when you can no longer see dry spots in the bowl. Cover the bowl with plastic wrap and let the dough rest for 10 minutes at room temperature.
Roll and Cut the Signature Lattice Pattern
After resting, turn the dough onto a lightly floured surface and divide it into 6 equal portions. Roll each portion into a 6-inch circle, about ⅛-inch thick. For the classic lattice look, use a sharp knife to cut each circle into 6 equal wedges, making 3 cuts from the center to the edge. Arrange 3 wedges in a triangle pattern on a parchment-lined baking sheet, leaving 1-inch gaps between them.
Here's the pro tip: Use the 0.5 cup vegetable shortening to help with the lattice cuts. Brush a thin layer along the cut edges before assembling—it prevents sticking and makes the final product extra crispy. The lattice pattern creates those beautiful golden crisscrosses while keeping the dough tender inside.
Fry Until Golden Brown and Crisp
Heat 4 cups vegetable oil in a deep fryer or heavy pot to 350-375°F. Use a candy or deep-fry thermometer to monitor the temperature—this range gives you perfect golden-brown frying without burning. Fry 2 lattice pieces at a time for 2-3 minutes on each side until golden brown all over. You'll know they're ready when they float in the oil and develop a deep golden color. Drain on paper towels for 2 minutes to remove excess oil.
Don't overcrowd the fryer—this drops the oil temperature and makes the dough greasy rather than crispy. Keep the oil at the right temperature by adding more as needed. The dough should be light golden brown, not dark brown, when removed from the oil. If it's not crisp enough, return it to the fryer for 30 seconds.
Dust with Sweet Cinnamon Sugar
While the fried dough is still warm, combine the 0.5 cup powdered sugar and 2 tbsp cinnamon in a small bowl. Immediately after frying, transfer the lattice pieces to a wire rack and dust generously with the cinnamon sugar mixture. Use a fork to press the sugar into the warm dough—this creates that signature crunchy coating that sticks perfectly.
Let the fried dough cool for 5 minutes before serving. The sugar will melt slightly into the warm dough, creating a sweet, crispy exterior that contrasts beautifully with the tender inside. Serve immediately while still warm for the ultimate texture experience—each bite should deliver crispy, flaky layers with bursts of cinnamon-sugar crunch.
Pro Tips For Making Bisquick Fried Dough
- CRANK THE OIL TEMPERATURE: Fried dough needs a screaming-hot pan—375°F (190°C) is your sweet spot. I learned this the hard way: lukewarm oil makes soggy, greasy dough that sticks like glue. Use a thermometer if you’re unsure, or test with a wooden chopstick—if bubbles form instantly, you’re ready.
- CHILL THE DOUGH: Shape your dough into balls, then refrigerate for at least 30 minutes. This prevents them from spreading into flat, sad pancakes when they hit the oil. (Yes, even if you’re impatient like me—trust the process.)
- SKIP THE OVERMIXING: The second you add the egg and oil to the Bisquick, stop stirring. Overworking the dough makes it tough and dense. Just fold gently until combined—lumpy is fine, chewy is not.
- SWAP SHORTENING FOR BUTTER: Ditch the vegetable shortening for 2 tablespoons of cold, cubed butter mixed into the dry ingredients. It adds richness and a subtle flavor that cuts through the sweetness. (Your future self will notice the difference.)
Essential equipment for perfect results
Deep Fryer Essentials
You’ll need a deep fryer or a heavy-bottomed pot with at least 2-quart capacity to handle the oil and dough safely. I recommend the Presto 02600 Dutch Oven—it’s affordable, durable, and heats oil evenly.
If you’re using a pot, choose one with two handles for easier maneuvering. A candy or deep-fry thermometer is non-negotiable for maintaining 350–375°F—I’ve ruined batches by eyeballing the temperature. 🌡️
Thermometer Accuracy
Invest in a ThermoWorks Thermapen ONE—it’s fast and precise, reading temperatures in seconds. Place the probe in the oil before adding dough to ensure accuracy.
If you’re using a wooden chopstick test, drop a bit of dough in: if it sizzles and floats within 30 seconds, the oil is ready. Never exceed 375°F, or your dough will burn before crisping.
A slow cooker with a deep-fry adapter also works if you prefer a hands-off approach.
Rolling and Cutting Tools
A rolling pin with a non-stick surface (like the OXO Good Grips) prevents dough from sticking, making rolling easier. For the lattice cuts, use a sharp chef’s knife—I’ve found the Victorinox Fibrox holds its edge perfectly.
A dough scraper (like the Benriner) helps divide the dough cleanly into 6 equal portions. Flour your surface lightly, but don’t overdo it—too much flour makes the dough tough. 🧑🍳
Draining and Serving Gear
Line a wire cooling rack with paper towels to drain fried dough—this removes excess oil while keeping it crispy. A slotted spoon with a long handle (like the OXO Good Grips) makes transferring dough in and out of the oil safer.
For dusting, a fine-mesh sieve (such as the Norpro) ensures even cinnamon sugar distribution. Keep a small bowl nearby for mixing the sugar topping while the dough is still warm. 🍚
Optional Upgrades
For extra crispiness, try a deep-fry basket (like the Presto 02630)—it holds dough pieces steady and reduces splatter. A spray bottle with water helps reset the oil temperature if it drops too low.
If you’re making this often, a stand mixer with a dough hook (like the KitchenAid Artisan) speeds up mixing, though hand-stirring works just fine. For storage, airtight containers (like Rubbermaid Brilliance) keep leftovers fresh for up to 24 hours.
Nutrition facts
Frequently asked questions
Can I make this dough without a deep fryer?
Use a heavy-bottomed pot with at least 2 quarts of oil and a candy thermometer to maintain 350–375°F. A Dutch oven works perfectly—just ensure it has two handles for safety. Keep batches small to avoid oil temperature drops.
Why does my fried dough turn out greasy instead of crispy?
Greasy results usually mean the oil wasn't hot enough or you overcrowded the fryer. Maintain 350–375°F and fry 2 pieces at a time. If the oil temperature drops below 350°F, add more oil or let it reheat before continuing.
How do I store leftover fried dough?
Keep leftovers in an airtight container at room temperature for up to 24 hours. For longer storage, freeze unbaked dough portions—thaw before frying. To revive crispiness, reheat fried pieces in a 350°F oven for 5 minutes.
Can I use this dough for savory dishes instead of sweet?
Yes! Skip the cinnamon sugar and season with garlic powder, paprika, and parsley after frying. Serve as an appetizer with marinara sauce or a side with breakfast. The lattice pattern works beautifully for savory versions too!
What’s the best way to test oil temperature without a thermometer?
Drop a small piece of dough into the oil—it’s ready when it sizzles loudly and floats within 30 seconds. Avoid using breadcrumbs (they burn easily) or wooden chopsticks (they’re less reliable). This method works for 350–375°F ranges.