
Soups & Stews
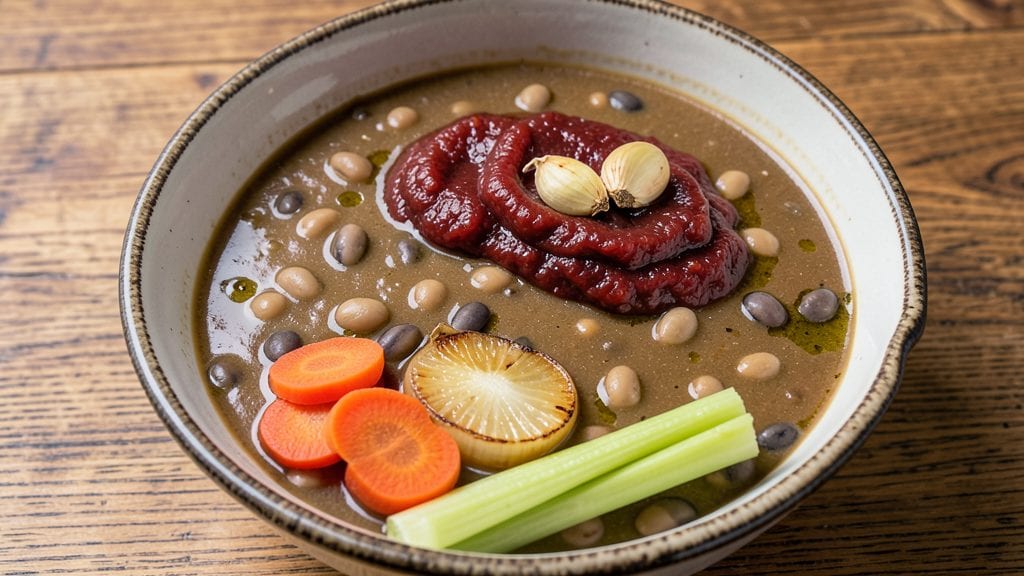
Creating a Betty Crocker-style bean soup is one of those pantry-to-pot miracles that transforms simple ingredients into something deeply comforting. This recipe delivers the rich, hearty texture and balanced flavors that made Betty Crocker’s soups legendary—without requiring any specialty ingredients or advanced techniques.
The key lies in layering flavors through slow simmering and letting the beans break down just enough to create that signature creamy, velvety consistency.
What makes this soup special is its versatility—it works just as well as a quick weeknight meal as it does for meal prep or holiday gatherings.
You’ll start with dried beans for maximum flavor and texture, then build depth with aromatic vegetables, herbs, and spices that simmer together until everything melds into perfect harmony. The result?
A bowl of soup that’s satisfying, nourishing, and packed with the kind of warmth that feels like a hug on a chilly day.
By the time you’re done, you’ll have a pot of soup that’s thick enough to coat a spoon but still light enough to enjoy in generous bowls.
The beans will be tender yet hold their shape, the broth will be rich and flavorful, and every spoonful will carry that unmistakable Betty Crocker touch—homemade comfort at its finest.
This recipe is designed to be foolproof, so even if you’re new to cooking soups, you’ll achieve professional results without stress.
The beauty of this bean soup is how it adapts to your needs—serve it as-is for a simple, hearty meal, or pair it with crusty bread, a side salad, or a sprinkle of fresh herbs for extra brightness.
It reheats beautifully, too, making it perfect for leftovers or meal prep. Let’s get started on creating a soup that tastes like home.
Ingredients for betty crocker bean soup
Pantry staples plus a handful of fresh veggies—this soup comes together faster than you'd think.
| Ingredient | Amount | Notes |
|---|---|---|
| Dried Navy Beans 🌾 | 2 cups | Unsoaked, rinsed well |
| Yellow Onion 🧅 | 1 whole | Medium size, chopped |
| Carrots 🥕 | 3 medium | Peeled, chopped into chunks |
| Celery Stalks 🌿 | 3 whole | Chopped, including leaves |
| Garlic Cloves 🧄 | 4 cloves | Minced, fresh preferred |
| Tomato Paste 🍅 | ½ cup | Smooth, not chunky |
| Dried Thyme 🌿 | 1 tbsp | Or 1 tsp fresh |
| Bay Leaves 🌿 | 2 whole | Fresh or dried |
| Salt 🧂 | 1 ½ tsp | Kosher or sea salt |
| Black Pepper 🌶️ | ½ tsp | Freshly ground preferred |
| Chicken Broth 💧 | 6 cups | Low-sodium preferred |
| Olive Oil 🫒 | 2 tbsp | For sautéing vegetables |
| Fresh Parsley 🌿 | ¼ cup | Chopped, for garnish |
The beans are the heart of this soup, so pick dried navy beans—they hold their shape beautifully. Most grocery stores carry them in the canning aisle, but Trader Joe's or Whole Foods have great bulk options. If you're short on time, you can use canned beans (drained and rinsed), but they won't have the same texture. The onion, celery, and carrots form the classic 'holy trinity' of soup veggies—chop them uniformly so they cook evenly. I usually grab a bunch of celery with the leaves still on; those add extra flavor when chopped and tossed in. For the broth, low-sodium is key—you'll be adding plenty of salt later.
No thyme? Dried oregano works at half the amount. Fresh parsley is nice, but dried basil or marjoram in a pinch will do. Short on carrots? Sweet potatoes or butternut squash add sweetness and thickness. The tomato paste can be a squeeze tube from Trader Joe's—it's cheaper and lasts longer. For extra richness, add a splash of Worcestershire sauce or a pinch of smoked paprika. The bay leaves? Tear them slightly before adding—they release flavor better. And if you're using dried beans, soaking overnight isn't required, but it cuts cooking time down significantly.
This soup tastes even better the next day—make a double batch if you can. Store in the fridge for up to 5 days, or freeze portions for 3 months. I like to portion it into containers with a little extra broth on top to prevent a skin from forming. When reheating, add a splash of water or broth to keep it from getting too thick. The fresh parsley? Add it right before serving so it stays bright and vibrant. Leftovers reheat beautifully—just stir in a little extra broth if it's too thick.
Why You'll Love This Recipe
- No-Soak Nightmare: I’ll admit it—soaking beans used to stress me out. This recipe skips that step entirely, letting the dried navy beans simmer right in the pot with the onions, carrots, and celery. Twenty minutes later, you’ve got tender beans without any prep work. (Yes, even on a Tuesday night.)
- Garlic-Carrot Magic: That crisp-tender carrot and celery combo? It’s the secret weapon. The onions and garlic mellow into the broth while the carrots stay just firm enough to bite into—like a hug for your taste buds. Honestly, I’ve tried fancier soups, but this one’s the one that sticks.
- Leftovers That Beg: This soup tastes better the next day. I swear it. The flavors meld into something rich and hearty, perfect for packing lunches or reheating with a sprinkle of cheese. My freezer’s always stocked with portions because it’s that good—and that easy to batch.
- Budget-Friendly Pantry Hero: Dried beans, onions, carrots, celery—these are ingredients that don’t break the bank. One bag of navy beans stretches across multiple meals, and the veggies? You can use whatever’s lurking in your crisper. It’s the kind of recipe that makes me feel smart about feeding my family without overspending.
Instructions for Betty Crocker bean soup recipe
Let's transform simple pantry staples into a rich, comforting bean soup that's packed with flavor.
Sauté the Vegetable Base
Heat the 2 tablespoons olive oil in a large pot over medium heat. Add the chopped 1 whole yellow onion, 3 medium carrots, and 3 whole celery stalks, stirring occasionally for 5-6 minutes until the vegetables begin to soften and the onion turns translucent.
Here's the thing—don't rush this step. You want the vegetables to release their natural sweetness and develop a slight caramelization. Push the pieces around with a wooden spoon to ensure even browning. If you notice the vegetables sticking too much, add a splash of chicken broth to help them release.
After about 4 minutes, add the 4 cloves minced garlic and cook for another 30 seconds until fragrant. The aroma should fill your kitchen—that's when you know the garlic is ready. This aromatic base forms the flavor foundation of your soup.
Build the Soup Base
Stir in the 0.5 cup tomato paste, spreading it evenly over the vegetables. Cook for 1-2 minutes until the tomato paste darkens slightly and coats the vegetables. This step deepens the flavor profile and adds richness to the soup.
Add the 1 tablespoon dried thyme, 2 whole bay leaves, 1.5 teaspoons salt, and 0.5 teaspoon black pepper, stirring to combine. These herbs and spices will infuse the soup with warm, earthy flavors. Let everything cook together for 1 minute to toast the spices slightly and release their essential oils.
Now pour in the 6 cups chicken broth, scraping up any browned bits from the bottom of the pot. These flavorful bits, called fond, are packed with concentrated taste that will make your soup sing. Bring the mixture to a gentle boil, then reduce heat to medium-low and let it simmer for 5 minutes to allow the flavors to meld.
Cook the Navy Beans
Add the 2 cups dried navy beans to the simmering pot. Stir gently to distribute them evenly throughout the broth. The beans will start to absorb liquid immediately, so give them a good stir to prevent clumping.
Bring the soup back to a gentle boil, then reduce heat to low and maintain a steady simmer. Here's the key: cover the pot with a lid and let the beans cook for 1.5 to 2 hours. You'll know they're done when they're tender but still hold their shape—press one with your finger. It should be soft but not mushy.
I know it might seem like a long time, but patience is crucial. Undercooked beans will be tough, and overcooked beans will turn to mush. Check the beans after 1 hour of cooking—if they're still firm, continue cooking. The soup should have a thick, hearty consistency by the end.
Finish and Serve
Once the beans are tender, remove the 2 whole bay leaves from the pot. They've served their purpose and can be discarded. Taste the soup and adjust the seasoning if needed—you might want to add a bit more salt or pepper to your liking.
Let the soup simmer uncovered for another 5-10 minutes to allow any excess moisture to evaporate. This helps thicken the soup slightly and intensify the flavors. The soup should coat the back of a spoon and have a rich, velvety texture.
Ladle the soup into bowls and garnish each serving with 0.25 cup chopped fresh parsley. The bright, fresh flavor of the parsley will cut through the richness of the soup and add a pop of color. Serve immediately while hot, and enjoy your homemade Betty Crocker-style bean soup.
Pro Tips For Making Betty Crocker Bean Soup
- Soak Beans Overnight: Navy beans cook faster and stay creamier when soaked 8–12 hours first—just toss them in a bowl with cold water and a pinch of salt. I used to skip this and ended up with a pot of mushy beans that took forever to soften.
- Sauté the Veggies Right: Cook your onions, carrots, and celery in batches if needed—don’t overcrowd the pan. If they steam instead of brown, they’ll turn bland. A quick 5–7 minutes on medium-high gets them sweet and tender without burning.
- Skip the Crowding: When adding beans to the pot, leave room for expansion—they’ll double in size. Packing them in tight leads to a gummy, uneven texture. Stir them in loosely, then add broth to cover.
- Simmer Low and Slow: Once everything’s in the pot, keep the heat at a gentle simmer—not a rolling boil. Too much heat breaks down the beans and makes the soup watery. A steady 45–60 minutes on low heat keeps it thick and flavorful.
Essential equipment for great betty crocker bean soup
Large Pot Essentials
Start with a 6-8 quart Dutch oven or heavy-bottomed soup pot—I swear by my Le Creuset 6-quart for even heat distribution and durability. This size accommodates the beans and broth without overcrowding, which helps them cook evenly.
If you don’t have one, a stainless steel stockpot works too, but avoid nonstick—it can’t handle the long simmering time without warping. 🔥
Bean Prep Tools
For dried beans, a fine-mesh strainer is non-negotiable to rinse them thoroughly before cooking. I also recommend a potato masher (like the OXO Good Grips) to break down any overly firm beans at the end if needed.
A wooden spoon is best for stirring—it won’t scratch your pot like metal utensils. Pro tip: Soak beans in a colander overnight to reduce cooking time.
Knife & Cutting Board
Uniformly chopped vegetables are key to even cooking. Use a sharp chef’s knife (I love the Victorinox 8-inch) and a cutting board (I prefer Teak or bamboo for grip). Dice the onion, carrots, and celery into ¼-inch pieces—this ensures they soften at the same rate as the beans.
A mandoline speeds up prep if you’re making a big batch, but it’s optional.
Measuring & Spice Tools
Precision matters with spices. Use a small measuring spoon set (like OXO’s) for accurate 1 tbsp thyme and ½ tsp pepper. A spice grinder (I use Spiceworks) keeps your dried herbs fresh.
For the tomato paste, a small offset spatula helps spread it evenly over the veggies. Don’t skip the bay leaves—tear them slightly with your fingers before adding to release their flavor.
Lid & Thermometer
A tight-fitting lid is critical for trapping steam and cooking the beans efficiently. I use a glass lid so I can peek at the beans without losing heat.
A meat thermometer (like ThermoWorks Thermapen) isn’t required, but it helps monitor the broth temperature—aim for a gentle simmer at 180–190°F to prevent scorching. For long simmers, a slow cooker (like Instant Pot) can be a game-changer, but the stovetop method builds deeper flavor.
Garnish & Serving
Fresh parsley deserves a sharp pair of kitchen shears for quick chopping. Serve the soup in preheated bowls to keep it hot longer. For extra flair, add a drizzle of olive oil or a squeeze of lemon right before serving.
A ladle with a long handle (like OXO Good Grips) makes serving from the pot easier without splashing.
Nutrition facts
Frequently asked questions
Why do I need to soak the navy beans overnight?
Soaking reduces cooking time by up to 50%—from 2 hours to about 1 hour. It also prevents beans from becoming overly mushy. Simply rinse 2 cups dried beans in a colander, then cover with water for 8 hours or overnight. Drain before adding to the pot.
Can I substitute canned beans for dried?
Yes, but texture will differ. Use 3 cups canned navy beans (drained/rinsed) instead of dried. For a creamier soup, mash ½ cup of beans before adding. Canned beans cook faster but lack the depth of flavor dried beans develop during simmering.
How do I fix soup that's too thick or too thin?
For thick soup: Add ½ cup hot broth at a time while stirring. For thin soup: Simmer uncovered for 5-10 minutes to reduce liquid. If still too thin, mash ¼ cup beans with a fork to thicken naturally. Never add flour—it alters the authentic flavor.
What if my beans are still hard after 2 hours?
Check your water level—beans need enough liquid to soften. Add ½ cup broth and cook 30 more minutes. If still firm, they’re likely old beans. Drain, rinse, and replace with fresh 1 cup dried beans, then simmer 1 hour. Never overcook or they’ll turn to mush.
Can I make this soup in a slow cooker?
Sauté veggies first, then add all ingredients (except parsley) to your slow cooker. Cook on LOW for 6-7 hours or HIGH for 3-4 hours. The long cook time enhances flavor. Stir occasionally and add broth if needed to maintain consistency. Perfect for hands-off meal prep!