Appetizers
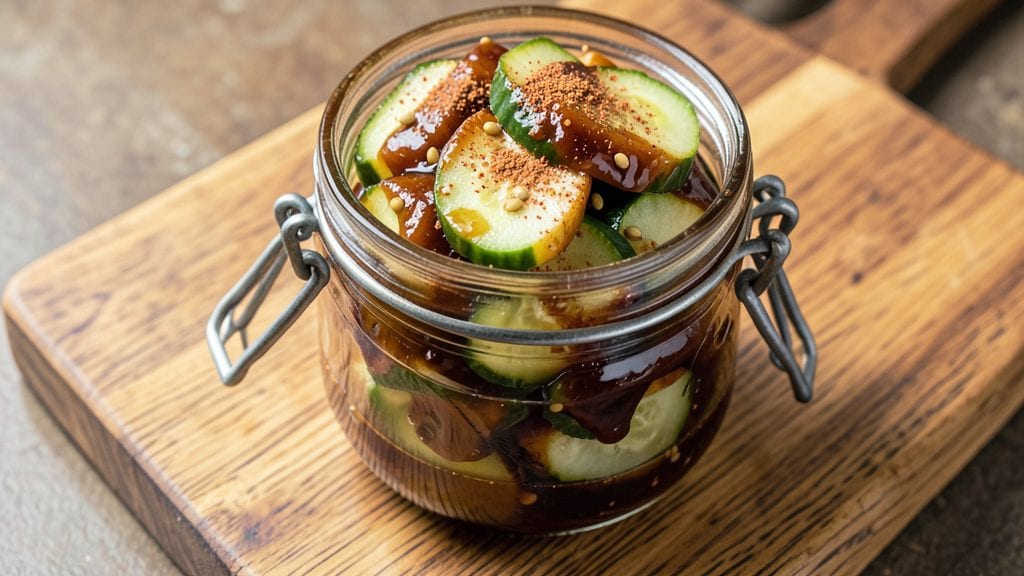
Transforming simple cucumbers into smoky vinegar-kissed BBQ pickles is one of those kitchen magic tricks that elevates every meal. Standing on a step stool in my grandmother’s kitchen in Sicily, I first learned how preserving vegetables could turn humble ingredients into something extraordinary.
This recipe captures that same artistry—where tangy, sweet, and smoky flavors meld into a crunchy, addictive bite that belongs on burgers, sandwiches, or straight from the jar.
The process is straightforward yet precise, blending vinegar, sugar, and spices to create a brine that tenderizes the cucumbers while infusing them with deep, caramelized flavor.
Unlike traditional pickles, this method develops a rich, almost barbecue-like depth from smoked paprika and a touch of liquid smoke, making it a standout condiment for grilling nights. With just 15 minutes of prep and 24 hours of resting, you’ll have a batch ready to impress.
What makes these pickles special is their versatility—they’re crisp enough to stand up to juicy burgers, sweet enough to balance spicy wings, and smoky enough to add complexity to charcuterie boards.
The secret lies in the balance of sweetness from brown sugar and the smoldering warmth of the spices, which deepen as they sit. Once you taste them, you’ll never buy store-bought pickles again.
This recipe scales effortlessly, so make a big batch and store it in the fridge for up to 2 weeks or preserve it in vinegar for months.
Whether you’re hosting a backyard barbecue or prepping for a week of sandwiches, these BBQ pickles will be the star of the show—just like Nonna’s secrets always were.
Ingredients for bbq pickles
Ten simple ingredients transform cucumbers into smoky, tangy BBQ pickles that'll steal the show.
| Ingredient | Amount | Notes |
|---|---|---|
| Fresh Kirby Cucumbers 🥒 | 2 lb | Whole, unpeeled, cut into 1/4-inch slices |
| White Vinegar 💧 | 2 cups | Distilled, not apple cider |
| Brown Sugar 🍚 | ½ cup | Light or dark, packed |
| Smoked Paprika 🌶️ | 2 tbsp | For authentic smoky flavor |
| Liquid Smoke 🔥 | 1 tbsp | Adjust for stronger smokiness |
| Mustard Seeds 🌾 | 1 tsp | Whole, for subtle crunch |
| Black Peppercorns 🌶️ | 1 tsp | Crushed lightly for bite |
| Garlic Powder 🧄 | 1 tsp | For depth, not garlic salt |
| Salt 🧂 | 1 ½ tsp | Kosher or sea salt |
| Dried Mustard 🌿 | ½ tsp | For tangy kick |
The cucumbers are the star—Kirby cucumbers (those bumpy, seedless ones) hold up best to slicing and soaking, but any firm cucumber works. Grab a 2-pound bag from Trader Joe's or Costco for the best value, or hit the farmers market for extra-crisp varieties. The vinegar matters too: distilled white vinegar keeps things bright and tangy, while apple cider vinegar adds a fruity note (though it won’t be as crisp). For the spices, Penzeys or bulk bins at Whole Foods are great for quality, but the regular grocery store stuff is fine if it’s fresh. Smoked paprika is non-negotiable—it’s what gives these pickles that BBQ vibe. Look for a brand like McCormick or Simply Organic for consistent flavor.
No smoked paprika? Substitute 1 tbsp chipotle powder for heat, or 1 tsp liquid smoke plus 1 tsp regular paprika for smokiness. Out of mustard seeds? Skip them—they’re more for texture than flavor. The dried mustard adds a subtle tang, but if you’ve got Dijon mustard, a teaspoon of that works in a pinch. For the sugar, white or brown both work, but brown gives that caramelized depth. If you’re watching sugar, reduce to 1/4 cup—the vinegar’s acidity will still balance it. The liquid smoke is optional but worth it: start with 1 tbsp and taste before adding more. These pickles get better as they sit, so don’t rush the 24-hour soak—trust the process.
Store these in an airtight jar in the fridge for up to 2 weeks, though they’ll likely disappear in 3-4 days—they’re that addictive. For longer storage, pour the pickles and brine into a clean jar, seal, and they’ll keep for months. The flavor actually improves after the first week as the spices meld. I like to double the batch and keep one jar in the fridge for quick snacks and one in the pantry for gifts. They’re perfect on burgers, sandwiches, or straight from the jar with a cold beer—just like Nonna’s kitchen magic.
Why You'll Love This Recipe
- No-Chop Required: I swear, the only prep is slicing cucumbers—and honestly, you can even leave the stems on if you're in a rush. The vinegar and sugar do all the work while you sip your iced tea.
- Smoky-Sweet Magic: That liquid smoke and smoked paprika? It turns simple pickles into a tangy, caramelized dream with just a hint of campfire flavor. My husband still steals half the jar.
- BBQ Sidekick: These pickles play nice with everything—slather them on burgers, toss in tacos, or just eat them straight from the jar with a cold beer. They’re the MVP of summer gatherings.
- Lasts All Week: A big batch keeps for months in the fridge, so you’re never scrambling for a snack. Plus, the ingredients cost pennies—this is how you stretch your grocery budget without sacrificing flavor.
Step-by-step instructions for smoky vinegar-kissed pickles
Here's how to make these tangy, smoky pickles that'll elevate any grilling spread.
Prepare the Cucumber Slices
Start by washing the 2 lb of fresh Kirby cucumbers thoroughly under cool water. I like to use a vegetable brush to make sure any dirt is removed from the skin. Cut each cucumber into ¼-inch thick slices—this thickness ensures they'll pickle evenly without becoming too soft. As you slice, arrange them on a clean kitchen towel and gently pat them dry with another towel. This step is crucial because any moisture left on the cucumbers will dilute your brine and affect the final texture.
For best results, slice the cucumbers just before making the brine. Freshly cut cucumbers hold their crunch better and absorb the smoky flavors more effectively. If you're working ahead, you can slice them up to 1 hour before pickling, but no longer—this keeps them crisp and prevents them from turning soggy.
Combine the Brine Ingredients
In a large, non-reactive bowl (glass or stainless steel works best), combine the 2 cups of white vinegar, 0.5 cup of brown sugar, 2 tablespoons of smoked paprika, 1 tablespoon of liquid smoke, 1 teaspoon of mustard seeds, 1 teaspoon of black peppercorns, 1 teaspoon of garlic powder, 1.5 teaspoons of salt, and 0.5 teaspoon of dried mustard. Stir everything together until the brown sugar is completely dissolved and the spices are evenly distributed. The mixture should look like a thick, smoky syrup with visible specks of mustard seeds and peppercorns.
This is where the magic happens—the blend of vinegar and sugar creates the perfect balance of tang and sweetness, while the smoked paprika and liquid smoke give those deep, smoky notes that pair perfectly with grilled meats. If you're using light brown sugar, the flavor will be slightly milder, but it still works beautifully. Give the mixture a taste at this stage—it should be quite strong, but that's okay because the cucumbers will mellow it out.
Pack the Cucumbers and Pour the Brine
Transfer the sliced cucumbers to a clean, quart-sized mason jar or airtight container. Pack them tightly but gently, making sure they're arranged in a single layer without overlapping too much. This ensures each slice gets coated evenly with the brine. Once the cucumbers are packed, pour the brine mixture over them until they're completely submerged. If you're using a jar, leave about ½ inch of headspace at the top to allow for expansion during the pickling process.
I like to use a wooden spoon to gently press down on the cucumbers, making sure they stay submerged. If any slices float to the top, you can weigh them down with a small plate or a clean stone. The goal is to keep every slice fully immersed in the brine so they pickle evenly and develop that perfect crunch. If you notice the brine isn't covering everything after a few minutes, you can add a splash more vinegar to help submerge them.
Seal and Refrigerate
Seal the jar or container tightly with a lid. For best results, I recommend using a two-piece lid to ensure an airtight seal. Place the jar in the refrigerator and let the pickles sit for at least 24 hours before eating. This gives the cucumbers enough time to absorb the flavors and develop that perfect tangy, smoky crunch. After 24 hours, you can taste them—they should be crisp, tangy, and infused with that deep, smoky flavor from the paprika and liquid smoke.
These pickles will keep in the refrigerator for up to 2 weeks, and they actually taste even better as they sit. The longer they pickle, the more flavor they develop. If you're planning to serve them at a cookout or BBQ, I suggest making them at least 48 hours ahead of time so the flavors have time to meld together perfectly. They're perfect for serving alongside burgers, hot dogs, or grilled chicken—just a little crunchy bite to cut through all the richness.
Pro Tips For Making Bbq Pickles
- BRINE FIRST, THEN PACK: Soak sliced cucumbers in ice water for 10 minutes before adding vinegar—this stops them from turning mushy. I learned this the hard way after making rubbery pickles twice in a row.
- USE FINE CUTS: Slice cucumbers paper-thin (⅛-inch or less) so the flavor penetrates evenly. Thick slices stay crunchy but bland—this isn’t a pickle contest, it’s about taste.
- SIMMER, DON’T BOIL: Keep the vinegar mixture at a gentle simmer (180°F) for 5 minutes after adding sugar and spices. Boiling burns the sugar and dulls the smoky flavor—this isn’t candy, it’s pickles.
- STORE COLD, USE FAST: Refrigerate the pickles immediately after packing and eat them within 3 days for peak crunch. After that, they’ll soften, no matter how perfect the recipe was.
Storing and reheating this recipe
Fridge Storage Secrets
Store your BBQ pickles in an airtight glass jar—I swear by Ball mason jars with their tight-sealing lids—to keep them crisp for up to 2 weeks. The vinegar brine acts as a natural preservative, but the refrigerator’s cool temperature slows down any potential softening.
I like to leave about ½ inch of headspace at the top to prevent spills when I shake them onto burgers later. 🥒
For maximum crunch, don’t stack the jar too tightly—leave room for the pickles to breathe. If you notice the cucumbers losing their crispness after 5-7 days, simply drain them, pat them dry, and return them to fresh brine for another 24 hours.
This trick refreshes them like new, just like Nonna used to do with her olives.
Freezer-Friendly Tips
If you’re planning ahead for a big gathering, these pickles freeze beautifully for up to 3 months. First, drain them well and pat them completely dry with paper towels—this prevents ice crystals from forming.
Then, pack them into freezer-safe bags or airtight containers, leaving 1 inch of space at the top for expansion. Label the bag with the date so you can track their freshness. 🧊
When you’re ready to use them, thaw the pickles in the fridge overnight. The texture will be slightly softer than fresh, but they’ll still add that smoky tang to your dishes. I like to use them on frozen burgers straight from the freezer—no thawing needed!
Reheating for Crunch
If your pickles have lost their crispness after storage, don’t toss them! Drain them well, then toss the cucumbers in 1 tablespoon of cornstarch and let them sit for 10 minutes.
This reactivates the starch and helps restore their crunch. For extra flavor, add 1 teaspoon of smoked paprika and ½ teaspoon of garlic powder to the mix before reheating. 🔥
For a quick fix, place the drained pickles on a baking sheet lined with parchment paper and broil them for 2-3 minutes on high. Keep a close eye on them—they’ll crisp up fast! This method works like a charm for pickles that have been sitting too long in the fridge.
Long-Term Preservation
For a pantry staple that lasts 6-12 months, follow traditional canning methods. Use a pressure canner to process the jars for 10 minutes at 10 pounds of pressure (adjust for altitude).
Once sealed, store them in a cool, dark place. The flavor will deepen over time, making them perfect for gifts or emergency snacking. 💛
When you’re ready to use canned pickles, simply open the jar and let them sit at room temperature for 30 minutes before serving. The longer they sit, the more the flavors meld together, creating that rich, smoky depth that makes them irresistible.
I always keep a jar in my pantry for those last-minute BBQ prep days!
Nutrition facts
Frequently asked questions
Can I use regular cucumbers instead of Kirby cucumbers?
Yes, but Kirby cucumbers are ideal because their thick skin and seedless flesh hold up best during pickling. If you only have regular cucumbers, peel them first and slice them ¼-inch thick. Remove the seeds to prevent bitterness, and pat them very dry before adding to the brine. The texture will be slightly softer but still delicious!
How do I make these pickles spicier?
Add ½ teaspoon of cayenne pepper or 1 teaspoon of chili powder to the brine for heat. For extra kick, include 1-2 thinly sliced jalapeños in the jar. If you prefer a smoky-spicy balance, swap 1 teaspoon of smoked paprika for chipotle powder and reduce the sugar slightly to ¼ cup.
Why did my pickles turn mushy?
Mushy pickles usually mean the cucumbers weren’t dry enough before pickling or the brine wasn’t acidic enough. Always pat cucumbers thoroughly and use distilled white vinegar (not apple cider). For extra crunch, add 1 tablespoon of cornstarch to the brine or soak the pickles in fresh brine for 1 more hour before serving.
Can I make this recipe without liquid smoke?
Replace the 1 tablespoon of liquid smoke with 1 teaspoon of smoked paprika plus ½ teaspoon of chipotle powder. For a deeper smoky flavor, add 1 smoked sausage link (like andouille) sliced and packed with the cucumbers. The pickles will still have that signature BBQ taste without the liquid smoke.
What’s the best way to serve these pickles?
These smoky pickles shine on burgers, hot dogs, BBQ sandwiches, and loaded fries. They also pair perfectly with grilled chicken, ribs, or as a tangy topping for tacos. For a snack, serve them with cheese cubes and crackers** on a charcuterie board. The sweet-tangy-smoky combo cuts through rich, fatty foods beautifully!