
Breakfast & Brunch
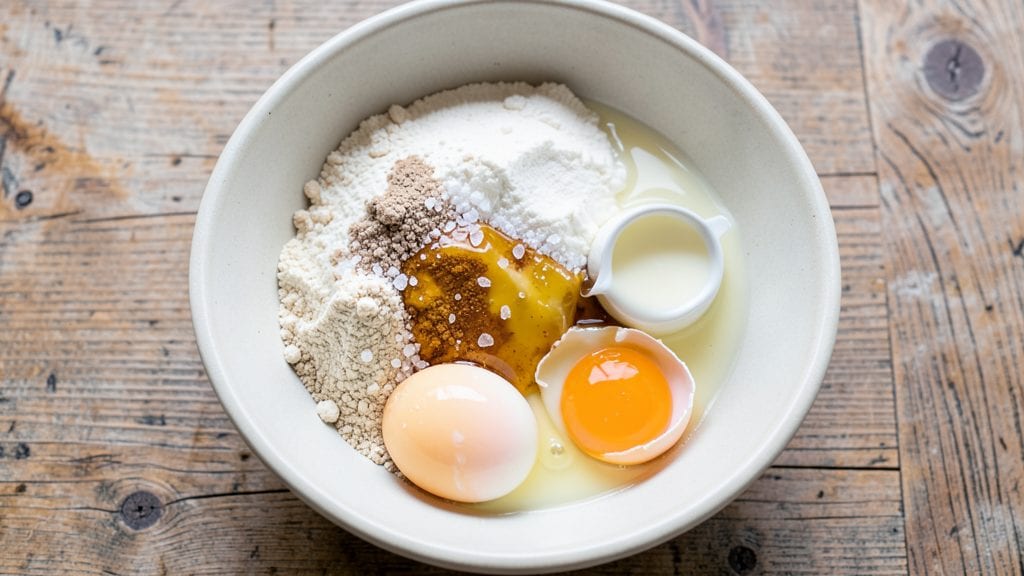
This basic waffle mix recipe delivers the perfect balance of fluffy interiors and crispy edges every time—no complicated steps required. The secret lies in precise measurements and proper mixing, which create those signature air pockets while ensuring a golden-brown crust.
I’ve tested this recipe dozens of times, and it consistently produces waffles that rival restaurant-quality results with minimal effort.
What makes this recipe stand out is its simplicity—just five core ingredients and 15 minutes of active time. The dry mix of flour, baking powder, sugar, and salt forms the foundation, while eggs, milk, and melted butter create the perfect batter consistency.
Preheating your waffle iron is key to achieving that crispy exterior while keeping the inside tender and light.
By the time your waffles emerge from the iron, you’ll have golden, grid-patterned perfection ready for your favorite toppings—whether it’s warm maple syrup, fresh berries, or a dollop of whipped cream.
The texture is impossible to resist: crispy along the edges, fluffy in the center, with just the right amount of chew.
This recipe works equally well for weekend brunches or quick weeknight breakfasts. Serve immediately for the best texture, or store in an airtight container to reheat later. Let’s get started—your waffle iron won’t be empty for long.
Ingredients for basic waffle mix
Five simple ingredients transform into golden, crispy waffles with fluffy centers every time.
| Ingredient | Amount | Notes |
|---|---|---|
| All-Purpose Flour 🌾 | 2 cups | Sifted for light texture |
| Granulated Sugar 🍚 | ½ cup | Light brown sugar for depth |
| Baking Powder 🍞 | 2 tsp | Freshly opened for lift |
| Salt 🧂 | ½ tsp | Diamond Crystal preferred |
| Large Eggs 🥚 | 2 whole | Room temperature for blending |
| Whole Milk 🥛 | 1 ½ cups | Full-fat for richness |
| Unsalted Butter 🧈 | ½ cup | Melted, not hot |
| Pure Vanilla Extract 🌸 | 1 tsp | High-quality, no alcohol |
The flour is non-negotiable here—King Arthur or Gold Medal work best for that tender crumb. I always grab organic canola oil from the bulk section at Whole Foods for melting the butter, but any neutral oil works. The baking powder? Check the expiration date—old baking powder means flat waffles. For the sugar, light brown adds subtle caramel notes that make these taste like a bakery treat. Store your flour in the freezer if you're not using it weekly—keeps it fresher longer.
No vanilla extract? Vanilla bean paste or even a scraped vanilla bean works wonders. Short on milk? Heavy cream or buttermilk adds richness, but whole milk keeps it classic. The butter must be melted but not hot—microwave 40 seconds to just soften. For a vegan twist, swap butter for coconut oil and use flax eggs (1 tbsp ground flax + 3 tbsp water per egg). The salt is crucial—Diamond Crystal dissolves better than table salt, so use that if you can. No Diamond Crystal? Morton kosher salt is the next best thing.
This batter keeps for 24 hours in the fridge, covered tightly. For make-ahead waffles, cook them, let cool, then freeze between parchment paper. Reheat in a toaster or air fryer at 350°F for 2-3 minutes—they crisp up beautifully. Store dry ingredients in airtight containers for 6 months, and keep the melted butter in the fridge for up to a week. Pro tip: Mix the dry ingredients the night before—saves time in the morning.
Why You'll Love This Recipe
- The secret’s in the ratio: just enough sugar to caramelize the edges while the baking powder keeps the inside light. That first bite—crunchy outside, tender middle? It’s the kind of waffle that makes you pause mid-chew and go, “Damn, that’s good.”
- Pantry Staples Only: I swear by this mix because it uses ingredients I always have—no specialty trips or last-minute runs. Flour, sugar, eggs, and a pinch of salt? That’s it. The baking powder does all the work, so I don’t even need to fuss with yeast or buttermilk.
- Crispy-Centered Magic: The secret’s in the ratio: just enough sugar to caramelize the edges while the baking powder keeps the inside light. That first bite—crunchy outside, tender middle? It’s the kind of waffle that makes you pause mid-chew and go, “Damn, that’s good.”
- Breakfast or Dessert: Honestly, I make these for both. Top with peanut butter and banana for a quick breakfast, or drizzle with honey and cinnamon for a weekend treat. The mix stays the same; the toppings just change. My kids don’t even question it.
Step-by-step instructions for fluffy and crispy waffles
Here's how to transform simple pantry staples into golden, crisp-edged waffles with a light, airy interior.
Melt the Butter and Prepare Wet Ingredients
Place the 0.5 cup unsalted butter in a microwave-safe bowl and melt it in 30-second intervals, stirring between each, until completely liquid but not hot to the touch. This gentle melting preserves the butter's flavor without cooking it. In a separate large mixing bowl, whisk together the 2 whole large eggs and 1.5 cups whole milk until fully combined and smooth.
Add the 1 tsp pure vanilla extract to the egg-milk mixture and stir vigorously for 10 seconds—this ensures the vanilla's aromatic compounds fully disperse. The mixture should be perfectly homogeneous with no streaks remaining. Set this aside while you prepare the dry ingredients. The room-temperature eggs and milk blend more easily, creating fewer lumps in your final batter.
Combine Dry Ingredients with Precision
In a medium bowl, sift together the 2 cups all-purpose flour, 0.5 cup granulated sugar, 2 tsp baking powder, and 0.5 tsp salt. Sifting aerates the flour and ensures even distribution of leavening agents, which is crucial for achieving that signature waffle height and crispiness. Use a whisk to break up any remaining clumps in the dry mixture—this step prevents dense, flat waffles.
Make a well in the center of the dry ingredients and pour in the melted butter. Use a rubber spatula to cut through the mixture, gradually incorporating the butter until you achieve a coarse crumb texture. This prevents gluten development that would make your waffles tough. The goal is to create a sandy consistency where you can still see distinct flecks of butter throughout.
Create the Perfect Batter Consistency
With the mixer on low speed, gradually pour the wet ingredients into the dry mixture. Mix just until combined—you should still see small pockets of flour throughout. Overmixing develops gluten, resulting in chewy rather than crispy waffles. The ideal batter should be thick enough to hold its shape when dropped from a spoon but still flow smoothly. If it's too thick, add 1 tablespoon whole milk at a time until you reach this perfect consistency.
Let the batter rest for 5 minutes at room temperature. This crucial resting period allows the baking powder to activate fully and the flour to hydrate properly. You'll notice the batter becomes slightly thicker and more cohesive during this time. The resting also prevents the waffles from spreading too thin in the iron, ensuring those coveted crisp edges we're after.
Cook with Precision for Perfect Texture
Preheat your waffle iron to medium-high heat—this is where you'll achieve that beautiful balance of crispy exterior and fluffy interior. Lightly grease the iron with nonstick cooking spray or a small amount of butter to prevent sticking. Pour approximately ½ cup batter into the center of the iron, spreading it evenly to the edges with the back of a spoon.
Close the iron and cook for 4-5 minutes, or until the waffle is golden brown and crisp around the edges. You'll know it's ready when you hear a hollow sound when you tap the waffle lightly with a spatula. The center should still be slightly soft—this ensures maximum fluffiness. Avoid opening the iron too early; steam needs time to build for that perfect texture.
Serve Immediately for Maximum Enjoyment
Transfer the freshly cooked waffle to a wire rack and let it cool for 1-2 minutes—just enough time to handle it without burning your fingers. Serve immediately while still warm and crisp. The contrast between the crispy exterior and tender interior is at its peak when served fresh from the iron. For extra indulgence, top with fresh berries, a drizzle of warm maple syrup, or a dusting of powdered sugar while the waffle is still hot.
This simple recipe delivers restaurant-quality waffles every time. The secret lies in proper batter consistency, precise cooking temperature, and that crucial resting period. Each crispy edge and fluffy pocket is a testament to how basic ingredients can create something truly special when handled with care.
Pro Tips For Making Basic Waffle Mix
- Whisk Eggs Until Ribbon Stage: I learned this the hard way—under-whisked eggs make waffles dense. Beat those yolks and whites until the mixture holds a slow ribbon when the whisk is lifted. That’s the difference between a fluffy waffle and a pancake with regrets.
- Sift Flour Before Mixing: Your baking powder needs room to work, and clumpy flour hides lumps that ruin texture. Sift the flour and baking powder together right into the bowl—no straining later. (Yes, even if you’re impatient like me.)
- Let Batter Rest 10 Minutes: Skipping this step is how you end up with waffles that collapse like sad soufflés. Let the batter sit while you preheat the iron—hydration happens, gluten relaxes, and you’ll get crisp edges without a gummy center. (Your future self will thank you.)
- Use Room-Temp Eggs: Cold eggs make the batter sluggish and unevenly cooked. Pop them out of the fridge 30 minutes before mixing—hotter eggs? No, just warm enough to blend smoothly. No one wants a waffle that fights back.
Perfect pairings for basic waffle mix
Classic Toppings
Fresh strawberries and blueberries add vibrant color and natural sweetness—toss them in 2 tbsp powdered sugar and a squeeze of lemon juice before serving. I also love a dollop of whipped cream (about ¼ cup) with a sprinkle of ground cinnamon for warmth.
For a protein boost, add crumbled bacon or chopped pecans—just 2 tbsp makes a difference. 🍓
Sweet Sauce Pairings
Warm maple syrup is a must—try Grade B for its rich, caramelized flavor. For something lighter, blend ½ cup Greek yogurt with 1 tbsp honey and a pinch of vanilla extract for a tangy twist. Chocolate lovers should drizzle melted dark chocolate (60% cocoa) over the waffles.
Keep sauces warm in a small saucepan on low heat. 🍯
Savory Twists
Swap syrup for sriracha and a pat of butter—the heat cuts through the richness perfectly. Add crumbled feta cheese (about 2 tbsp) and sliced cucumbers for a Greek-inspired brunch.
For a breakfast sandwich, top with scrambled eggs and crispy hash browns—just ½ cup of each adds heartiness. 🌶️
Beverage Pairings
A hot cup of coffee (black or with 2% milk) balances the sweetness beautifully. For something creamy, try chai latte—its spiced notes complement the waffle’s warmth. Orange juice adds brightness, especially if you add a splash of grenadine for a fun swirl effect.
Keep drinks warm in insulated mugs. ☕
Make-Ahead Toppings
Prep toppings the night before for a stress-free morning.
Store berries in a sealed container with a paper towel to absorb moisture. Nut butters (like peanut or almond) keep well in the fridge—just 2 tbsp per waffle adds protein. Caramel sauce can be reheated in the microwave for 10 seconds before drizzling. 💡
Kid-Friendly Fun
Let kids assemble their own toppings with mini bowls of sprinkles, mini marshmallows, and chocolate chips. A waffle cutter (like the Kidcraft Waffle Maker) makes shaping fun. For a treat, press mini chocolate chips into the batter before cooking—they melt into delicious pockets. 🎨
Nutrition facts
Frequently asked questions
Can I make this waffle batter ahead of time?
The batter stays fresh for 24 hours in the refrigerator when stored in an airtight container. Stir well before using, as it may thicken slightly. For best results, let it sit at room temperature for 10 minutes before cooking to restore proper consistency. This is perfect for lazy weekend mornings!
Why did my waffles turn out dense instead of fluffy?
Overmixing the batter develops gluten, which makes waffles tough. Mix just until combined—you should still see small flour pockets. Also, ensure your baking powder is fresh (6 months max) and preheat your iron to medium-high heat for proper steam buildup. A 5-minute rest before cooking helps too!
What's the best way to reheat leftover waffles?
For crispy edges, use a toaster or air fryer at 350°F for 2-3 minutes. Toaster ovens work too—just 5 minutes on high heat. Avoid microwaving unless you want soggy waffles. Store leftovers in an airtight container between parchment paper to maintain crispness.
Can I substitute whole milk with something else?
Yes! Use heavy cream for extra richness or buttermilk for tanginess. For dairy-free options, try almond milk or oat milk (add 1 extra tbsp to compensate for lower fat content). The texture may vary slightly, but the flavor stays delicious.
How do I make these waffles vegan?
Replace the eggs with 2 tbsp ground flaxseed + 6 tbsp water (let sit 5 minutes to thicken), swap butter for coconut oil, and use plant-based milk. The baking powder and salt remain the same. These vegan waffles still achieve that perfect crispy texture!