
Desserts
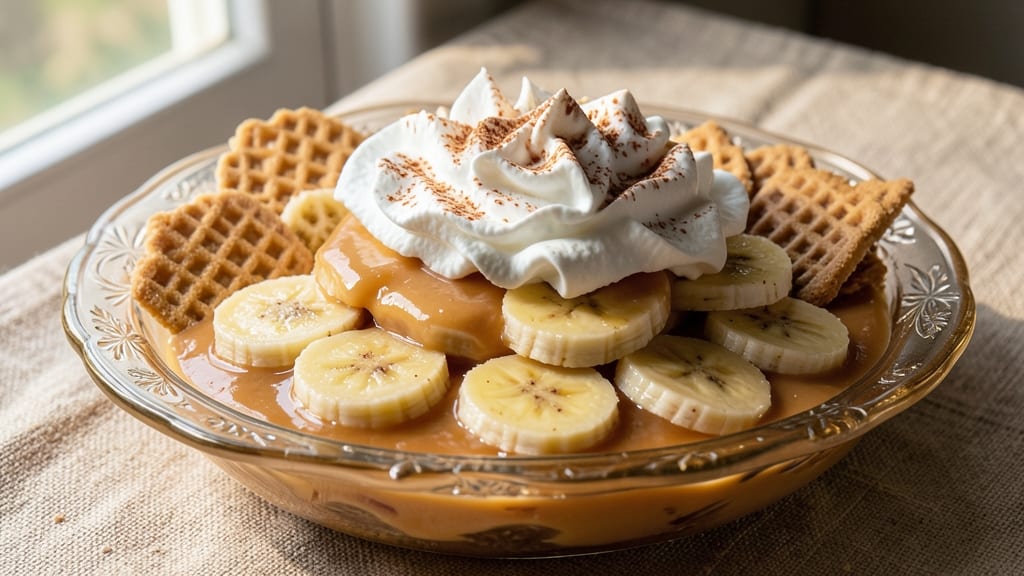
This homemade banana pudding recipe transforms simple ingredients into layers of creamy custard, fresh banana slices, and crisp vanilla wafers—all without a single boxed mix. The secret lies in a smooth cornstarch custard that sets perfectly between layers, while ripe bananas add natural sweetness and texture.
I developed this version after realizing how easy it is to recreate restaurant-style pudding at home with just a few pantry staples and patience.
The custard base uses milk, sugar, cornstarch, and vanilla extract to create a silky, pudding-like layer that holds its shape between wafer and banana layers. Freshly sliced bananas prevent browning when layered quickly, while store-bought vanilla wafers provide that signature crunch.
What makes this version special is how the flavors meld during chilling—each bite delivers creamy custard, sweet banana, and buttery wafer in perfect harmony.
This recipe delivers restaurant-quality banana pudding with a fraction of the effort, using only 10 ingredients and 30 minutes of active time. The custard sets beautifully after chilling, while the bananas stay tender and the wafers maintain their crispness.
It's the kind of dessert that feels indulgent yet comes together with simple techniques anyone can master.
Perfect for summer gatherings, potlucks, or a nostalgic weekend treat, this banana pudding keeps well for 2 days in the refrigerator. Serve individual portions in glasses for a visually stunning dessert that always impresses. Let's create this classic with a homemade twist.
Ingredients for banana pudding recipe no pudding mix
Ten simple ingredients transform into restaurant-style banana pudding without any mix.
| Ingredient | Amount | Notes |
|---|---|---|
| Large Bananas 🍌 | 4 whole | Ripe but firm, sliced lengthwise |
| Vanilla Wafers 🍪 | 16 whole | Store-bought, classic flavor |
| Whole Milk 🥛 | 4 cups | Full-fat for creaminess |
| Granulated Sugar 🍚 | ¾ cup | White or light brown |
| Cornstarch 🌾 | ¼ cup | Fine, for smooth custard |
| Pure Vanilla Extract 🥄 | 1 tbsp | High-quality, imitated-free |
| Salt 🧂 | ¼ tsp | Fine sea salt preferred |
| Unsalted Butter 🧈 | ½ cup | Cold, cubed for layers |
| Heavy Whipping Cream 🥛 | 1 cup | Cold, for whipped topping |
| Powdered Sugar 🍚 | ¼ cup | For whipped cream |
The bananas are critical—look for firm but ripe ones with brown speckles, not mushy spots. Dole or Chiquita brands often deliver consistent quality at grocery stores. Slice them lengthwise into 1/4-inch pieces and toss immediately with lemon juice (not listed) to prevent browning. The vanilla wafers? Nabisco or Keebler are the gold standard, but any store-brand works if they're fresh. For the custard, whole milk is non-negotiable—it creates that velvety texture. If you must use reduced-fat, expect a slightly lighter result.
No vanilla extract? Vanilla bean paste works beautifully—just use half the amount. The cornstarch is your thickening agent; arrowroot powder can substitute at the same quantity. For the whipped cream topping, if you're short on time, store-bought whipped topping in a can saves steps. The butter for the layers can be melted and cooled if you're in a rush, but cold cubes create those signature flaky layers. Pro tip: Toast the vanilla wafers lightly before assembling to enhance their flavor without burning them.
Assemble the pudding in a glass baking dish for easy serving—it shows off those pretty layers. Cover and refrigerate for at least 4 hours (overnight is ideal) to let flavors meld. The custard stays creamy for 2 days in the fridge, while the wafers maintain their crunch. For make-ahead convenience, assemble the layers up to 1 day ahead—just add the whipped cream topping fresh. Freezing isn't recommended as it alters the texture of both the custard and wafers.
Why You'll Love This Recipe
- No Pudding Mix Needed: I swear by this shortcut—just bananas, wafers, and a stovetop mix. No measuring cups, no boxes to open, just a handful of pantry staples that taste way better than instant.
- Creamy Without the Work: That silky milk-cornstarch sauce? It’s the star. You’ll forget you didn’t use a mix—thick, smooth, and just sweet enough to let the ripe bananas shine. (Honestly, the first time I made it, I double-checked the recipe.)
- Potluck Hero: Bring this to a gathering and watch it disappear. The layers of wafers and banana slices hold up perfectly—no soggy bottoms, no fuss. Even my picky cousin’s kids devour it.
- Leftovers? Better Than New: The flavor actually improves overnight. Cold or at room temp, it’s still rich and comforting. I’ve packed this for lunches for days—no reheating, just grab-and-go satisfaction.
Step-by-step instructions for layered banana pudding
Here's how to create a creamy, no-fuss banana pudding with homemade custard and fresh fruit.
Prepare the Vanilla Custard Base
In a medium saucepan, combine the 4 cups whole milk, 0.75 cup granulated sugar, 0.25 cup cornstarch, 1 tbsp pure vanilla extract, and 0.25 tsp salt. Whisk vigorously until the cornstarch dissolves completely—no lumps allowed. This ensures a smooth custard texture without graininess.
Place the saucepan over medium heat and cook, stirring constantly with a wooden spoon, until the mixture thickens enough to coat the back of the spoon (about 5-7 minutes). You'll notice it go from thin to a glossy, pudding-like consistency. Remove from heat immediately to prevent overcooking, which would make the custard too stiff.
Slice Bananas and Layer Components
While the custard cools slightly, peel and slice the 4 whole large bananas lengthwise into ¼-inch thick pieces. Arrange 8 vanilla wafers in a single layer at the bottom of an 8x8-inch glass baking dish or trifle dish. This creates the foundation for your pudding.
Spread ½ of the warm custard evenly over the wafers, then add half of the banana slices in a single layer. Repeat with another layer of wafers, remaining custard, and remaining banana slices. The key here is even distribution—press down gently on the top layer to ensure all components make contact and soak up the custard.
Chill and Set the Pudding
Cover the dish tightly with plastic wrap and refrigerate for at least 4 hours, preferably overnight. This chilling time allows the custard to fully set and the flavors to meld together. The bananas will soften slightly while absorbing the custard, creating that perfect balance of texture.
Here's the thing—don't rush this step. The longer it chills, the creamier the texture becomes. If you're short on time, you can speed this up by placing the dish in the freezer for 2 hours, but the texture won't be as refined.
Prepare the Whipped Cream Topping
In a chilled mixing bowl, whip the 1 cup heavy whipping cream and 0.25 cup powdered sugar together using a hand mixer until soft peaks form. This should take about 2 minutes on medium speed. The cream should hold its shape when the whisk is lifted, but still be spreadable with a spatula.
Spread the whipped cream evenly over the chilled pudding, creating a smooth, even layer. This topping adds a light, airy contrast to the dense custard and bananas. Use a spatula to smooth out any lumps, ensuring an attractive presentation.
Serve and Enjoy
Let the pudding sit at room temperature for 15-20 minutes before serving to allow the whipped cream to soften slightly. This makes it easier to scoop and creates a more elegant texture. The pudding should be firm enough to hold its shape when sliced but still creamy in the mouth.
Slice into 8 equal portions and serve immediately. Each bite should deliver the perfect combination of creamy custard, tender bananas, crisp vanilla wafers, and light whipped cream topping. The contrast in textures—creamy, crunchy, and soft—makes this dessert truly special.
Pro Tips For Making Banana Pudding Recipe No Pudding Mix
- Slice Bananas First: Cut them into ½-inch chunks before assembling—this keeps the fruit from turning mushy while the custard sets. I learned this the hard way when I layered whole bananas and woke up to a soggy mess.
- Toast Wafers Lightly: Run vanilla wafers through the toaster for 10 seconds before layering—they’ll hold up better and add a subtle crunch. Skip this, and you’ll end up with a sad, squishy bottom layer.
- Whisk Cornstarch Cold: Mix cornstarch with sugar before adding milk to avoid clumps. I used to toss it in dry and ended up with a lumpy pudding every time—now I measure it first.
- Simmer Until Thick: Keep the custard at a steady boil for 2 full minutes after thickening—this ensures it’s smooth, not pasty. Undercook it, and you’ll get that sad, gluey texture no one wants.
Creative variations of banana pudding recipe no pudding mix
Southern-Style Banana Pudding
This variation takes inspiration from classic Southern desserts by adding a layer of homemade vanilla bean custard instead of the standard cornstarch version. Use 1 vanilla bean scraped and seeds added to the custard, plus 1 extra tbsp sugar to enhance sweetness.
For extra indulgence, fold ½ cup crushed vanilla wafers into the custard before layering—this creates a crumbly texture throughout. 🍮
No-Bake Chocolate Chip Twist
Swap the vanilla wafers for graham crackers and add ½ cup mini chocolate chips to the custard. Fold in 1 tbsp cocoa powder when making the custard for a subtle chocolate flavor.
Top with whipped cream and extra chocolate chips for a decadent dessert. This version works well with firm bananas that hold their shape better during chilling.
Creamy Coconut Banana Pudding
Replace the milk with 4 cups coconut milk (full-fat canned) and add 1 tsp coconut extract to the custard. Use toasted coconut wafers (or regular vanilla wafers) and top with toasted coconut flakes. The coconut flavor pairs beautifully with bananas, creating a tropical-inspired dessert that's perfect for summer gatherings.
Spiced Pumpkin Banana Pudding
For an autumnal version, blend ½ cup pumpkin puree into the custard along with ½ tsp cinnamon, ¼ tsp nutmeg, and ¼ tsp ginger. Use gingersnap cookies instead of vanilla wafers for the layers.
The warm spices complement the bananas while adding depth to the custard. This variation tastes like fall in every bite. 🎃
Lemon-Lavender Layered Pudding
Infuse the custard with 1 tbsp lemon zest and ½ tsp culinary lavender buds (steeped in the warm milk before mixing). Use lemon shortbread cookies for the layers and garnish with fresh berries. The bright citrus and floral notes create an elegant dessert that's perfect for brunch or afternoon tea.
Peanut Butter Banana Pudding
Add ¼ cup peanut butter (creamy or crunchy) to the custard while it's still warm, whisking until smooth. Use peanut butter cookies for the layers and top with chopped peanuts.
This version delivers a rich, nutty flavor that pairs surprisingly well with the sweet bananas. For extra decadence, drizzle with chocolate syrup before serving. 🥜
Nutrition facts
Frequently asked questions
Why does my homemade custard turn out grainy?
Graininess happens when cornstarch clumps or isn't fully dissolved before cooking. Always whisk vigorously until smooth, then cook on medium heat while stirring constantly. If lumps appear, immediately remove from heat and whisk again. For extra insurance, mix cornstarch with a little cold milk first before adding to the hot liquid.
Can I use overripe bananas in this recipe?
Yes, but with a few adjustments. Overripe bananas (with brown spots) are sweeter and softer, so reduce the sugar to 0.5 cup instead of 0.75 cup. Toss sliced bananas with 1 tsp lemon juice immediately after cutting to prevent further browning. The texture will be creamier, but the flavor will be more intense.
How do I make this pudding without vanilla wafers?
Use graham crackers, shortbread cookies, or even homemade vanilla sponge cake for layers. For best results, crush the cookies slightly to mimic wafer texture. If using cake, layer it in thin slices (about ¼-inch thick) and press gently to create a stable base. The custard will still set beautifully around these alternatives.
Can I make this ahead of time for a party?
Assemble the entire pudding (without whipped cream) up to 1 day ahead and refrigerate. Add the whipped cream topping just before serving to keep it light and fluffy. For longer storage, cover tightly and refrigerate for up to 2 days. The flavors actually improve with time as the custard absorbs into the bananas.
What's the secret to perfectly set custard?
The key is proper chilling time and temperature. Refrigerate for at least 4 hours (overnight is ideal) to let the custard fully set. Avoid overcooking the custard—it should coat the back of a spoon but still be pourable when hot. If it's too thick, whisk in 1 tbsp warm milk to restore smoothness.