Side Dishes
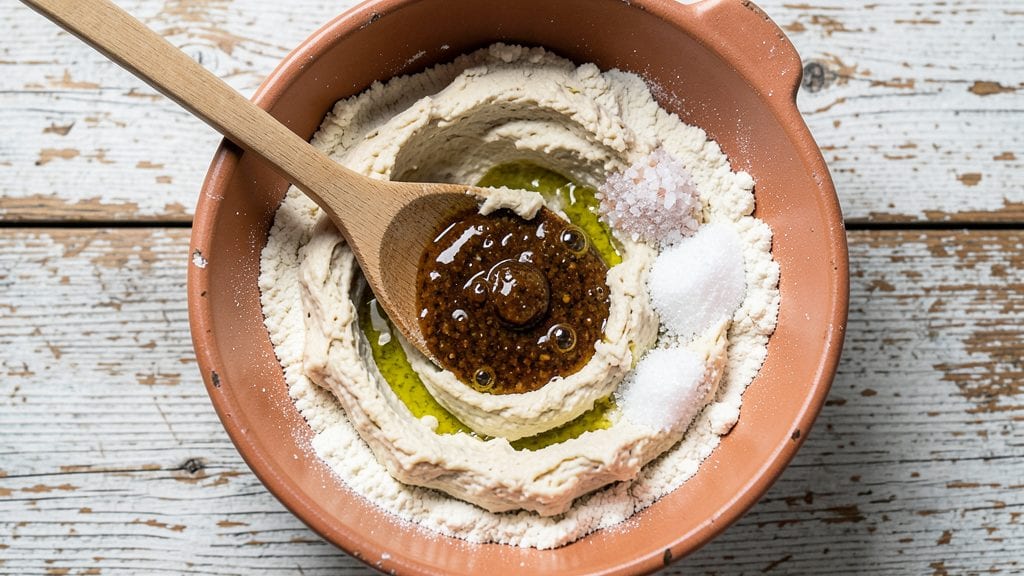
Creating authentic bread that rivals artisan bakery loaves starts with a few key secrets—beginning with your sourdough starter. This recipe delivers the crispy crust, open crumb, and deep flavor that define traditional breadmaking, using time-tested techniques that balance tradition with modern convenience.
The process may seem intricate, but each step builds toward that perfect loaf you’ve always craved.
What sets this method apart is the focus on fermentation—both the active development of your starter and the slow, controlled rise of the dough.
A well-fed starter (with precise ratios of flour and water) creates the tangy complexity that defines authentic bread, while proper proofing ensures a light, airy interior.
We’ll cover everything from maintaining your starter to shaping the dough for an even bake, ensuring your loaf turns out with the same character you’d find in a European bakery.
The result is bread with a golden, crackling crust that gives way to a soft, chewy interior with an open crumb structure. This isn’t just any loaf—it’s the kind that holds up to toast, sandwiches, or simply enjoying with butter straight from the oven.
Whether you’re a beginner or a seasoned baker, these techniques will elevate your bread game without requiring specialized equipment.
We’ll also explore variations, including a no-knead approach for busy schedules and adaptations for gluten-free flours, so you can customize this recipe to fit your needs. Let’s get started on crafting bread that tastes like it came from a professional oven.
Ingredients for authentic bread
Four key ingredients transform simple flour into artisan bread with crispy crust and open crumb.
| Ingredient | Amount | Notes |
|---|---|---|
| Unbleached All-Purpose Flour 🌾 | 5 cups | King Arthur preferred for texture |
| Active Dry Yeast 🍞 | ¼ oz | Fresh yeast works too (1 packet) |
| Active Sourdough Starter 🍞 | 1 cup | 100% hydration, bubbly and active |
| Granulated Sugar 🍚 | 1 tbsp | White or raw, not brown |
| Diamond Crystal Kosher Salt 🧂 | 2 tsp | Fine grain preferred |
| Extra-Virgin Olive Oil 🫒 | 1 tbsp | High-quality, fruity variety |
| Warm Water 💧 | 3 cups | 105-110°F, not boiling |
| Cornmeal 🌽 | ¼ cup | For dusting baking sheet |
| Ice Water ❄️ | ½ cup | For final dough adjustment |
| Semolina Flour 🌾 | ¼ cup | For bread bowl finish |
The King Arthur flour is non-negotiable here—its high protein content gives that perfect open crumb structure. Grab the white whole wheat blend if you want extra nutrition without sacrificing texture. Your sourdough starter should be active (bubbly and doubling in 4-6 hours)—if it's sluggish, feed it extra flour and wait another day. Trader Joe's sells great starter cultures if you're just beginning, but nothing beats your own wild yeast. For yeast, Saf-Instant is my go-to because it doesn't need proofing time, but classic active dry works too if you give it 5 minutes to bloom in warm water first.
No semolina? Fine cornmeal or all-purpose flour works in a pinch, though it won't give that signature crunchy finish. Running low on olive oil? Melted butter adds richness but burns faster—use sparingly. The water temperature matters more than you'd think: too hot kills the yeast, too cold slows fermentation. 105-110°F is ideal—test with your finger (should feel warm, not hot). For salt, Diamond Crystal dissolves better than table salt, giving you cleaner flavor. Need a gluten-free version? Swap 2 cups flour for a 1:1 gluten-free blend (like Bob's Red Mill), but expect a denser loaf.
This dough keeps beautifully—portion into 2-ounce balls and freeze for up to 3 months. Thaw overnight in the fridge before baking. The starter itself? Store in the fridge and feed weekly to maintain strength. For a no-knead shortcut, mix everything, let it rise overnight, then bake—same great results with less effort. The bread reheats best in a 200°F oven for 10 minutes to revive that bakery-fresh crunch.
Why You'll Love This Recipe
- No-Knead Magic: I swear by this—just mix the flour, yeast, and sourdough starter, let it rise overnight, and bake. The dough is so forgiving; no stretching, no punching, no stress. Honestly, I’ve made it while chatting on the phone.
- Tangy Depth: That sourdough starter? It’s the secret weapon. The bread develops this complex, slightly funky flavor that’s way more interesting than plain white loaves. The touch of sugar balances the salt perfectly—crust crackles, inside stays soft.
- Weeknight Workhorse: This bread is my go-to for sandwiches, toast, or even French toast. I’ll make a batch on Sunday, and it lasts me all week—no sad, dried-out slices here. Between us, it’s the only bread I buy anymore.
- Pantry Stretch: Unbleached flour and kosher salt are cheap staples, and a little yeast goes a long way. I’ve fed my whole family (plus neighbors) with one batch—no wasted ingredients, just pure, satisfying bread. Not the prettiest, but the taste makes up for it.
Step-by-step instructions for authentic sourdough bread
Here's how to transform your active sourdough starter into a rustic, crusty loaf with an open crumb and tangy depth.
Mix the Dough with Precision
In a large mixing bowl, combine the 5 cups unbleached all-purpose flour, 1 cup active sourdough starter, 1 tablespoon granulated sugar, and 2 teaspoons diamond crystal kosher salt. I use a wooden spoon for this initial mix to avoid over-developing the gluten prematurely. Create a well in the center and pour in the 3 cups warm water (105-110°F) and 1 tablespoon extra-virgin olive oil. Let the water sit for 1 minute before gently stirring everything together.
This resting period allows the flour to absorb the water gradually, preventing a gummy dough. After stirring, use your hands to work the dough until it comes together into a shaggy mass. You'll notice the dough will be sticky—this is normal with sourdough. The key here is patience; don't rush the mixing process. The dough should feel slightly tacky but cohesive enough to pull away from the sides of the bowl.
Knead and Develop Gluten
Turn the dough out onto a lightly floured surface and knead for 8-10 minutes using a stretch-and-fold technique. This method builds strength without overworking the dough. To perform a stretch-and-fold: wet your hands slightly, grab one side of the dough, stretch it upward, and fold it over itself. Rotate the dough a quarter turn and repeat. You'll see the dough gradually become smoother and more elastic as gluten develops.
I know it seems counterintuitive to handle sticky dough, but trust the process. The dough should feel slightly springy when you press it gently—this indicates proper gluten development. If it feels too slack, let it rest for 5 minutes before continuing. The goal is to create a dough that's strong enough to hold its shape during proofing but still retains enough tenderness for that classic sourdough texture.
Bulk Ferment for Depth of Flavor
Place the dough back in the mixing bowl, cover it loosely with a damp kitchen towel or plastic wrap, and let it ferment at room temperature for 4-6 hours. This bulk fermentation is where the magic happens—the sourdough starter will work its acidity and complexity into the dough. You'll notice the dough will rise by about 50-75% and develop bubbles on the surface and throughout when you press your finger gently into it.
I recommend checking the dough after 3 hours to see if it's ready. Press your finger into the dough—if it springs back slowly (indicating good gluten development) and leaves a noticeable indentation, it's time to shape. If not, let it ferment for another hour. The room temperature matters here; if your kitchen is cooler than 70°F, extend the fermentation time by up to 2 hours. The dough should smell slightly tangy and sweet, with a noticeable yeasty aroma.
Shape and Final Proof
Turn the dough out onto a lightly floured surface and gently shape it into a round boule. To do this, use your hands to create a taut surface on top of the dough, then pull the edges toward the center while rotating the dough. This technique creates surface tension that helps the loaf hold its shape during baking. Place the shaped boule seam-side up on a baking sheet dusted with ¼ cup cornmeal—this prevents sticking and adds a subtle crunch to the crust.
Cover the dough loosely and let it proof for 1-2 hours until it has risen by about 50% and feels light when pressed gently. The final proof is crucial for that airy crumb we're after. I like to do this proof in the refrigerator if I'm baking the next day—it enhances flavor development and makes scoring easier. For a same-day bake, keep it at room temperature and watch for that beautiful rise. When the dough feels springy to the touch and has clearly expanded, it's ready for the oven.
Score and Bake to Perfection
Preheat your oven to 450°F with a Dutch oven inside for 45 minutes. This high heat and steam environment creates that iconic sourdough crust. Once preheated, carefully transfer the dough (still on its cornmeal-dusted sheet) to the hot Dutch oven. Using a razor blade or sharp knife, score the top of the dough with a ½-inch deep cut—this allows the bread to expand properly and creates that beautiful ear-like crust.
Bake covered for 25 minutes, then remove the lid and bake for another 15-20 minutes until the crust is deep golden brown and the internal temperature reaches 205-210°F. You'll know it's done when the bread sounds hollow when tapped on the bottom. The aroma at this stage is incredible—warm, tangy, and slightly caramelized. Let the bread cool on a wire rack for at least 1 hour before slicing. This resting period allows the crumb to set properly, preventing a gummy texture.
Create the Bread Bowl Finish
For that authentic artisan touch, brush the cooled loaf with ¼ cup ice water to soften the crust slightly, then dust generously with ¼ cup semolina flour. This creates a beautiful, textured finish that's characteristic of traditional sourdough bread. The semolina adds a subtle nutty flavor and prevents the crust from becoming too hard as it cools completely.
Slice into thick pieces and serve warm with your favorite butter or olive oil. The interior should be open and airy with a fine crumb, while the exterior boasts a crisp, crackly crust with a deep golden hue. Each bite should deliver that perfect balance of tangy sourdough flavor, chewy texture, and satisfying crunch. This is the kind of bread that makes you feel like you've just baked in a Parisian boulangerie—authentic, rustic, and utterly delicious.
Pro Tips For Making Authentic Bread
- Test Your Starter First: Skip the guesswork—drop a spoonful of your sourdough starter into warm water with a pinch of sugar. If it floats within 5 minutes, it’s active enough to use. I learned this the hard way after baking a dense brick of bread because my starter was sluggish.
- Weigh Your Flour: Scooping flour from the bag packs in air, which throws off hydration. Use a kitchen scale—this recipe’s structure depends on precise ratios. After years of eyeballing, I finally got consistent rises and texture.
- Salt the Water Last: Dissolve the kosher salt in the water after mixing yeast and starter. Salt kills yeast, and you want those little guys to get a head start. I used to add it early and wondered why my dough took forever to rise.
- Shape Tightly, Rest Longer: Handle the dough aggressively to develop gluten, then let it rest 30–60 minutes before baking. This relaxes the gluten for a better oven spring. I was skeptical until I tried it—now my bread has that professional crumb every time.
Dietary considerations for this recipe
Gluten-Free Adaptation
For a gluten-free version, replace 3 cups of all-purpose flour with a 1:1 gluten-free blend like Bob's Red Mill or King Arthur. Add 1 tablespoon xanthan gum to improve elasticity—this mimics gluten's structure.
Expect a denser crumb; compensate by increasing hydration slightly (add 1 tablespoon extra water). Proofing times may extend by 30-60 minutes due to slower fermentation in gluten-free flours. 🌾
Keto-Friendly Version
Transform this into a low-carb loaf by swapping flour for almond flour and coconut flour in a 3:1 ratio. Use 1 cup almond flour and ¼ cup coconut flour instead of the original 5 cups. Reduce water to 2 cups and omit sugar entirely.
The dough will be drier—add 1 extra tablespoon olive oil for moisture. Bake at 350°F for 30-35 minutes until golden. This version yields 8 net carbs per slice (vs. 20+ in traditional bread).
Vegan Substitutions
Replace the active dry yeast with ¼ oz nutritional yeast for a vegan-friendly starter. Use vegan butter instead of olive oil (reduce by 1 teaspoon to avoid excess fat). For binding, add 1 tablespoon ground flaxseed mixed with 3 tablespoons water to the dough.
Proofing times may increase by 1 hour—monitor closely for full rise. The crust will still develop beautifully with these adjustments. 🌱
Low-FODMAP Options
For digestive sensitivity, use a low-FODMAP flour blend like Oats in Sight or BFree. Replace the sourdough starter with ½ cup commercial yeast (no fermentation triggers). Omit garlic powder and onion powder entirely.
The dough will be less tangy but still yield a crisp crust. Proof at 75°F for 3-4 hours to ensure proper rise without over-fermenting. 💛
Allergen-Free Precautions
Always check labels for cross-contamination warnings on gluten-free flours and nutritional yeast. Use a dedicated mixing bowl and utensils if sharing equipment with gluten-containing doughs. For nut-free keto bread, substitute almond flour with sunflower seed flour (add 1 extra tablespoon psyllium husk for structure).
Store finished loaves in airtight containers to prevent allergen exposure during storage. Safety first—never assume a product is safe without verification. ⚡
Nutrition facts
Frequently asked questions
Why does my sourdough starter need to be bubbly before baking?
The bubbles indicate active fermentation, which means your starter has enough wild yeast and bacteria to develop that signature tangy flavor and proper rise. A sluggish starter (flat or slow-rising) won't create the same open crumb or crust texture. Feed it extra flour and time if it's underactive—this builds strength for the dough.
Can I use this recipe without a Dutch oven?
Yes! If you don’t have a Dutch oven, try these alternatives: Place the dough on a baking sheet under a preheated broiler for the first 10 minutes to create steam, then bake as directed. For extra crust development, bake on a pizza stone or steel for 10 minutes before transferring to the oven. The crust won’t be as crackly, but the flavor will still be authentic.
How do I know when the bread is fully baked?
Look for three key signs: The crust should be deep golden brown, the internal temperature should reach 205-210°F (use an instant-read thermometer), and tapping the bottom should sound hollow. If the crust darkens too quickly, tent the bread with foil. Overbaking dries out the crumb—pull it out when it’s just slightly underdone.
What’s the best way to store leftover bread?
For freshness, wrap the loaf in a clean kitchen towel and place it in a paper bag at room temperature for 2-3 days. To extend shelf life, freeze slices in an airtight container for up to 3 months. Thaw at room temperature or toast directly from frozen. Avoid plastic bags—they trap moisture and make the crust soggy.
Can I make this bread without a sourdough starter?
Replace the 1 cup sourdough starter with 1 cup warm water + 2¼ teaspoons active dry yeast. Let the yeast bloom for 5 minutes before mixing into the dough. The flavor will be milder (less tangy), but the texture will still be excellent. For a faster rise, increase the yeast to 2½ teaspoons and reduce fermentation time by 1 hour.