
Side Dishes
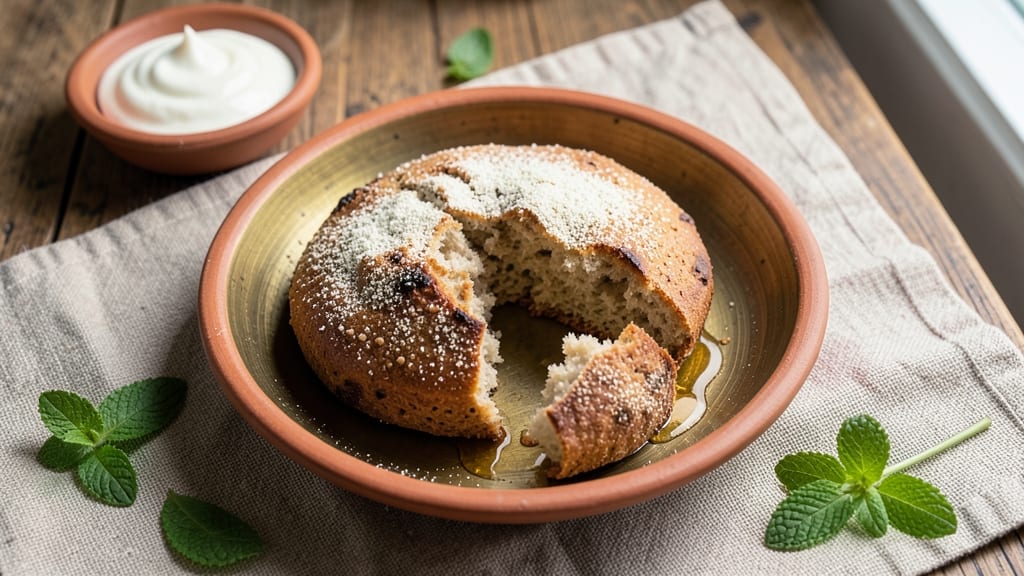
Mastering atta bread turns simple ingredients into flaky, golden layers that elevate any Indian meal. This recipe captures the essence of homemade roti using just whole wheat flour, water, and a pinch of salt—no yeast, no shortcuts, just traditional technique refined for modern kitchens.
The secret lies in proper kneading, resting, and cooking on a hot skillet, creating that signature tender yet slightly crisp exterior.
What sets this atta bread apart is its versatility—perfect for everyday meals or special occasions. Whether you're making classic missi roti or experimenting with garlic-infused naan, the same foundational method delivers restaurant-quality results at home.
The dough requires just 15 minutes of active prep followed by a 30-minute rest, making it ideal for busy weeknights when you still crave homemade comfort.
By the final flip, you'll have bread that's soft and chewy inside with delicate, flaky layers that melt in your mouth. The aroma of freshly cooked roti—lightly toasted with ghee—transforms any meal into a celebration of Indian home cooking.
This is bread that connects generations, where every bite carries the warmth of tradition.
The beauty of this recipe is its adaptability—use oil for everyday cooking or ghee for special occasions, and adjust the rolling thickness for different textures. Once you perfect the technique, you'll never buy store-bought rotis again. Let's get started on creating your own stack of golden, flaky layers.
Ingredients for atta bread
Four staples transform into golden, flaky layers—no yeast, no shortcuts, just tradition.
| Ingredient | Amount | Notes |
|---|---|---|
| Whole Wheat Flour (Atta) 🌾 | 2 cups | High-protein, medium-coarse grind preferred |
| Warm Water 💧 | 1 ¼ cups | 100°F for ideal dough formation |
| Ghee or Vegetable Oil 🫒 | 2 tbsp | Ghee for special occasions, oil for everyday |
| Salt 🧂 | ½ tsp | Fine sea salt preferred |
| Yogurt (Optional) 🥛 | ¼ cup | Plain, room-temperature for softness |
| Semolina (Sooji) (Optional) 🌾 | ¼ cup | For extra flakiness in layers |
The flour is everything here. Atta flour should be medium-coarse grind—think Patanjali or 24 Mantra brands for that authentic texture. If you're using store-bought atta, check the protein content: 10-12% is ideal. The water needs to be warm (about 100°F) to activate the gluten properly without overworking the dough. I always use a digital thermometer for this—no guessing. For the ghee, Amul or Patanjali are my go-tos, but any good-quality ghee will do. The semolina is optional but worth it if you want that extra flaky layer like in restaurant-style rotis.
Short on ghee? Vegetable oil works just fine—no one will know the difference unless you're serving it to a ghee purist. No yogurt? Skip it or use milk, but the dough will be slightly stiffer. The salt is non-negotiable—it balances the earthy flavor of the atta. If you're making this for a crowd, double the recipe but keep the same ratios. The dough should be soft but not sticky—add water 1 tbsp at a time if needed. And for the love of all things flaky, don’t over-knead. We’re not making bread dough here.
This dough is a patient one—let it rest 30 minutes covered at room temperature. It’ll thank you with perfect layers. Store the dough in the fridge for up to 2 days wrapped in a damp towel. For the semolina, keep it in an airtight container for 3 months—it’s shelf-stable but loses freshness over time. The ghee? 6 months in the fridge if unopened. And once you’ve made a batch, you’ll never go back to store-bought rotis—trust me, the aroma alone is worth the effort.
Why You'll Love This Recipe
- No-Fuss Kneading: I swear by this recipe because you don’t need a stand mixer—just your palms and 10 minutes. Warm water and atta do the heavy lifting, so the dough comes together smoother than store-bought. (Yes, even on a Tuesday night.)
- Ghee Magic: That golden ghee or oil rubbed into the dough? Pure flavor without extra effort. The bread develops a subtle richness—crisp on the outside, soft inside—that makes it taste like a restaurant treat.
- Packable Perfection: Wrap a few in foil, and they’re your new lunchbox hero. Kids love the texture, and it stays fresh for days. Honestly, I make a double batch every Sunday—half for breakfast, half for snacks.
- Pantry Staple: Five ingredients, zero guilt. Atta’s already in my cabinet, and yogurt (if I use it) adds just enough tang to keep it interesting. Budget-friendly? Absolutely. My wallet and waistline both thank me.
Step-by-step instructions for atta bread
Here's how to transform simple pantry staples into restaurant-worthy flaky layers.
Prepare the Dough Base
In a large mixing bowl, combine the 2 cups of whole wheat flour (atta) with the 0.5 teaspoon of salt. Create a well in the center and pour in the 2 tablespoons of ghee or vegetable oil. Using your fingertips, rub the oil into the flour until you see small crumbly pieces forming—this ensures even distribution of fat for those perfect flaky layers.
If using, add the 0.25 cup of room-temperature yogurt to the center of the well. The yogurt adds tenderness and helps bind the dough. Gently mix with a wooden spoon just until combined, then gradually add the 1.25 cups of warm water while stirring. The dough should come together but still feel slightly sticky—this is ideal for creating those signature flaky layers.
Knead for Elasticity and Flakiness
Turn the dough onto a lightly floured surface and knead vigorously for 8-10 minutes. You're working to develop gluten, but don't overdo it—this isn't bread dough, so it shouldn't become smooth and elastic. Instead, aim for a slightly rough texture with small cracks forming on the surface, which will become your flaky layers when baked.
Here's the thing—if the dough feels too dry, sprinkle a little more warm water and knead again. If it's too sticky, add a teaspoon of flour at a time. The perfect dough should hold together when pressed but still feel slightly tacky. Wrap the dough in a clean kitchen towel and let it rest for 30 minutes at room temperature—this resting period relaxes the gluten and makes rolling easier.
Layer and Roll for Signature Flakes
After resting, divide the dough into 4 equal portions. On a clean surface, take one portion and roll it into a thin rectangle about 6 inches wide and 12 inches long. If using, sprinkle the 0.25 cup of semolina (sooji) evenly over half of the rolled dough, leaving a 1-inch border around the edges. This semolina creates the crispy, flaky layers that make this bread special.
Fold the plain half over the semolina-dusted half like an envelope, then roll the dough tightly into a log. Repeat with the remaining dough portions. The key here is keeping the dough as thin as possible when rolling—this maximizes surface area for those beautiful flaky layers to develop. Place the rolled dough logs on a baking sheet lined with parchment paper and cover with a damp towel to prevent drying while you prepare the remaining logs.
Steam and Bake for Perfect Texture
Preheat your oven to 375°F. Place a small baking dish on the bottom rack of the oven and fill it with 1 cup of boiling water. This creates steam that helps develop those signature flaky layers. Once the oven is fully preheated, carefully place the dough logs on the middle rack, spacing them about 1 inch apart.
Bake for 25-30 minutes until the bread turns golden brown and sounds hollow when tapped on the bottom. The steam from the boiling water will rise and create those beautiful, crispy layers between the soft interior. Here's what to watch for: the edges should be golden brown, and the top should have a slightly crispy texture. If you're unsure, check at the 20-minute mark—your oven might run hot.
Rest and Serve Warm
Remove the bread from the oven and let it cool on a wire rack for 5-10 minutes. This resting period allows the layers to set and makes slicing easier. The bread should be warm but not hot to the touch when you serve it. Cut into slices and serve immediately for the best texture—those flaky layers will be at their crispy, delicate peak.
Real talk: this bread is best enjoyed fresh from the oven. The layers will soften as it cools, so don't wait too long. Pair with your favorite curry or use as a wrap for sandwiches. The combination of the whole wheat atta, ghee, and semolina creates a texture that's both hearty and delicate—exactly what makes this bread so special in Indian kitchens.
Pro Tips For Making Atta Bread
- Knead Until Silky: Stop when the dough stops sticking to your fingers—no need for a glassy, overworked ball. Atta bread thrives on gentle handling; over-kneading turns it tough. I used to push it until it looked like store-bought dough, but the best batches come from a firm yet tender mix that still has a slight crumbly texture.
- Warm Water Only: Cold water makes atta bread dense and chewy. Heat your water to just under boiling—about 100°F (38°C)—so it’s warm to the touch but not scalding. This activates the flour’s enzymes properly, giving you a light, airy crumb. (Yes, even if you’re impatient like me.)
- Ghee Over Oil: Skip the neutral oil unless you’re in a rush. Ghee’s low smoke point and rich flavor caramelize beautifully during cooking, adding a nutty depth that oil can’t match. Use just 1 tablespoon per batch—it’s enough to coat the dough and create that signature golden crust.
- Rest Before Rolling: Let the dough sit covered for at least 30 minutes after kneading. This relaxes the gluten, making it easier to roll out evenly without tearing. I learned this the hard way—skipping the rest led to jagged edges and uneven baking. (Your future self will thank you.)
Dietary considerations for these flavors
Gluten-Free Adaptation
For a gluten-free version, replace 2 cups atta flour with a 1:1 gluten-free whole wheat blend (like Bob's Red Mill GF Atta). Add 1 tbsp xanthan gum to improve elasticity, and increase water by 1 tbsp since GF flours absorb differently.
The texture will be slightly denser but still delicious—just avoid over-kneading to prevent dryness. 🌾
Low-Carb Options
Swap atta for almond flour (2 cups) and add ¼ cup psyllium husk powder to bind the dough. Use 3 tbsp melted butter or ghee instead of oil, and reduce water to 1 cup.
The result is a lower-carb bread with a nutty flavor. Bake at 350°F for 20-25 minutes—these stay crisp longer than traditional versions.
Vegan-Friendly Swaps
Replace ghee with vegan butter (like Miyoko's) or coconut oil. Use unsweetened almond milk yogurt (like Silk) instead of dairy yogurt. For extra binding, add 1 tbsp flaxseed meal + 3 tbsp water to the dough.
The texture remains soft but slightly denser, perfect for vegan curries or wraps. 🌱
Nut-Free Allergy Note
If nut allergies are a concern, use a rice flour + tapioca starch blend (like Cuppa Soufflé) instead of almond flour. Add ½ tsp apple cider vinegar to the water for better gluten-free binding.
These versions require 10-15 minutes extra kneading to develop structure. Always test small batches first—allergies don’t play around!
Protein Boost
For extra protein, add ¼ cup ground flaxseeds or chickpea flour to the atta mix. These boost fiber too! If using chickpea flour, reduce water by 2 tbsp—it absorbs more moisture.
The bread will have a slightly earthier taste but holds up better for sandwiches. I love this version for breakfast with peanut butter and banana. 💪
Diabetic-Friendly Adjustments
Opt for low-glycemic atta flour (like Atta from millet blends) and reduce portion sizes to ½ cup per serving. Pair with high-fiber sides (like lentil curry) to balance blood sugar.
Skip semolina if watching carbs—it’s high in simple starches. The ghee adds healthy fats that slow digestion, helping stabilize glucose levels. Always check flour labels for fiber content. 💡
Nutrition facts
Frequently asked questions
Can I make atta bread without yogurt?
Yogurt adds tenderness but isn't essential. Replace it with 2 tablespoons milk or skip it entirely—just add 1 extra tablespoon water to compensate. The dough will be slightly firmer but still work perfectly for rolling.
Why does my dough crack when rolling?
Those cracks are normal and actually help create flaky layers! Over-kneading causes excessive gluten development, making the dough too elastic. Knead just until smooth (8-10 minutes), then let it rest 30 minutes before rolling. If cracks appear early, cover the dough with a damp towel while working.
How do I store leftover atta bread?
Wrap cooled bread tightly in aluminum foil or place in an airtight container. Store at room temperature for 2 days or refrigerate for 5 days. To reheat, warm in a dry skillet over medium heat for 1-2 minutes per side until crispy again. Freeze for up to 3 months—thaw overnight in the fridge.
Can I make atta bread in a microwave?
No, microwave cooking won't create the signature flaky layers. The steam from baking is essential for that texture. For quick cooking, use a nonstick skillet on medium-high heat—cook 1-2 minutes per side until golden. The oven method still gives the best results for layered texture.
What's the best way to make garlic naan from this dough?
Add 2 minced garlic cloves + 1 tbsp chopped cilantro to each rolled dough log before baking. For extra flavor, brush with melted ghee after baking. Cook on a hot skillet for 30 seconds per side instead of baking—this gives that classic naan puff. Serve immediately with butter!