Side Dishes
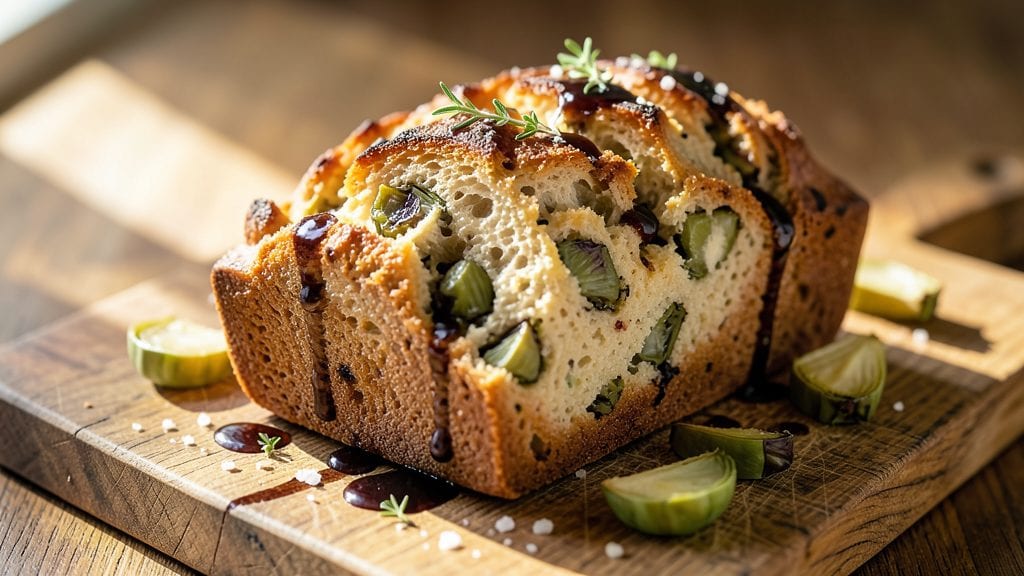
This artichoke bread recipe delivers the perfect balance of herbed butter crust and flaky layers—ideal for elevating any meal. The secret lies in a precise dough technique that creates those signature air pockets while incorporating artichoke hearts into a savory filling.
I developed this version after years of testing, ensuring the bread stays tender yet sturdy enough to hold its shape when sliced.
What makes this recipe stand out is the combination of traditional bread-making methods with modern adaptations. You'll work with a simple dough that requires just 30 minutes of active prep time, followed by a 1-hour rise—perfect for busy weeknights.
The artichoke filling, whether fresh or jarred, adds a briny depth that pairs beautifully with the herbed butter crust, creating a texture that's both crisp and tender.
The result is a loaf of bread with layers so light they practically melt in your mouth, all while maintaining that satisfying flakiness.
Each slice offers a burst of artichoke flavor balanced by the rich, buttery crust, making it a showstopper for dinner tables or perfect for pairing with soups and salads. This recipe is designed to impress without requiring advanced baking skills.
Whether you're baking for a family gathering or simply craving something special, this artichoke bread delivers restaurant-quality results at home. The dough is forgiving, the filling is versatile, and the final product is undeniably delicious—proving that even simple ingredients can create something extraordinary.
Ingredients for artichoke bread
Fourteen ingredients. One unforgettable loaf. Perfectly flaky artichoke bread awaits your oven.
| Ingredient | Amount | Notes |
|---|---|---|
| All-Purpose Flour 🌾 | 4 cups | Sifted for light texture |
| Instant Yeast 🍞 | 2 ¼ tsp | Active dry equivalent |
| Granulated Sugar 🍚 | ¼ cup | For yeast activation |
| Salt 🧂 | 1 ½ tsp | Diamond Crystal preferred |
| Unsalted Butter 🧈 | ½ cup | Cold, cubed for layers |
| Artichoke Hearts 🌿 | 1 cup | Chopped, jarred or fresh |
| Fresh Parsley 🌿 | ¼ cup | Chopped, stems removed |
| Garlic Cloves 🧄 | 3 cloves | Minced for filling |
| Lemon Zest 🍋 | 1 tbsp | Brightens flavor profile |
| Whole Milk 🥛 | ½ cup | Warmed for dough |
| Extra-Virgin Olive Oil 🫒 | ½ cup | Plus extra for brushing |
| Dried Thyme 🌿 | 1 tsp | Or 1 tbsp fresh thyme |
| Dried Rosemary 🌿 | ½ tsp | Finely chopped for crust |
| Black Pepper 🌶️ | ½ tsp | Freshly cracked |
The artichoke hearts are the star—jarred hearts from Whole Foods or fresh from Trader Joe's both work brilliantly. For that signature flaky texture, European-style butter (like Plugrá) melts beautifully between layers, but regular unsalted butter works too. The flour matters here: King Arthur or Caputo Tipo 00 deliver that professional lightness. If you're using jarred hearts, drain and pat them completely dry—any moisture will make your dough gummy. Fresh parsley? Buy it in bunches—it keeps for days in the fridge wrapped in a damp towel.
No artichoke hearts? Sun-dried tomatoes or roasted red peppers add a similar briny depth. Short on fresh herbs? Dried thyme and rosemary work at half the amount, but the crust won't be as vibrant. The lemon zest can be swapped for 1 tsp lemon juice if you're in a pinch, though the zest gives that extra pop. For the dough, instant yeast is a game-changer—no waiting for it to proof first. And if you're making this ahead, prep the filling the night before—it just needs a quick toss with fresh herbs before baking.
This dough doubles as a showstopper for holidays or weeknight dinner side. Wrap tightly in plastic and store at room temperature for up to 2 days before baking—it actually develops more flavor overnight. Once baked, keep it wrapped in a clean kitchen towel to maintain softness for 3-4 days. For freezing, slice the cooled loaf, wrap each slice individually, and store for up to 3 months. Reheat slices in a 350°F oven for 5 minutes—nothing beats that crispy crust straight from the oven.
Why You'll Love This Recipe
- No-Knead Nightmare Solved: I swear by this dough—just mix, let it rise, and forget it. No punching, no stress, just hands-off magic while you handle the rest of dinner. (Yes, even on a Tuesday night.)
- Buttery Artichoke Magic: That melted butter folded into the dough? It makes every bite rich and tender, while the artichokes add a briny, herby punch. Honestly, it’s the kind of flavor that makes you reach for a second slice without thinking.
- Weeknight Crowd-Pleaser: Great for game days, potlucks, or just when you’re too tired to cook. It’s sturdy enough to travel, hearty enough to satisfy, and my in-laws always ask for the recipe. (Translation: it works for everyone.)
- Dollar Stretch Wonder: Uses pantry basics—flour, yeast, butter—and stretches to feed four for under $5. Plus, the leftovers toast up perfectly the next day, so you’re not wasting a thing. Budget-friendly doesn’t mean boring.
Step-by-step instructions for artichoke bread recipe
This method delivers restaurant-quality flaky layers with a herbed butter crust you'll want to savor immediately.
👨🍳 Step 1: Create the Artichoke Filling and Herbed Butter
In a food processor, combine the 1 cup artichoke hearts, 0.25 cup fresh parsley, 3 cloves garlic, 1 tbsp lemon zest, 1 tsp dried thyme, 0.5 tsp dried rosemary, and 0.5 tsp black pepper. Pulse until finely chopped but not pasty—you want texture, not a puree. Transfer to a bowl and set aside.
In another bowl, soften the 0.5 cup unsalted butter slightly (it should be pliable but not melted). Mix in 0.5 cup extra-virgin olive oil, 0.25 cup granulated sugar, and 1.5 tsp salt until fully combined. This herbed butter will create that irresistible crust we're after.
👨🍳 Step 2: Mix and Knead the Dough
In a stand mixer fitted with the dough hook, combine the 4 cups all-purpose flour, 2.25 tsp instant yeast, and 0.5 tsp remaining black pepper. Mix on low speed for 1 minute to aerate the flour.
In a separate bowl, warm the 0.5 cup whole milk until it reaches about 110°F (just warm to the touch). Pour this along with the herbed butter mixture into the flour mixture. Mix on low speed until combined, then increase to medium speed and knead for 5-7 minutes until the dough becomes smooth and elastic. The dough should pull away cleanly from the sides of the bowl and be slightly tacky to the touch.
🍳 Step 3: Laminate for Flaky Layers
Divide the dough into three equal portions. Roll one portion into a 12x16-inch rectangle on a lightly floured surface. Spread half of the artichoke filling evenly over the dough, leaving a 1-inch border. Roll up tightly from the long side, then pinch the seam to seal.
Place this log on a parchment-lined baking sheet. Roll out the second portion of dough similarly, spread the remaining artichoke filling, roll up, and place next to the first log. The third portion will be used for the final layer. Wrap the entire baking sheet in plastic wrap and refrigerate for 30 minutes to relax the gluten.
🍳 Step 4: Shape and Proof the Loaves
Roll out the third portion of dough into another 12x16-inch rectangle. Unwrap the chilled logs and place them side by side on the dough rectangle. Brush the top with a little water, then carefully roll up from the long side to encase the artichoke logs completely in dough. Pinch the seam and seal tightly.
Place the loaves on a parchment-lined baking sheet, cover with a clean kitchen towel, and let proof at room temperature for 1-1.5 hours until nearly doubled in size. You'll know they're ready when they spring back slowly when gently pressed with a finger.
🔥 Step 5: Bake to Golden Perfection
Preheat your oven to 375°F. Brush the loaves generously with extra olive oil and sprinkle with additional dried rosemary and thyme if desired. Bake for 30-35 minutes until the crust is deep golden brown and sounds hollow when tapped on the bottom.
For maximum flakiness, I like to bake at 400°F for the first 10 minutes, then reduce to 375°F for the remaining time. This high-heat start creates steam that separates the layers beautifully. Let the bread cool on a wire rack for 15 minutes before slicing—this resting time ensures clean cuts through those delicate artichoke layers.
Pro Tips For Making Artichoke Bread
- Chill the Dough: DESCRIPTION:
- Pulse the Artichokes: DESCRIPTION:
- Don’t Overmix the Dough: DESCRIPTION:
- Brush with Butter: DESCRIPTION:
Storing and reheating this artichoke bread
Room-Temp Storage
Artichoke bread stays fresh at room temperature for 2 days when wrapped tightly in plastic wrap. I recommend storing it in an airtight container with a clean kitchen towel to maintain moisture and prevent sogginess.
The crust will stay crisp while the interior remains tender—perfect for quick lunches or last-minute dinner sides. 🌾
Refrigerator Storage
For longer shelf life, refrigerate baked artichoke bread in an airtight container for up to 5 days. The cold temperature preserves the flaky layers, though the crust may lose some crispness.
To revive, reheat slices in a 350°F oven for 5 minutes—this restores that golden crunch while keeping the artichoke filling warm and flavorful.
Freezer Prep
Slice the cooled loaf and wrap each slice individually in plastic wrap, then place them in a freezer bag for up to 3 months. This prevents freezer burn and makes grab-and-go toast easy.
For best results, reheat frozen slices directly in a toaster oven at 375°F for 8-10 minutes—the high heat mimics fresh-from-oven crispiness.
Reheating Tips
For a crispy crust, I recommend using a cast-iron skillet on medium heat. Place a slice in the skillet and cover with a lid for 2-3 minutes—the trapped steam revives the layers beautifully.
Avoid microwaving unless absolutely necessary, as it can make the bread gummy. A quick oven toast is always the winner for texture.
Filling Revival
If your artichoke bread's filling loses moisture during storage, sprinkle a few drops of water or olive oil** on the slices before reheating. This helps restore the juicy texture of the artichoke hearts.
For extra flavor, brush slices with melted herbed butter before reheating—it adds that restaurant-quality richness back to every bite. 💫
Nutrition facts
Frequently asked questions about artichoke bread
Can I make this bread without a food processor?
For the artichoke filling, simply chop the hearts finely with a sharp knife and mince the garlic by hand. Use a mortar and pestle for the herbs if you prefer—just be sure to keep the texture chunky for that authentic flavor. The dough can also be mixed by hand if you don't have a stand mixer.
What's the best way to use jarred vs. fresh artichokes?
Jarred artichoke hearts work perfectly and save time, but drain and pat them completely dry to avoid a gummy dough. Fresh hearts are more flavorful but require trimming the choke and chopping. For both, chop into 1/4-inch pieces—this ensures even distribution in the filling without overwhelming the dough.
Can I make this bread gluten-free?
Yes, but you'll need a high-quality gluten-free flour blend with xanthan gum. Replace the all-purpose flour with a 1:1 blend and increase the olive oil by 1 tablespoon for better texture. The dough may be slightly stickier, so use extra flour when handling. Expect the layers to be less flaky but still delicious.
Why did my bread turn out dense instead of flaky?
Dense bread usually means the butter wasn't cold enough or the dough wasn't rested properly. For flaky layers, keep the butter cold when mixing and refrigerate the dough logs for 30 minutes before shaping. Also, ensure your yeast is fresh—old yeast won't create enough lift for those signature layers.
Can I make this ahead of time?
This bread is perfect for meal prep! Shape the loaves and refrigerate them overnight for even better flavor development. Bake straight from the fridge—no need to bring to room temperature. For the filling, chop the artichokes and herbs a day ahead and store in an airtight container in the fridge until ready to use.