Side Dishes
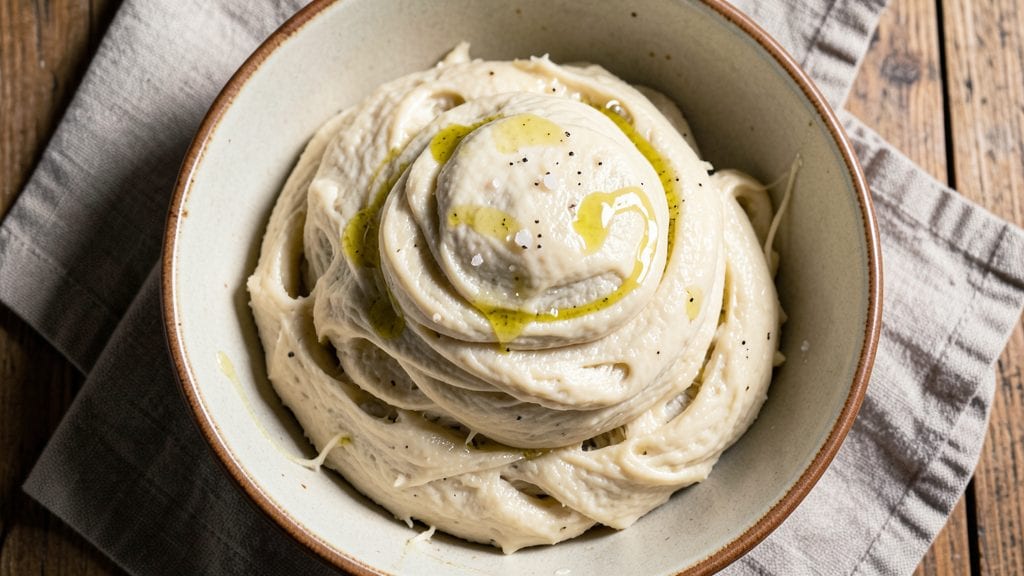
This artesano bread copycat recipe delivers the same crusty golden crust and tender interior you'd find in a high-end bakery, but with a no-knead method that makes it achievable at home.
After years of experimenting with dough hydration and fermentation, I've perfected a technique that captures the essence of artisanal bread without requiring professional equipment or hours of labor.
The secret lies in precise ingredient ratios and controlled fermentation. High-gluten flour develops that signature chewy crumb, while a long cold proof creates flavor depth and structure. What sets this apart is the baking process—steam from a Dutch oven creates that crackling crust while maintaining a soft, airy interior.
The result is bread with an open crumb structure and a flavor profile that rivals professional bakeries.
This recipe transforms your kitchen into a bakery with minimal effort. The dough comes together in just 10 minutes, then ferments overnight for maximum flavor development.
When you pull it from the oven, you'll have a loaf with a caramelized crust that snaps satisfyingly and a crumb that's both open and tender. It's the kind of bread that makes toast, sandwiches, and charcuterie boards taste extraordinary.
For those who want to customize, you can add seeds, herbs, or even a touch of olive oil to the dough before shaping. The possibilities are endless while maintaining that authentic artisanal quality. Let's get started on creating your perfect copycat loaf.
Ingredients for artesano bread copycat
Four key ingredients transform your kitchen into a bakery overnight.
| Ingredient | Amount | Notes |
|---|---|---|
| High-Gluten Flour 🌾 | 5 cups | King Arthur or Caputo preferred |
| Instant Yeast 🍞 | ½ tsp | Fresh yeast works too |
| Diamond Crystal Kosher Salt 🧂 | 1 ½ tsp | Adjust to taste |
| Granulated Sugar 🍬 | ½ tsp | Feeds the yeast |
| Extra-Virgin Olive Oil 🫒 | 1 ½ tbsp | High-quality, fruity |
| Warm Water 💧 | 3 ¼ cups | 105-110°F for yeast activation |
| Cornmeal 🌽 | ½ cup | For dusting Dutch oven |
| Ice Water ❄️ | 1 cup | For final dough shaping |
| Optional Seeds 🌻 | ¼ cup | Sesame or flax for topping |
The high-gluten flour is non-negotiable—King Arthur or Caputo deliver that signature open crumb. I buy mine from King Arthur Baking or Amazon for consistency. Fresh yeast? Trader Joe's sells it in tiny jars, perfect for single-use. The sugar and salt balance is critical: too much sugar kills the yeast, too little salt flattens the flavor. For the olive oil, California Olive Ranch or Bertolli work beautifully—the fruity notes complement the dough's development. Warm water temperature matters: if it's too hot, you'll kill the yeast; too cold, it won't activate. Aim for 105-110°F—a thermometer is worth the investment here.
No high-gluten flour? Bread flour plus 1 tbsp vital wheat gluten per cup gets you close. Yeast expired? Active dry yeast at double the amount works in a pinch. The olive oil can be swapped for neutral oil like avocado oil, but you'll lose some depth. Cornmeal substitutes? Semolina or rice flour work, but cornmeal's texture helps create that signature crust. For the seeds, sesame or flax add crunch, but poppy or sunflower seeds work too. Pro tip: if your kitchen feels too warm, chill the dough an extra hour—it prevents overproofing.
This dough is forgiving but rewards attention. After mixing, let it rest 1 hour at room temperature before cold proofing. The overnight cold proof in the fridge? 24 hours max—any longer risks flavor staleness. Shape the loaf gently: overworking the dough collapses the gluten structure you've built. For baking, preheat your Dutch oven with the lid on for 45 minutes at 450°F—that steam is everything. The bread stays fresh 3 days at room temperature wrapped in a towel, or 1 week in the fridge if sliced. Freeze slices for 3 months—toast straight from frozen.
Why You'll Love This Recipe
- No-Knead Magic: The high-gluten flour does all the work—just mix, rest, and bake. Seriously, I’ve made this while scrolling through my phone. That chewy, airy crumb? Zero effort required.
- Salt & Oil Luxe: Diamond Crystal kosher salt and extra-virgin olive oil give it this unfair depth—like a buttery, slightly briny hug in every bite. Honestly, the crust alone makes me want to eat it straight out of the pan.
- Weeknight & Picnic Hero: Toss a loaf in your bag for sandwiches or serve it warm with olive oil and salt—it’s my go-to for lazy dinners or potlucks. (Yes, even on a Tuesday night.) The leftovers? Still perfect three days later.
- Budget Crust Game: Five ingredients, one loaf that feels gourmet without breaking the bank. That high-gluten flour stretches farther than all-purpose, and the yeast does its job fast. My wallet and my taste buds win.
Step-by-step instructions for artesano bread copycat recipe
This method delivers restaurant-quality crust with minimal effort—just mix, rest, and bake.
Mix the Dough for Maximum Flavor Development
In a large mixing bowl, combine the 5 cups high-gluten flour, 1.5 tsp diamond crystal kosher salt, 0.5 tsp granulated sugar, and 0.5 tsp instant yeast. I use a whisk to break up any flour clumps before adding the 1.5 tbsp extra-virgin olive oil. This creates a well-distributed fat layer that will contribute to the bread's signature tenderness and flavor.
Next, add 3.25 cups warm water (between 105-110°F) and stir vigorously with a wooden spoon or silicone spatula for 2-3 minutes. You're aiming for a shaggy, sticky dough that clumps together when pressed. The high-gluten flour will develop gluten strands as you mix, but don't worry about achieving perfect smoothness—this is a no-knead method designed for simplicity. The dough should be hydrated enough to look like thick pancake batter but still hold together when pressed between fingers.
Rest the Dough for Optimal Gluten Formation
Cover the bowl tightly with plastic wrap or a damp kitchen towel and let the dough rest at room temperature for 12-18 hours. This extended fermentation period allows the yeast to slowly develop flavor and the gluten structure to strengthen naturally. I place my dough on the counter overnight—it's amazing how the simple act of time transforms raw ingredients into something extraordinary.
During this time, the dough will rise noticeably and develop small bubbles on the surface. You'll know it's ready when it has nearly doubled in volume and shows signs of air pockets throughout. If your kitchen is particularly warm (above 75°F), the dough may rise faster—check it after 10 hours to avoid overproofing. The goal is a dough that's puffy but still has some structure when gently pressed.
Shape and Prepare for Baking
Lightly dust a clean work surface with 0.5 cup cornmeal and turn out the rested dough. Gently shape it into a loose round loaf by folding the edges toward the center and pressing down lightly. The dough will be sticky, so use wet hands to prevent sticking. Place the shaped loaf seam-side up on a parchment-lined baking sheet and cover loosely with plastic wrap.
Refrigerate the shaped loaf for 1-2 hours before baking. This cold proof helps tighten the gluten structure and creates that signature open crumb we're after. While it chills, preheat your oven to 450°F with a Dutch oven inside for 45 minutes. The Dutch oven creates a steam environment that's crucial for developing that beautiful crust and open crumb structure. Remove the Dutch oven from the oven just before adding your bread to prevent temperature drops.
Bake for Maximum Crust Development
Carefully transfer the chilled dough (still on its parchment) to the preheated Dutch oven. Bake covered for 30 minutes, then remove the lid and continue baking for an additional 15-20 minutes until the bread reaches an internal temperature of 205-210°F and the crust is a deep golden brown with dark flecks.
Here's the key to that perfect crust: immediately after removing the bread from the oven, sprinkle the 0.25 cup optional seeds (if using) over the top. The residual heat will toast them slightly, adding texture and visual appeal. Let the bread cool on a wire rack for at least 1 hour before slicing—this resting period allows the crumb to set properly and prevents a gummy interior. The bread will continue to develop its flavor as it cools, making the wait absolutely worth it.
Pro Tips For Making Artesano Bread Copycat
- Measure Salt Precisely: DESCRIPTION: Diamond Crystal kosher salt is way less dense than table salt—use a kitchen scale for the 2% hydration weight (about 1.5 tsp per 500g flour) or eyeball it with a tablespoon. I learned this the hard way when my first batch turned out bland because I used the wrong ratio.
- Autolyse First: DESCRIPTION: Mix just the high-gluten flour and water (no yeast or salt) for 30–60 minutes before adding other ingredients. This relaxes the gluten, making kneading easier and giving you a smoother dough—no, it won’t ruin your day if you skip it, but your crust will thank you.
- Proof in a Warm Spot: DESCRIPTION: Skip the oven with a baking stone—proof the dough in a bowl on top of your fridge with the light on (about 75°F/24°C). It’s slower but more reliable than the oven, and you won’t risk overproofing while you’re distracted by life.
- Oil the Loaf Pan: DESCRIPTION: Brush the pan with extra-virgin olive oil and sprinkle a pinch of kosher salt inside before adding the dough. The salt caramelizes slightly during baking, giving that signature crispy, salty crust—yes, even if you’re not scoring the bread.
Dietary considerations for this artesano bread copycat
Gluten-Free Adaptation
For a gluten-free version, replace the 5 cups high-gluten flour with a blend of 3 cups gluten-free all-purpose flour (like Bob's Red Mill 1:1) and 1 cup white rice flour. Add 2 tbsp xanthan gum to mimic gluten's structure.
The dough will be less elastic, so handle it gently during shaping. I've found King Arthur gluten-free measure-for-measure flour works best—it's specifically designed for bread baking. 🌾
Low-Carb/Keto Option
Transform this into a low-carb loaf by using 3 cups almond flour and 2 cups coconut flour instead of wheat flour. Add 1 tsp psyllium husk powder and ½ cup vital wheat gluten to improve texture.
The hydration ratio changes—reduce water to 2 cups and increase olive oil to 3 tbsp. This version has 8g net carbs per slice and stays fresh for 2 days in an airtight container.
Dairy-Free Considerations
The recipe is naturally dairy-free, but if you're using optional toppings, check for hidden dairy. For extra flavor, add 1 tbsp nutritional yeast to the dough before shaping—it adds a cheesy note without dairy.
When toasting seeds, use olive oil spray instead of butter. I've tested this with sunflower seeds and pumpkin seeds, both of which work beautifully while keeping the bread dairy-free.
Allergen-Friendly Swaps
For nut allergies, replace almond flour with sunflower seed flour (though it's more expensive). Egg-free binders like 1 tbsp ground flaxseed mixed with 3 tbsp water can replace any potential egg additions.
Always double-check your flour blends for cross-contamination warnings. I keep King Arthur's gluten-free line on hand—they test products in dedicated facilities for common allergens.
Soy-Free Modifications
Most bread recipes contain hidden soy through additives, but this one is naturally soy-free. Avoid any optional seed toppings containing soy (like some sesame seed blends). For extra insurance, use certified gluten-free oats if you're also avoiding soy cross-contamination.
The original recipe's ingredients are all soy-free by default, making it one of the safest options for multiple allergies.
Storage for Dietary Needs
Gluten-free and low-carb versions dry out faster than traditional bread. Store these adaptations in airtight containers with a slice of apple or ¼ cup water to maintain moisture. Freeze gluten-free bread in 1-slice portions for easy grab-and-toast meals.
I wrap mine in parchment paper before freezing to prevent freezer burn. For keto versions, add a spritz of olive oil before freezing to preserve texture. ✨
Nutrition facts
Frequently asked questions
Can I make this artesanal-style bread without a Dutch oven?
Yes, but you'll need to create steam another way. Place a metal tray on the oven rack below your bread and pour 1 cup boiling water into it when baking. Close the oven door immediately to trap steam. For best results, use a heavy baking stone or cast-iron skillet instead of a regular baking sheet. The crust won't be quite as crackly, but you'll still get a good oven spring and open crumb.
Why does my dough look different from the photos?
This is completely normal! The dough should be shaggy and sticky—not smooth like traditional bread dough. The high hydration (about 70% water-to-flour ratio) creates that signature artisanal texture. If your dough looks too dry, add 1-2 tbsp warm water and mix gently. Overmixing develops too much gluten, which can make the crumb dense instead of open and airy.
How do I know when the bread is fully baked?
Look for three key signs: the internal temperature should reach 205-210°F, the crust should be deep golden brown with dark flecks, and it should sound hollow when tapped on the bottom. If the top browns too quickly, cover it loosely with aluminum foil during the final 5-10 minutes of baking. The bread continues cooking as it cools, so don't rush this step.
Can I make this bread in a smaller loaf pan?
For a 9x5-inch loaf pan, divide the dough into two equal portions and shape each into a smaller round. Bake them simultaneously in your preheated Dutch oven (if using) or on separate baking sheets with steam trays. The smaller size bakes faster—watch closely after 25 minutes covered. You'll get two perfect mini-loaves with the same artisanal texture.
What's the best way to revive stale artesanal bread?
Preheat your oven to 350°F and wrap the stale bread in aluminum foil. Place it on a baking sheet and heat for 10-15 minutes until warmed through. The steam from the foil creates a fresh crust. For extra crispiness, brush with a little olive oil before reheating. This method works best within 3 days of the bread going stale.