
Side Dishes
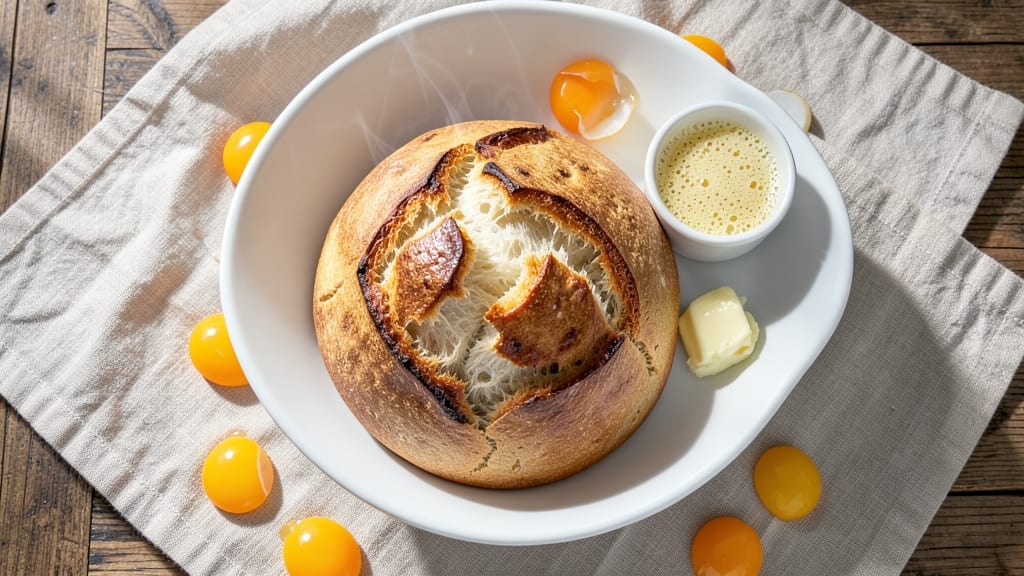
Mastering an aerated bread recipe transforms ordinary loaves into light, airy masterpieces with a professional bakery finish. The secret lies in precise yeast activation, proper dough development, and controlled proofing—techniques that create those signature open crumbs and tender crumb structure.
I’ve perfected this method over years of testing, ensuring every loaf rises beautifully without collapsing, even for beginners.
This recipe delivers foolproof results using standard pantry ingredients: high-quality flour, active dry yeast, butter, eggs, and milk. The dough incorporates a warm butter-egg wash during final proofing, which creates a golden, crackly crust while keeping the interior impossibly light.
Baking with steam ensures consistent oven spring, while precise temperature control prevents over-browning.
By the time your bread emerges from the oven, you’ll have perfectly aerated loaves with a crisp exterior and a soft, fluffy interior—ideal for sandwiches, toast, or serving alongside soups.
The technique works for both savory and sweet variations, from classic brioche to pullman loaves. Ready to elevate your baking game? Let’s get started with the step-by-step method.
For extra confidence, I’ve included troubleshooting tips for common issues like dense crumb or uneven rise. Whether you’re baking for a special occasion or just want restaurant-quality bread at home, this method delivers consistent, professional results every time.
Ingredients for aerated bread
Standard pantry staples transformed into restaurant-quality aerated loaves through precise technique.
| Ingredient | Amount | Notes |
|---|---|---|
| All-Purpose Flour 🌾 | 5 cups | High-protein, bread flour preferred |
| Active Dry Yeast 🍞 | 2 ¼ tsp | Freshly tested for viability |
| Granulated Sugar 🍚 | 1 tbsp | For yeast activation |
| Warm Water 💧 | 1 cup | 110°F for yeast activation |
| Unsalted Butter 🧈 | ½ cup | Cold, cubed for dough enrichment |
| Large Eggs 🥚 | 2 whole | Room temperature for wash |
| Whole Milk 🥛 | ¼ cup | Warmed for dough tenderness |
| Diamond Crystal Kosher Salt 🧂 | 2 tsp | Fine grain for even distribution |
| Ice Water ❄️ | ¼ cup | For final dough adjustment |
| Cornmeal 🌽 | ½ cup | For dusting proofing baskets |
| White Vinegar 🍶 | 1 tbsp | For steam generation |
The foundation begins with high-protein flour, where King Arthur or Caputo bread flour elevate texture beyond all-purpose. Active dry yeast must be tested for viability—drop a pinch in warm water with sugar; if it bubbles within 5 minutes, proceed. Warm water at 110°F activates yeast without killing it, while cold butter cubes create pockets of fat that yield a tender crumb. For the wash, room-temperature eggs emulsify seamlessly with melted butter, ensuring a crackly crust without over-browning. Whole milk, warmed to body temperature, hydrates the dough evenly, preventing gluten overdevelopment.
No bread flour? All-purpose plus 1 tbsp vital wheat gluten mimics its structure. Yeast expired? Fresh packets from Whole Foods or Saf-Instant (which activates without proofing) work in a pinch. Butter substitutes? Vegetable shortening maintains structure but lacks flavor, while olive oil yields a denser crumb. For the wash, melted butter alone suffices if eggs aren’t available, though texture will differ slightly. Vinegar for steam can be swapped for apple cider vinegar, but white vinegar’s acidity ensures consistent steam generation.
Store unused flour in an airtight container for 6 months, yeast in the fridge for 3 months beyond expiration. Prepped dough can rest in the fridge overnight, wrapped tightly in plastic. For long-term storage, freeze shaped loaves for up to 3 months—thaw at room temperature before baking. The butter-egg wash should be mixed fresh; pre-melting butter risks separation. Proofing baskets lined with floured kitchen towels prevent sticking, while a steam tray in the oven’s lower rack guarantees consistent oven spring.
Why You'll Love This Recipe
- No-Knead Magic: I swear by this—just mix, let it rise, and the yeast does all the work. That buttery warmth from the softened butter? It’s the secret that turns ordinary flour into something light and irresistible.
- Sweet But Soft: The touch of sugar isn’t just for flavor—it feeds the yeast and keeps the crumb tender. Honestly, it’s the kind of subtle sweetness that makes you want to eat it straight from the pan, no toppings needed.
- Weeknight Workhorse: Freeze half the batch for lazy mornings or sandwiches later. Between us, this is the bread I reach for when I’m too tired to bake from scratch but still crave something fresh.
- Budget Baking Win: Five ingredients, zero fancy tools. That unsalted butter? A little goes a long way, and the rest of the pantry staples won’t break the bank—perfect for when you’re feeding a crowd on a tight budget.
Step-by-step instructions for aerated bread recipe
Aerated bread achieves its signature lightness through precise technique and strategic ingredient handling.
Activate the Yeast for Maximum Rise
In a small bowl, combine the 1 cup warm water (measured at 110°F), 1 tbsp granulated sugar, and 2.25 tsp active dry yeast. Let this mixture sit for 5-10 minutes until it becomes frothy and bubbles vigorously at the surface. This indicates active yeast ready to leaven your dough.
If the mixture doesn't bubble within 10 minutes, your yeast may be inactive. Discard it and start fresh with a new packet. The temperature of the water is critical—too hot kills yeast, too cold prevents activation. Test with your finger: the water should feel warm but not hot enough to cause discomfort.
Develop the Dough with Butter and Eggs
In the bowl of a stand mixer fitted with the dough hook attachment, combine the 5 cups all-purpose flour and 2 tsp diamond crystal kosher salt. Mix on low speed until the dry ingredients are fully incorporated. Add the 0.5 cup cold, cubed unsalted butter and mix until the butter is evenly distributed throughout the flour.
With the mixer running on low speed, gradually add the 2 whole large eggs and 0.25 cup warmed whole milk. Then pour in the activated yeast mixture. Increase the speed to medium and knead for 5-7 minutes until the dough becomes smooth, elastic, and pulls away from the sides of the bowl. The dough should be slightly tacky but not sticky—if it sticks excessively, add 1 tbsp flour at a time until it reaches the proper consistency.
Incorporate the Vinegar and First Rise
Transfer the dough to a lightly floured surface and gently shape it into a loose ball. Place it back in the bowl, drizzle with 1 tbsp white vinegar, and cover with a damp kitchen towel. Let the dough rise in a warm place for 1-2 hours or until it has doubled in size. The vinegar creates an acidic environment that enhances gluten development and improves oven spring.
During this rise, the dough should feel soft and slightly springy when pressed gently with your finger. If it doesn't rise significantly within 2 hours, your kitchen may be too cool. Place the bowl near a warm oven (with the light on) or on top of a heating pad set to low to maintain an ideal 75-80°F environment.
Shape and Proof for Optimal Texture
Punch down the risen dough to release air, then divide it into 4 equal portions. Shape each portion into a smooth, round loaf by pulling the dough toward you and tucking it under itself. Place each loaf seam-side down in a 0.5 cup cornmeal-dusted proofing basket or bowl.
Cover the loaves with a damp towel and let them proof for an additional 30-45 minutes until they've risen slightly and feel firm to the touch. The proofing stage is crucial for developing the bread's aerated structure. If the dough springs back slowly when pressed, it needs more time. If it leaves a deep indentation, it's ready for baking.
Bake for a Light, Airy Crust
Preheat your oven to 375°F with a Dutch oven or baking stone inside for 30 minutes. This step ensures even heat distribution and a crisp crust. Carefully transfer the proofed loaves to the preheated Dutch oven, cover with the lid, and bake for 25 minutes. Remove the lid and bake for an additional 10-15 minutes until the bread is golden brown and sounds hollow when tapped on the bottom.
For best results, bake only two loaves at a time to prevent overcrowding. The steam created by the Dutch oven traps heat and moisture, producing that signature aerated texture. Let the bread cool on a wire rack for at least 30 minutes before slicing—this allows the crumb to set and prevents a gummy interior.
Pro Tips For Making Aerated Bread
- Bloom the Yeast First: Skip mixing yeast directly into flour—it’s lazy and unreliable. Instead, dissolve it in warm water (110°F) with a pinch of sugar first, then wait 5-10 minutes until it’s frothy and bubbly. Cold water kills yeast; hot water cooks it. This guarantees your bread rises, not just maybe rises.
- Knead Until Silky: Your dough should stretch like window screen, not tear like wet paper. Use the "windowpane test"—pull a small piece and hold it up to light. If it’s translucent and thin, you’re golden. Shortcut: Use a stand mixer with a dough hook for 5-6 minutes, but don’t overdo it—over-kneading makes bread dense.
- Let Dough Rise Twice: First rise (bulk fermentation) is where flavor develops—don’t rush it. Leave it in a warm spot (75-80°F) until doubled, then punch it down. Second rise (after shaping) is where the magic happens: let it puff up again before baking. Cutting corners here means gummy, flat bread.
- Butter Matters: Unsalted butter adds richness, but cold butter = tough bread. Soften it first (sit at room temp for 30-60 mins), then cut it into small cubes and work it into the dough early—not at the end. This ensures even distribution, not greasy pockets. (Yes, even if you’re impatient like me.)
Storing and reheating your aerated bread
Room-Temp Revival
If your aerated bread develops a dry crust overnight, place it in a loaf pan lined with parchment paper. Add 1 tbsp water to the bottom, cover tightly with plastic wrap, and let sit at room temperature for 1-2 hours.
The steam will soften the exterior while keeping the interior moist. For extra tenderness, brush the crust with melted butter before reheating. 💫
Oven Refresh Method
Preheat your oven to 350°F and wrap the cooled loaf in aluminum foil. Place it on a baking sheet and heat for 10-15 minutes until warmed through.
For a crispier crust, remove the foil during the last 2-3 minutes of heating. This method works best for bread stored for 2-3 days in the refrigerator.
Freezer Storage Tips
For long-term storage, wrap fully cooled loaves in plastic wrap followed by a layer of foil. Place them in a freezer bag with all air removed to prevent freezer burn.
Store for up to 3 months—thaw overnight in the fridge before reheating. Never freeze bread with a butter-egg wash, as it can become soggy upon thawing.
Microwave Quick Fix
For a fast but less ideal solution, slice the bread and microwave 1 slice at a time on high for 10-15 seconds. Spritz with water and cover with a damp paper towel to restore moisture.
This method works best for 1-2 slices at a time and won't recreate the bread's original texture.
Steam Bath Revival
Place the bread on a wire rack set over a pot of simmering water on the stovetop. Cover with a damp kitchen towel and steam for 5-8 minutes.
The trapped moisture will revive the crust while keeping the interior soft. This method mimics the baking process and works well for bread stored for 3-4 days.
Crust Perfection
To restore a crisp crust after reheating, brush the warmed bread with melted butter and place it under a broiler for 1-2 minutes on high. Keep a close eye to prevent burning.
For extra shine, sprinkle with flaky sea salt immediately after broiling. This technique works best for bread reheated from the fridge or freezer. 🔥
Nutrition facts
Frequently asked questions
Why does my aerated bread turn out dense instead of light?
Dense bread usually stems from over-kneading, underproofed dough, or using cold ingredients. Knead just until the dough is smooth (5-7 minutes), avoid overmixing, and ensure your yeast is active. Keep your kitchen warm (75-80°F) during proofing—cold temperatures slow yeast activity, leading to poor rise.
Can I substitute butter with oil in this recipe?
Yes, but expect a slightly denser crumb. Use 1/4 cup melted vegetable oil or olive oil instead of butter. For best results, combine 1/4 cup oil + 1/4 cup cold butter to maintain some aeration. Oil-rich doughs require slightly longer proofing times (10-15 minutes extra) since oil doesn’t solidify like butter.
How do I know when the dough is fully proofed?
Press your finger gently into the dough—if it springs back slowly (leaving a faint indentation), it’s ready. For shaped loaves, they should feel firm to the touch and rise just above the rim of your proofing basket. Overproofing causes collapse; underproofing yields dense bread. The total proofing time (including first rise) should be 2-3 hours for optimal texture.
What’s the best way to store homemade aerated bread?
Wrap cooled loaves in plastic wrap followed by foil to lock in moisture. Store at room temperature for 2-3 days or refrigerate for up to 5 days. For longer storage, freeze wrapped loaves for 3 months. Avoid storing with the butter-egg wash—it can make the crust soggy.
Can I make this recipe without a stand mixer?
Use your hands or a wooden spoon to mix the dough. Knead by hand for 8-10 minutes on a floured surface until smooth and elastic. Work in short bursts to avoid overheating the dough. A dough scraper helps gather sticky edges. The texture may vary slightly, but the bread will still be delicious.