
Desserts
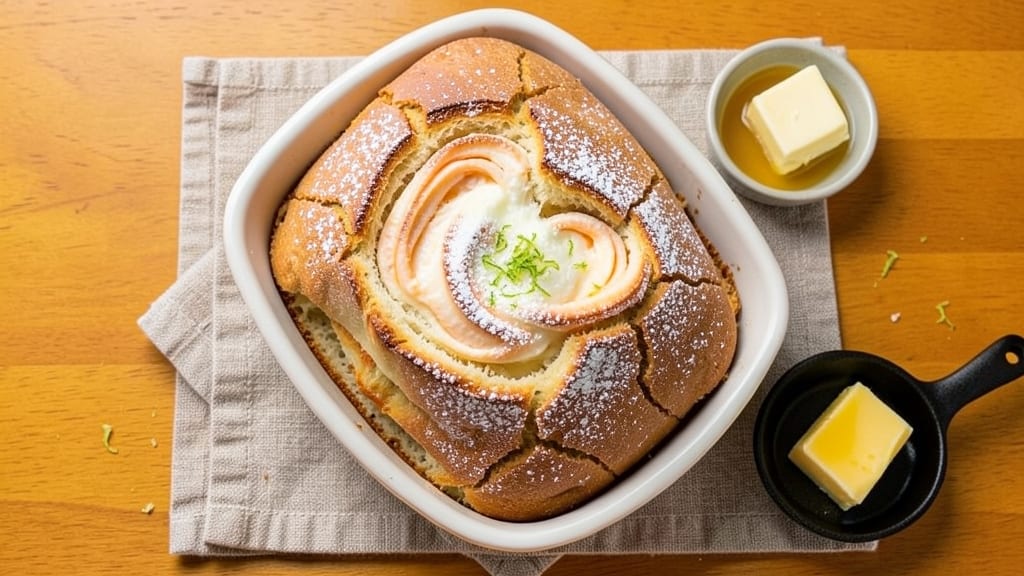
This 7-Eleven cheesecake bread recipe delivers the perfect fusion of buttery bread and creamy cheesecake swirls you crave from convenience stores—but made fresh at home. The secret lies in a precise layering technique that keeps the base crisp while trapping that signature cheesecake filling between golden-brown crusts.
After years of experimenting with store-bought versions, I perfected this method to recreate that addictive texture and flavor without the preservatives.
The recipe combines simple pantry staples with a few professional techniques to achieve restaurant-quality results. You'll work with a standard bread dough base enriched with butter for maximum flakiness, then swirl in a tangy cream cheese filling that stays perfectly gooey in the center.
The key to success is baking at the right temperature—too hot and the filling leaks, too cool and the bread stays dense.
What you'll end up with is a loaf that looks like it came straight from a bakery case: crisp golden-brown layers with pockets of creamy cheesecake filling visible through the cracks. Each bite delivers the perfect balance of buttery bread and sweet, tangy cheesecake—no soggy bottoms or dry crumbs.
This is the kind of dessert that disappears faster than you can say "break room snack."
Serve warm with a cup of coffee for the ultimate afternoon treat, or cut into squares for a satisfying dessert option. The recipe makes one standard loaf pan, perfect for sharing or meal prepping ahead of time. Let's get baking!
Ingredients for 7 eleven cheesecake bread
Twelve simple ingredients transform into that iconic convenience store dessert—crisp layers hiding gooey cheesecake swirls.
| Ingredient | Amount | Notes |
|---|---|---|
| All-Purpose Flour 🌾 | 4 cups | Sifted for light texture |
| Granulated Sugar 🍚 | ½ cup | White sugar preferred |
| Instant Yeast 🍞 | 2 ¼ tsp | Fresh yeast for best rise |
| Salt 🧂 | ½ tsp | Diamond Crystal preferred |
| Unsalted Butter 🧈 | 1 cup | Cold, cubed for flakiness |
| Milk 🥛 | 1 cup | Room temperature |
| Large Eggs 🥚 | 1 whole | Room temperature |
| Cream Cheese 🧀 | 8 oz | Full-fat, room temperature |
| Powdered Sugar 🍚 | ½ cup | For filling sweetness |
| Vanilla Extract 🌿 | 1 tsp | Pure vanilla preferred |
| Lemon Juice 🍋 | 1 tbsp | Freshly squeezed |
| Heavy Cream 🥛 | ¼ cup | Cold for stability |
| Baking Powder 🍞 | 1 tsp | For lift in layers |
The butter and cream cheese are the stars here—full-fat versions make all the difference. For the butter, grab Land O'Lakes or Plugrá from the dairy section—nothing fancy, just good quality. The cream cheese? Philadelphia Original is the gold standard, but any full-fat block works. Room temperature is key—both should be soft but not melted. I always check the expiration on the yeast too—fresh is non-negotiable for that perfect rise. Flour? King Arthur or Gold Medal are my go-tos—they're reliable and give that tender crumb.
No powdered sugar? Granulated sugar mixed with 1 tsp cornstarch works in a pinch. Short on vanilla? Vanilla bean paste adds depth, or even 1/2 tsp vanilla bean seeds if you've got a whole bean. The heavy cream can be swapped for half-and-half in a bind, but it won't be as stable. For the lemon juice, fresh is best, but bottled works if you've got it. The baking powder? Check the expiration date—old baking powder loses its punch. Pro tip: if your dough feels too sticky, add 1 tbsp more flour. If it's too dry, add 1 tsp milk at a time until it comes together.
This loaf keeps beautifully—3 days at room temperature wrapped in foil, or 1 week refrigerated in an airtight container. For longer storage, slice and freeze up to 3 months. I like to reheat slices in the oven at 300°F for 5-7 minutes to revive that bakery-fresh crunch. The filling stays creamy even after reheating—perfect for quick breakfasts or after-dinner treats. Double the recipe and bake in two pans for a party—it disappears fast!
Why You'll Love This Recipe
- Here’s what sold me: the way the sugar caramelizes slightly on the edges while the center stays soft. It’s like a cross between a buttery biscuit and a light, airy cheesecake—no actual cheese, but that buttery richness hits the spot. (Yes, even on a Tuesday night.)
- No Yeast Stress: I swear by this recipe—just mix the flour, sugar, yeast, and butter, then let it rise once. No kneading, no waiting hours, no second rise. That butter keeps it tender while the sugar gives it just enough chew, and honestly? The yeast does all the work while I sip my coffee.
- Sweet & Salty Magic: Here’s what sold me: the way the sugar caramelizes slightly on the edges while the center stays soft. It’s like a cross between a buttery biscuit and a light, airy cheesecake—no actual cheese, but that buttery richness hits the spot. (Yes, even on a Tuesday night.)
- Leftovers? More Like Leftovers Party: This bread freezes like a dream—slice it, wrap it, and toss it in the freezer. Reheat in the toaster or oven, and it’s fresh again. I make a double batch because my kids fight over the last slice, and honestly? The second day is just as good as the first.
Step-by-step instructions for 7-Eleven cheesecake bread
Here's how to create those iconic buttery layers with creamy swirls—every slice will taste like your favorite convenience store treat.
Prepare the Cream Cheese Filling
In a medium bowl, beat the 8 oz cream cheese until completely smooth and free of lumps. This is your secret weapon for that signature 7-Eleven flavor. Add the 0.5 cup powdered sugar, 1 tsp vanilla extract, and 1 tbsp lemon juice, then mix until fully combined. The lemon juice brightens the flavor and prevents the filling from becoming too heavy.
Next, gently fold in the 0.25 cup cold heavy cream using a spatula. You want to maintain some texture—don't overmix. Cover the bowl with plastic wrap and refrigerate while you prepare the dough. This chilled filling will create those beautiful swirls without melting prematurely in the warm bread.
Make the Dough and Layer the Butter
In a large bowl, combine the 4 cups all-purpose flour, 0.5 cup granulated sugar, 2.25 tsp instant yeast, 0.5 tsp salt, and 1 tsp baking powder. Whisk everything together until evenly distributed. Here's the thing—don't skip sifting the flour first. It ensures light, airy layers that mimic the original perfectly.
Make a well in the center and add the 1 whole large egg, 1 cup room-temperature milk, and 1 cup cold cubed butter. Using a wooden spoon or your hands, mix just until the dough comes together. You want it to be slightly shaggy at this stage. Turn the dough out onto a lightly floured surface and knead gently for about 2 minutes until smooth.
Now for the magic: roll the dough into a 12x18-inch rectangle about 1/4-inch thick. Spread the 1 cup cold cubed butter evenly over the entire surface, leaving a 1-inch border around the edges. This creates those signature flaky layers that make this bread irresistible.
Assemble the Swirls and Shape the Loaf
Spread the chilled cream cheese filling over the buttered dough, leaving the 1-inch border clear. Here's where it gets fun—roll the dough tightly into a log starting from the long side, pinching the seam to seal. This creates the classic spiral pattern that traps all those creamy swirls inside.
Place the log seam-side down in a 9x5-inch loaf pan that's been lightly greased. The dough will rise significantly, so don't overfill the pan. Cover the pan with a clean kitchen towel and let it rise in a warm place for 1 to 1.5 hours, or until it's puffed about 1.5 inches above the pan.
Bake to Golden Perfection
Preheat your oven to 350°F while the dough rises. When the dough has doubled in size, bake uncovered for 45 to 50 minutes until the top is golden brown and the internal temperature reaches 190°F. The bread should sound hollow when tapped on the bottom.
Here's the critical part: don't open the oven during baking. The steam is what creates those beautiful layers. If you peek too early, you'll lose that moisture and end up with a dense loaf instead of the light, airy texture you want.
Cool and Slice for Maximum Enjoyment
Remove the bread from the oven and let it cool in the pan for 10 minutes. Then transfer it to a wire rack to cool completely. This resting period allows the layers to set properly and prevents the filling from oozing out when you slice.
Once completely cool, slice into 12 even pieces using a serrated knife. Each slice should reveal those perfect swirls of cream cheese filling surrounded by flaky, buttery layers. The bread will keep well at room temperature for 3 days or can be frozen for up to 3 months—perfect for making ahead.
Pro Tips For Making 7 Eleven Cheesecake Bread
- Cut Butter Cold: The 7-Eleven version calls for softened butter, but I’ve found that cold butter (cut into chunks) creates flakier layers—especially when folded into that sweet dough. Let it sit at room temp for just 20-30 minutes before mixing, no more. Over-softened butter = dense, sad bread.
- Bloom Yeast Right: Skip the "toss it in dry" habit—mix instant yeast with the warm sugar and milk first (if your recipe uses it) and let it sit for 5 minutes until foamy. I learned this the hard way when my dough never rose properly. If your recipe skips liquid, still bloom it in a tiny bit of warm water—it makes a real difference.
- Don’t Overmix Dough: The second you add flour, stop folding after 2-3 turns. I used to knead like I was making pizza dough, and the bread turned tough. This recipe relies on tender layers, so handle it like you’re tucking in a blanket—not wrestling with it.
- Proof in a Warm Spot: Your oven’s light-on setting is your best friend here. Place the dough in a greased bowl, cover it with a towel, and proof it there for 1–1.5 hours. No kitchen thermometer? Stick your finger in—if it springs back slowly, it’s ready. Rushing it leads to dense, flat loaves.
Creative variations of this 7 eleven cheesecake bread
Sweet & Salty Fusion
For a flavor twist that keeps the classic texture but adds complexity, try a sweet & salty caramelized onion variation. After spreading the cream cheese filling, sprinkle ½ cup thinly sliced red onions over the dough before rolling.
Caramelize them in a pan with 1 tbsp butter and 1 tbsp brown sugar until golden, then layer them between the dough and filling. The onions add a deep, jammy sweetness that pairs perfectly with the tangy cream cheese. 🌟
Chocolate Swirl Upgrade
Add a decadent chocolate element by mixing ¼ cup melted dark chocolate (60% cocoa) into the cream cheese filling before assembling. For extra richness, fold in 2 tbsp chopped toasted pecans or walnuts.
The chocolate deepens the dessert quality while keeping the same flaky, buttery layers. I like to use Ghirardelli 60% dark chocolate bars for the best melt and flavor.
Citrus Zest Twist
Brighten the filling with 1 tbsp orange zest and 1 tsp orange extract alongside the vanilla. The citrus cuts through the richness and adds a refreshing contrast. For visual appeal, sprinkle 1 tsp freeze-dried orange peel bits on top before baking.
This works especially well with a vanilla glaze drizzle after cooling—mix ½ cup powdered sugar with 2 tbsp milk and brush over the cooled loaf.
Spiced Chai Variation
Infuse the dough with warm spices by adding 1 tsp ground cinnamon, ½ tsp ground cardamom, and ¼ tsp ground cloves to the flour mixture.
For the filling, steep 1 tbsp loose chai tea in 2 tbsp warm milk for 5 minutes, then strain and mix into the cream cheese. The spices create a cozy, aromatic twist that pairs beautifully with hot coffee or chai tea. 🍵
Mini Muffin Version
For a handheld treat, divide the dough and filling into 12 mini loaf pans (4x4-inch) or a 12-cup muffin tin. Bake at 350°F for 20-25 minutes until golden. These bite-sized versions are perfect for parties or as a quick dessert with coffee.
To make them extra special, brush the tops with egg wash (1 egg + 1 tbsp milk) before baking for a glossy finish.
Gluten-Free Adaptation
For a gluten-free version, replace the all-purpose flour with a 1:1 gluten-free flour blend (like Bob's Red Mill 1-to-1) plus ½ tsp xanthan gum. Use ½ cup melted butter instead of cold cubes to ensure proper layering.
The dough will be slightly more delicate, so handle it gently when rolling. The texture won't be identical, but it still delivers that creamy cheesecake filling with a tender, flaky crust. 💪
Nutrition facts
Frequently asked questions
Can I make this cheesecake bread without a loaf pan?
Yes! For a free-form version, shape the dough into a round log and place it on a parchment-lined baking sheet. Bake at 350°F for 35-40 minutes until golden. The texture will be slightly denser, but still delicious. For extra flair, brush the top with egg wash before baking.
Why did my cheesecake filling leak out during baking?
This usually happens when the filling isn't chilled enough or the oven temperature is too high. Always keep the filling refrigerated until assembly, and bake at 350°F—never higher. For extra insurance, place the assembled loaf in the fridge for 20 minutes before baking.
How do I store cheesecake bread for maximum freshness?
Wrap the cooled loaf tightly in plastic wrap and store at room temperature for 3 days. For longer storage, slice and freeze individual portions for up to 3 months. To reheat, warm slices at 300°F for 5-7 minutes until the filling is gooey again.
Can I substitute regular cheese for cream cheese in the filling?
Not recommended! Cream cheese provides the perfect tangy richness and smooth texture. For a similar effect, you could use a blend of 4 oz cream cheese + 4 oz ricotta cheese, but the flavor won't be identical. The original recipe relies on that signature cream cheese taste that makes it special.
What's the best way to slice this bread for perfect swirls?
Use a serrated knife and cut the loaf while it's still warm (after cooling for 10 minutes). Score the top lightly with a knife first to guide your cuts. For clean slices, dip the knife in hot water between cuts. Each slice should reveal those beautiful cheesecake swirls!